| Welcome, Guest |
You have to register before you can post on our site.
|
| Forum Statistics |
» Members: 2,927
» Latest member: scheibs
» Forum threads: 14,184
» Forum posts: 263,257
Full Statistics
|
| Online Users |
There are currently 318 online users.
» 2 Member(s) | 312 Guest(s)
Applebot, Baidu, Bing, Google, Gone in 60, Lord Popgun
|
| Latest Threads |
What did you do on or to ...
Forum: Other Bikes
Last Post: pdedse
4 hours ago
» Replies: 973
» Views: 72,113
|
What did you do on or to ...
Forum: General Discussion
Last Post: Gone in 60
8 hours ago
» Replies: 449
» Views: 42,904
|
2022 Kawasaki Z650RS
Forum: Other Bikes
Last Post: peterbaron
Yesterday, 02:22 PM
» Replies: 216
» Views: 14,254
|
CB1100 Monthly Photo Chal...
Forum: CB1100 Photos & Videos
Last Post: Gone in 60
07-31-2026, 07:24 AM
» Replies: 5,438
» Views: 396,474
|
2026 Heartland Rally 8/29...
Forum: Meet Ups & Gatherings
Last Post: Redbird
07-30-2026, 02:10 PM
» Replies: 90
» Views: 7,950
|
Bay Area: Tri-Valley Cons...
Forum: Seat Time
Last Post: Gone in 60
07-29-2026, 08:12 AM
» Replies: 5
» Views: 166
|
Wanted - 2014 CB1100 STD...
Forum: For Sale / Wanted to Buy — Members
Last Post: Razor
07-29-2026, 03:52 AM
» Replies: 2
» Views: 168
|
2014 CB1100 DLX wanted
Forum: For Sale / Wanted to Buy — Members
Last Post: nickdivita
07-28-2026, 07:35 PM
» Replies: 0
» Views: 52
|
Valve Adjustment Shims
Forum: Mechanical & Technical
Last Post: MagnaRider
07-28-2026, 12:49 PM
» Replies: 13
» Views: 545
|
Oil Filter
Forum: Mechanical & Technical
Last Post: Gone in 60
07-26-2026, 02:33 PM
» Replies: 12
» Views: 437
|
|
|
| Updated Forum Logo Options (Courtesy of Whoops!) |
|
Posted by: rdprdp01 - 01-06-2026, 09:03 PM - Forum: Suggestions
- Replies (16)
|
 |
Good evening,
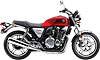
The Forum Members are evenly divided between a larger logo and a smaller log.
Whoops has some serious design jobs and some great Photoshop skills. He created two additonal options for our consideration. Note that the Honda Photos are used with permission as is the embedded font. Whoops went the extra mile to make sure neither the po-po or a gaggle of lawyers knock on my door demanding justice and renumeration. 
Please review these five options and place your vote in our new poll. I will leave the poll up for 10 days and will update the logo per the consensus.
Thanks again, Whoops, for the contribution and the time invested. Regardless of the outcome, your already strong reputation on the Forum has been enhanced. Much love, brother.
David
Option 1: Smaller logo, white background, classic design, CB1100 emphasis
![[Image: nLvSgve.png]](https://i.imgur.com/nLvSgve.png)
Option 2: Larger logo, Members' motorcycles, Community Forum emphasis
![[Image: e4alkFh.png]](https://i.imgur.com/e4alkFh.png)
Option 3: Smaller logo, tasteful legacy tie-in to previous Forum's logo, Whoops sprinkles on top
![[Image: WzA8kFr.png]](https://i.imgur.com/WzA8kFr.png)
Option 4: Smaller logo, Honda Logo Left, CB1100 Right
![[Image: Oj7GKlX.png]](https://i.imgur.com/Oj7GKlX.png)
Option 5: Smaller logo, CB1100 Tag Left, Honda CB1100 Half Shot Horizontal
![[Image: UUa38OW.png]](https://i.imgur.com/UUa38OW.png)
|

|
|
| Bay Area: Mount Diablo State Park (2025) |
|
Posted by: rdprdp01 - 01-04-2026, 10:36 AM - Forum: Seat Time
- Replies (3)
|
|
In April of each year, the Mount Diablo State Park blossoms in a sea of green in all directions. The only place on the planet where I believe a more lush view can be found is Ireland.
The Summit Museum sits atop an ancient mountain that provides what I consider to be the most spectacular views in the East Bay.
A detailed history of Mount Diablo and the Protected Park which now surrounds has been published to YouTube:
I suspect I am the only old nerd on this Forum whereas the rest of you are the coolest motorcycle riders in the world, who would invest the 25 minutes to watch it in its entirety. 
As it exists today, here is a quick snapshot:
- Mount Diablo is 3,800 ft high.
- It is nestled in a Protected Park and will be preserved forever.
- There are five entry ways into the Park which will ultimately reach the Visitor Center on the Mountain Summit. The North Gate is the most motorcycle friendly.
- Mount Diablo is a peaceful placed, shared by hikers, cyclists, motorcyclists, campers, equestrians, environmentalists, students, and the surviving wildlife.
- I have ridden my bicycle and motorcycle several times to the summit. Each time I returned slightly different and always in a better state of mind.
Here are a few pictures I took in 2025 when I visited last:
![[Image: Jeg3n2S.jpeg]](https://i.imgur.com/Jeg3n2S.jpeg)
![[Image: xOOdC8u.jpeg]](https://i.imgur.com/xOOdC8u.jpeg)
![[Image: IWugevi.jpeg]](https://i.imgur.com/IWugevi.jpeg)
![[Image: 3LmHxbj.jpeg]](https://i.imgur.com/3LmHxbj.jpeg)
![[Image: DG3WN7z.jpeg]](https://i.imgur.com/DG3WN7z.jpeg)
As it relates to motorcycling, the North Gate ascent is one of the greatest twisty rides which can be found in North America. Although far less known than the Tail of the Dragon in North Carolina, the turns and views are similar. Alhtough I suspect it is local pride gone too far, some local motorcyclists claim that there are 365 turns from the base of the mountain to the summit, one for each day of the year.
![[Image: 4A0FHSs.png]](https://i.imgur.com/4A0FHSs.png)
The road is a two lane road which requires as much skill to go slow up a mountain as it does to carve up a canyon at speed. Here are a few pictures I took along the way:
![[Image: 1bzjp9T.jpeg]](https://i.imgur.com/1bzjp9T.jpeg)
![[Image: MbbjcAP.jpeg]](https://i.imgur.com/MbbjcAP.jpeg)
![[Image: KzQL0If.jpeg]](https://i.imgur.com/KzQL0If.jpeg)
![[Image: qhEGviI.jpeg]](https://i.imgur.com/qhEGviI.jpeg)
![[Image: 0yPcU9t.jpeg]](https://i.imgur.com/0yPcU9t.jpeg)
![[Image: NX8h08h.jpeg]](https://i.imgur.com/NX8h08h.jpeg)
![[Image: 7x8BNfw.jpeg]](https://i.imgur.com/7x8BNfw.jpeg)
Following the Spring Rain in April, I will ride Mount Diablo again. If you are the East Bay, you are welcomed to join me. I will publish a date on the calendar in March. For now, please consider the possibilities. Ride safe and find your special place. I have found mine. David
|
|
|
|
| Do You Like The Updated Forum Header |
|
Posted by: rdprdp01 - 01-01-2026, 05:44 PM - Forum: Suggestions
- Replies (6)
|
|
I created a Forum Logo, drawing from uploaded images from our Members.
The previous header was smaller, but it did not do justice to the beauty of the motorcycles on this Forum.
If you like this updated Forum Logo, please indicate same in the poll. If you prefer a small header with no images and only text, please select that option in the poll.
Have a wonderful 2026. David
|
|
|
|
| m-txd/rxd wire (white) ecu to instruments communication |
|
Posted by: deano - 01-01-2026, 04:39 AM - Forum: Mechanical & Technical
- Replies (28)
|
 |
Hello all,
I am new to this Forum, and although searched, I can't find any help or results for the below subject, that had been previously posted. This now shows, when I search as :
Instrument Cluster - CB1100 Forum
We've been trying to replace the speedo on a ABS fitted CB1100 today with an Acewell in the workshop and there seem to be problems disconnecting the original speed
MyBB has experienced an internal SQL error and cannot continue.
SQL Error:
145 - Table './cb1100forum/mybb_sessions' is marked as crashed and should be repaired
Query:
DELETE FROM mybb_sessions WHERE ip='82.10.41.143'
Please contact the MyBB Group for support.
The problem for me, is that I purchased a CB1100 RS 2017, that had been crashed damaged, and the clocks were smashed, and needed replacing, I could not find or buy, direct Cb1100 clocks, so bought the nearest looking, and best fit to the originals, from a CB400 Super Four VTEC (via AlixExpress)
These work, but I have had to work out all the wiring for myself, as they are simply plugged to fit the CB400 Vtec, and not directly to the CB1100.
My issue, is that the CB1100 rs uses a M-TxD/RxD white, communication wire, that sends info to and from the original clocks, back to the ECU. I guess, it runs inernally via the Engine management light, or Temp light, or oil pressure, or all of these, so if an issue, and these light up, it sends back to the ECU, to tell the bike, not to rev above 5,500 RPM, and in effect, run on limp mode.
My question is this, how if I have swapped clocks, can I over come this issue ?
Is there something I can coneect to this white wire, to override/ eliminate the info being sent back to the ECU ?
Is there a fix, or has anyone else, come accross this issue, changed clocks for an Acwell or other brand, and had to fix this problem ?
I really need your help guys ?
|
|
|
|
| Greetings from the California Coast |
|
Posted by: JRD - 12-30-2025, 12:19 PM - Forum: New Members
- Replies (15)
|
 |
Good morning, all! I just had the amazing fortune of being able to pick up a 2017 cb1100ex and wanted to introduce myself to the community.
I have already found this space to be very useful for finding information and advice on our limited accessory options. Seems like a very helpful and knowledgeable group.
I have been riding, intermittently, for about 20 years. My first bike was a ‘92 cb Nighthawk 750 that I got when i was 19 and used as my only transportation for about three years. Great bike that I didn’t appreciate or take proper care of at the time. Since then I have owned a Shadow Aero 750 and a RE INt650.
Just got the CB a few weeks ago. Found a mint 2017 with only 4400 miles on it. Clean bill of health from my mechanic. Probably paid a bit too much for it but the 2017s seem rare as hell and I wanted it.
I am absolutely blown away by how nice this bike is. Everything about it inspires confidence. Solid as a rock. Not a lick of plastic bodywork on it. Feels like it is held to the ground with magnets. Can pull power from any gear at any speed. Can comfortably do 80 in 3rd gear while also happy to just cruz at 25mph (also in 3rd). Too heavy to really throw around in the windies, but if you follow its lead it will sigh and settle into corners like your dad easing into his favorite recliner.
Reviews say it is underpowered but I can’t imagine what they are talking about. I’m not racing this thing against R1s at the track. It has ample power, at any speed, out if any gear. I twist the throttle. I go. What more could I want?
Reviews say it is overweight. I ask “compared to what?” It is 100lbs less than my old Shadow (with twice the HP) I think maybe folks only know sport bikes? This isn’t trying to be a sport bike. It’s trying to be a UMJ. The weight grants stability and comfort and smoothness and confidence that a lighter bike simply couldn’t have.
I. Love. This. Bike. Last king of a dying kingdom.
Came with a National Cycle 17” universal mount windscreen. Works fine but the turbulance off the screen edge crests right into my helmet and really ups the wind noise. Took that off (it’s for sale, if you still want it after that review) and the bike runs much smoother and quieter. The pressure on my chest above 80mph is a bit much, now, so I’m in the process of moving the Dart Marlin over from my RE (Dart was able to dig a mounting kit out of backstock for me). Experienced tells me that it’s the perfect little windscreen: takes the pressure off your chest but lets your head ride in clean air.
Came with some small zip-tied on leather saddlebags. Work okay. Look okay. I’m currently looking into hard luggage options.
Can’t wait for the weather to get dry so I can load up my pillion and take it for some real adventures!
|
|
|
|
| Basic Maintenance: Brake Fluid |
|
Posted by: rdprdp01 - 12-26-2025, 05:34 PM - Forum: How To . . .
- Replies (13)
|
|
Of all the maintenance tasks on a motorcycle, many motorcycle owners overlook changing brake fluid. There are a common set of excuses: - “The fluid looks clean.”
- “If it ain’t broke, don’t fix it.”
- “It is a two-person job, and I don’t have a helper.”
The harsh reality is simple: stopping confidently is as important as accelerating quickly. Our Owner’s Manual recommends that CB1100 owners change brake fluid every two years or 4,000 miles / 6,500 kilometers. Although this guideline is good, it fails to consider the unique experience of each rider and riding situation. Hence, in some instances, more frequent changes are required.
Although the braking system of our CB1100 is closed (brake fluid flows through a series of cables and an Anti-lock Braking System (ABS) to actuate brake calibers), the fluid reservoir does have a very small vent to allow for thermal expansion and contraction. Without this vent, our brake system could form a vacuum lock and prevent our brakes from working. But this same feature also enables humidity from the air to mix with the brake fluid as it “sits” in the reservoir. That delusion of brake fluid with water lowers the boiling point of brake fluid over time and can cause brake fluid to become less effective. Motorcyclists who drive aggressively also place additional stress on brake fluid.
For me, I drive in an environment and in a manner that merits an annual brake fluid change. Am I a motorcycle hooligan? No. Do I live in an environment that has 95% humidity year-round? No. However, I ride close to ocean where fog is common; I drive on congested highways that require frequent stops at speed; my motorcycle is heavy; etc.
The Nature of Brake Fluid: The Good and The Bad
Brake fluid is a hydraulic fluid that has an incompressible quality. When properly maintained, the fluid in our braking system will enable force to be applied to our brake calibers to stop on demand. But over time, brake fluid can literally boil from hard stops and the extreme heat created when we apply our brakes. If water is introduced into the brake fluid, the boiling temperature is lessoned. This reality can cause air bubbles to form in the fluid from the vapor or steam that is generated when we apply our brakes, lessoning the force the fluid which can be applied to the brake calibers. Although less so now than in the past, brake fluid is also corrosive. Once brake fluid has been compromised with water, it can accelerate the corrosion of brake calibers and brake lines inside our braking system. Brake fluid can damage painted services, plastics, and various metals.
Step 1: Complete Staging for the Brake Fluid Change
When I change my brake fluid, I plan for the worst. At some point,
- I am going to spill brake fluid on my hands, clothing, and shoes.
- A hose will become dislodged, and fluid will go places where I do not want it to go.
- I will use more fluid than I had anticipated.
To address each situation, I make sure I wear clothing, gloves, and boots that are appropriate for the task:
![[Image: DqLU4Qv.jpeg]](https://i.imgur.com/DqLU4Qv.jpeg)
I have plenty of shop towels and water available to clean up a spill:
![[Image: vJJAcgu.jpeg]](https://i.imgur.com/vJJAcgu.jpeg)
I wear gloves to protect my skin and do everything I can to limit prolong contact:
![[Image: Y5ZwPsy.jpeg]](https://i.imgur.com/Y5ZwPsy.jpeg)
I protect the metal and painted surfaces of the motorcycle by using furniture blankets and towels. I place the motorcycle on its center stand and make sure I can easily access all calipers:
![[Image: XwfUxBD.jpeg]](https://i.imgur.com/XwfUxBD.jpeg)
I purchase OEM Brake Fluid appropriate for my motorcycle. I plan on using 12 ounces per brake caliber plus another 12 ounces to top off each reservoir (4 12-ounce bottles total):
![[Image: 75AF5ql.jpeg]](https://i.imgur.com/75AF5ql.jpeg)
I make sure I have a torque wrench available to tighten things to the engineering specification:
![[Image: LVS2rG5.jpeg]](https://i.imgur.com/LVS2rG5.jpeg)
I use syringes to extract and add fluid to the two brake reservoirs, reducing the risk of brake fluid spilling:
![[Image: GbWZcUp.jpeg]](https://i.imgur.com/GbWZcUp.jpeg)
The rear brake reservoir on my motorcycle must be unbolted from the frame because a support strut prevents the top of the reservoir from being removed. I use a small cardboard box to “MacGyver” a platform that can support the reservoir once I unbolt it:
![[Image: SAgGszf.jpeg]](https://i.imgur.com/SAgGszf.jpeg)
I source plenty of clear hose and recycle some kind of open container I can use to easily see brake fluid as it is bled from the system and replaced with new fluid:
![[Image: l5J2Dtg.jpeg]](https://i.imgur.com/l5J2Dtg.jpeg)
Finally, I make sure I have my standard set of motorcycle tools available, a clean flat service I can use to lay things out that I remove from the motorcycle, and good light so I am not squinting.
Step 2: Remove Rearview Mirror Next to Top Reservoir
To avoid possible damage, I remove the rearview mirror from the handlebars. Because I have a cowl on my motorcycle, I must unbolt a few bolts to flex the cowl screen “forward” so that I can rotate the rearview mirror. I stage the rearview mirror and cowl-screen bolts and nuts on my workbench:
![[Image: AaByART.jpeg]](https://i.imgur.com/AaByART.jpeg)
![[Image: s5ormG7.jpeg]](https://i.imgur.com/s5ormG7.jpeg)
![[Image: grl14s2.jpeg]](https://i.imgur.com/grl14s2.jpeg)
Step 3: Connect a Drain Hose to Left Front Brake Caliber
I attach a drain hose to the left front brake caliber bleeder valve, secure it with a zip tie, loosen it ½ turn with a wrench, cover the brake caliber with shop towels, and place the end of the drain hose into my collection bucket:
![[Image: YCHVCX9.jpeg]](https://i.imgur.com/YCHVCX9.jpeg)
![[Image: 4SZi4iM.jpeg]](https://i.imgur.com/4SZi4iM.jpeg)
Step 4: Remove Existing Brake Fluid from the Top Reservoir and Bleed the Front Brake Calibers
I carefully remove the retaining screws from the top cover. Note that these screws are very “soft.” I take special care not to strip them by using the proper bit and making sure my screwdriver is properly seated prior to twisting:
![[Image: SU3v4iH.jpeg]](https://i.imgur.com/SU3v4iH.jpeg)
I then remove the reservoir cap and diaphragm from the reservoir, clean them, and stage them on my workbench:
![[Image: FUvYNAc.jpeg]](https://i.imgur.com/FUvYNAc.jpeg)
![[Image: qzcGlPr.jpeg]](https://i.imgur.com/qzcGlPr.jpeg)
![[Image: 6n1Btty.jpeg]](https://i.imgur.com/6n1Btty.jpeg)
![[Image: mfIb6Vx.jpeg]](https://i.imgur.com/mfIb6Vx.jpeg)
Using a syringe, I remove the existing brake fluid from the Top Reservoir:
![[Image: Hd0cGcH.jpeg]](https://i.imgur.com/Hd0cGcH.jpeg)
Using the other syringe, I fill the Top Reservoir with new brake fluid. I actuate the front brake continually until I can see brake fluid passing through the drain hose into the collection bucket. I pay close attention to the amount of fluid in the Top Reservoir and the fluid that is passing through the drain hose. I refill the Top Reservoir as necessary. When I add fluid, I close the bleeder valve first. I use a velcro to keep the brake lever depressed while I am filling the Top Reservoir. When it is full, I then loosen the bleeder valve and continue to actuate the brake lever, pushing more fluid and bubbles through the drain hose. This technique helps to prevent air from flowing backward to the Top Reservoir and creating more bubbles to exhaust:
![[Image: B8R2huv.jpeg]](https://i.imgur.com/B8R2huv.jpeg)
![[Image: 3lml0VO.jpeg]](https://i.imgur.com/3lml0VO.jpeg)
I focus on color and bubbles exiting the hose. When I see the color is consistent with the color of the new fluid and that no bubbles appear in the drain hose, I keep the brake lever fully depressed, tighten the brake caliber bleeder valve, and then actuate the brake again. If everything is right, the brake lever should be very firm and stiff. If it is not, re-open the caliber bleeder valve and continue to bleed the breaks again until the desired state is achieved.
![[Image: sHly3Hr.jpeg]](https://i.imgur.com/sHly3Hr.jpeg)
![[Image: nttve6C.jpeg]](https://i.imgur.com/nttve6C.jpeg)
I disconnect the drain hose from the brake caliber bleeder valve, remove the towels protecting the brake caliber, and using a moist towel wipe down the brake caliber.
I repeat the same process for the left front caliber.
When I have bled both calibers properly and the front brake lever is firm and actuates properly, I check the Top Reservoir, add brake fluid if necessary, insert the diaphragm, reservoir cap, and reservoir cover and torque the retention screws to 0.8 Nm (0.6 ft-lbs). I then install the rearview mirror and insert the screws the I removed from the front cowl screen. Please Note: If the Top Reservoir ever needs fluid, I bleed my front calibers and check for leaks. I do not "top off" fluid in between sessions where I bleed my front calibers.
Step 5: Connect a Drain Hose to Rear Brake Caliber
Like the front calibers, I attach a drain hose to the rear brake caliber bleeder valve, secure it with zip tie, loosen it ½ turn with a wrench, cover the brake caliber with shop towels, and place the end of the drain hose into my collection bucket. Next, i remove the tool storage compartment to make room for my make-shift box:
![[Image: F9YqIIk.jpeg]](https://i.imgur.com/F9YqIIk.jpeg)
I remove disconnect the mounting bracket for the Rear Reservoir from the frame and relocate it to the make-shift box I inserted to support it. I then remove the Rear Reservoir cap and diaphragm, clean them, and place them on my workbench.
![[Image: DHqtDuE.jpeg]](https://i.imgur.com/DHqtDuE.jpeg)
![[Image: 2bCAoYZ.jpeg]](https://i.imgur.com/2bCAoYZ.jpeg)
![[Image: bo7dE0O.jpeg]](https://i.imgur.com/bo7dE0O.jpeg)
Next, I use a syringe to remove the old brake fluid from the Rear Reservoir. Necy, I fill the Rear Reservoir with new brake fluid. Because I am definitely not ambidextrous, I actuate the rear brake with my left hand while monitoring the flow of brake fluid and bubbles into my collection bucket. When the fluid is solid and clear in the drain hose, I depress the rear brake lever, hold it, and tighten the rear caliber bleeder valve with a wrench, using my right hand.
![[Image: S69pqjN.jpeg]](https://i.imgur.com/S69pqjN.jpeg)
![[Image: LndgHtl.jpeg]](https://i.imgur.com/LndgHtl.jpeg)
Once I have rear caliber bleeder valve tightened, I disconnect the drain hose from the brake caliber bleeder valve, remove the towels protecting the brake caliber, and using a moist towel wipe down the brake caliber. I then re-assemble the Rear Reservoir and attach it to the frame. I first hand-tighten the Rear Reservoir and then torque the bolt to 0.8 Nm (0.6 ft-lbs).
![[Image: a10Z07J.jpeg]](https://i.imgur.com/a10Z07J.jpeg)
![[Image: Q59pKAi.jpeg]](https://i.imgur.com/Q59pKAi.jpeg)
Step 6: Check ABS
After I change the fluid on the front and rear calibers, I check the ABS on my CB1100EX to make sure it is functioning properly. I use the following protocol:
- No ABS error messages are reported on the display when I hard stop.
- Brake lever tension for the front and rear calibers are firm and consistent with my prior braking experience.
- Braking performance is consistent with my prior experience.
I begin my ABS Test first in a parking lot. I look for a slightly wet parking lot or slight gravel surface so I can simulate a real-world scenario when the ABS will actuate:
![[Image: AMeQKk8.jpeg]](https://i.imgur.com/AMeQKk8.jpeg)
Using a hard braking technique, I then proceed to a neighborhood street, escalate to a city street, and finally I test at speed on the Interstate. I monitor my display to see if any ABS error messages appear.
Note that even if my ABS has problems, I can still stop my motorcycle. I take special care to ensure that my speed and environment enables me to remain in control of my motorcycle at all times.
Please see ABS conceptual schematic to see how the ABS links the front calibers and rear calibers when my wheel is about to lock up during hard or emergency braking:
![[Image: d9z7C4s.jpeg]](https://i.imgur.com/d9z7C4s.jpeg)
![[Image: Sdy0ZB4.jpeg]](https://i.imgur.com/Sdy0ZB4.jpeg)
I did have one instance when I encountered an ABS problem following brake fluid replacement. Somehow, I trapped some air in the ABS modulator unit following a brake fluid change. Although I did not encounter a ABS Error / Warning, I heard the ABS Module actuating even when the motorcycle was turned off (the ABS Module is located under the gas tank). I concluded the ABS was trying to prime the brake lines. To correct the problem, I found a slightly slippery parking lot in an office complex, accelerated to 15 miles per hour, and performed several hard stops to intentionally trigger the ABS multiple times. The pulsing action of the ABS pump moved the air out of the modulator. I returned home and listened to see if the ABS Module was actuating. Thankfully, it was not. I then re-bled brake lines until the smallest of all bubbles in CB1100 history was pushed from the ABS to the calipers and into my collection bucket. Life was then truly good.
|
|
|
|
|
 Search
 Member List
 Calendar
 Help
Help