Whitehouse K17 mods...

Thread starter
Thanks, Cormanus. I'm really enjoying this. I'm taking my time, making little errors and having to correct them as I go (I'm no mechanic!) but trying to do the very best, professional job that I can.

Radio on, plentiful supplies of tea and biscuits (I suppose that'd be coffee and cookies in the States? :D ), a bit cramped but sufficient room. I'm loving it! ;)
 
Nice work Bazbro and thanks for taking the time to shoot some pictures for us all, Thinking about the surface rust, have a look under the front fender as well where the support meets the chromed main part.

When i got mine there were some rusty spots and i sprayed clear polyurethane on the entire inside of both fenders but it will be interesting to see if this acf50 does the job, i might do what you are doing at some time but it looks like it's a repeat process.
Not very impressed with the chrome under the fenders, also pulled the rear shocks off one by one and put some grease on the points that were dry and started to rust slightly and put some wide pvc tape on the rear swingarm where the dirt started to "eat" the paint, you can't see it but it protects the paint nicely.

Glad you enjoy working on the bike.
 
Thread starter
Good thoughts there, Max. It really does pay dividends to get paint/oil/grease/ACF50/whatever into all the nooks and crannies BEFORE corrosion gets there.

I like the pvc tape idea too.

ACF50 won't withstand the direct blast of water coming off the wheel in the centre of the mudguard, but it will stay in all those little, out-of-the-way protected places where water/rust stay.

As I do the various jobs on this 'bike, I'll be using ACF50 to future-proof against rust/corrosion.
 
I love your great write ups , a set of dentist picks are very useful for taking out o rings and things like the little rubber insert , very cheap to buy.
 
max_imp said:
Nice work Bazbro and thanks for taking the time to shoot some pictures for us all, Thinking about the surface rust, have a look under the front fender as well where the support meets the chromed main part.

When i got mine there were some rusty spots and i sprayed clear polyurethane on the entire inside of both fenders but it will be interesting to see if this acf50 does the job, i might do what you are doing at some time but it looks like it's a repeat process.
Not very impressed with the chrome under the fenders, also pulled the rear shocks off one by one and put some grease on the points that were dry and started to rust slightly and put some wide pvc tape on the rear swingarm where the dirt started to "eat" the paint, you can't see it but it protects the paint nicely.

Glad you enjoy working on the bike.
(+1) Seems like a shortcut taken by the manufacturer.
 
Thread starter
Yes! Dental picks. A very good idea, John. They would've worked and not damaged the insert either. I actually thought they were just plugs of hardened silicone, until I looked closely and realised that they were actually manufactured hexagon bars, chopped up! Why they're fitted, I don't know - none of the other hex bolts on the 'bike have 'inserts'.

One of the reasons I'm explaining EVERY little thing I do is precisely because I'm NOT a mechanic. The mechanics among you will be yawning at much of what I scribble, but I hope it explains in simple terms how I've done stuff and to encourage guys who aren't mechanics to have a go. I mean, if I can do it, anyone can!

Oh, and by the way, over here we call mechanics "mucky necks"... :D
Fitting Samurider's rear light unit - this morning's job...

The unit itself is very well made - up to Honda standard, robust and well-chromed. It really does look like the CB750 rear light. It doesn't use the CB1100's standard light fitting, so three new holes must be drilled. The instructions are quite clear, and include a photograph of the completed assembly.

fc59d4c2970209b5a2e33b3d5d59a9d2.jpg


I re-measured where the holes should go, three times just to be sure(!) drilled small pilot holes and then the 6mm holes. Here are tje bolts inserted, ready to attach the housing. I chose to have the bolt threads INSIDE the housing, for protection from the elements.

fc42d0e374aae4fe272436918886e52f.jpg


I'm not sure how Samurider plans the route for the electrics. There are three options -
1. Out of the oval hole, as standard (but the wire then goes across the top of the mudguard and must be squeezed between the light and the mudguard).
2. Under the mudguard and out of the hole below the original (same problem as 1)
3. Drill a new 'entry' hole behind the rear light, run the cable invisibly under the mudguard and up through the new hole.

No 3 is the one I favour but I have (temporarily) fitted No 1. To ease where the cable is trapped under the light, I have fitted grommets between the mudguard and the light housing. This has eased the passage of the wire.

c16418cf127675ce0c1c98d06a01b555.jpg


I'll see what blanking plugs, flexible 'boots' or grommets my dealer has before I finally decide the wire route. The mudguard also needs chrome blanking plugs or something akin to coachbolts.

The grommets I've fitted will not be necessary if I drill a hole and go with No 3 option, so they will be removed. I'd be interested to hear (and see!) how others have fitted their 750-style rear lights

Wiring was made simple because (a) the wires had been stripped back in the accident and (b) Samurider very considerately includes a set of new connectors identical to Honda's originals.

e70cc79f82bb23dc317c4de47c52423f.jpg


It works!

020d564d8763c4042d5fb6813a354d0d.jpg
 
Thread starter
And this afternoon's task was to fit a Brake Light Modulator.
It gives 4 or 5 VERY quick flashes, then four slower on/off before finally remaining on. Very eye-catching, which is the whole object.

It's a GS-100A from e-Bay - about 4 or 5 dollars (GB£7 for two!) as opposed to £25 to £40 in m/c shops here! It may or may not last. - I'll report here if it fails but at the moment it works extremely well.

03602c0632928f83d180b9f930d5acaa.jpg


The wires are
Brake = Green/Yellow
Rear light = Brown
Earth = Green

The wiring both into and out of the Modulator are red = Live and black = Earth

So, connect both black wires to Earth, "Red In" to "Green/Yellow Power In", then "Red Out" to "Green/Yellow to brake light". Simples!! :)
 
Great work, Bazbro. :)
 
RE Strobe Controller for LED Stoplight:

Interesting. I think I have seen a few pick-up trucks have these. For some, it almost creates some sort of "tunnel vision" (or "deer in the headlights") stone. You know it is there, but feel paralyzed. I suppose it could be worse like Ralphing up lunch or sumthin'.
 
Thread starter
GoldOxide_imp said:
RE Strobe Controller for LED Stoplight:

Interesting. I think I have seen a few pick-up trucks have these. For some, it almost creates some sort of "tunnel vision" (or "deer in the headlights") stone. You know it is there, but feel paralyzed. I suppose it could be worse like Ralphing up lunch or sumthin'.
I was prepared to switch to a LED rear/stop light but this device operates on the standard bulb very well. I guess the initial brief flashes may be more clearly defined on a LED but it all works well.
Bulb life may be a factor and, of course, longevity/reliability of the unit itself. We shall see... :).
 
Thread starter
Replacing the engine left side (generator) cover. Part One...

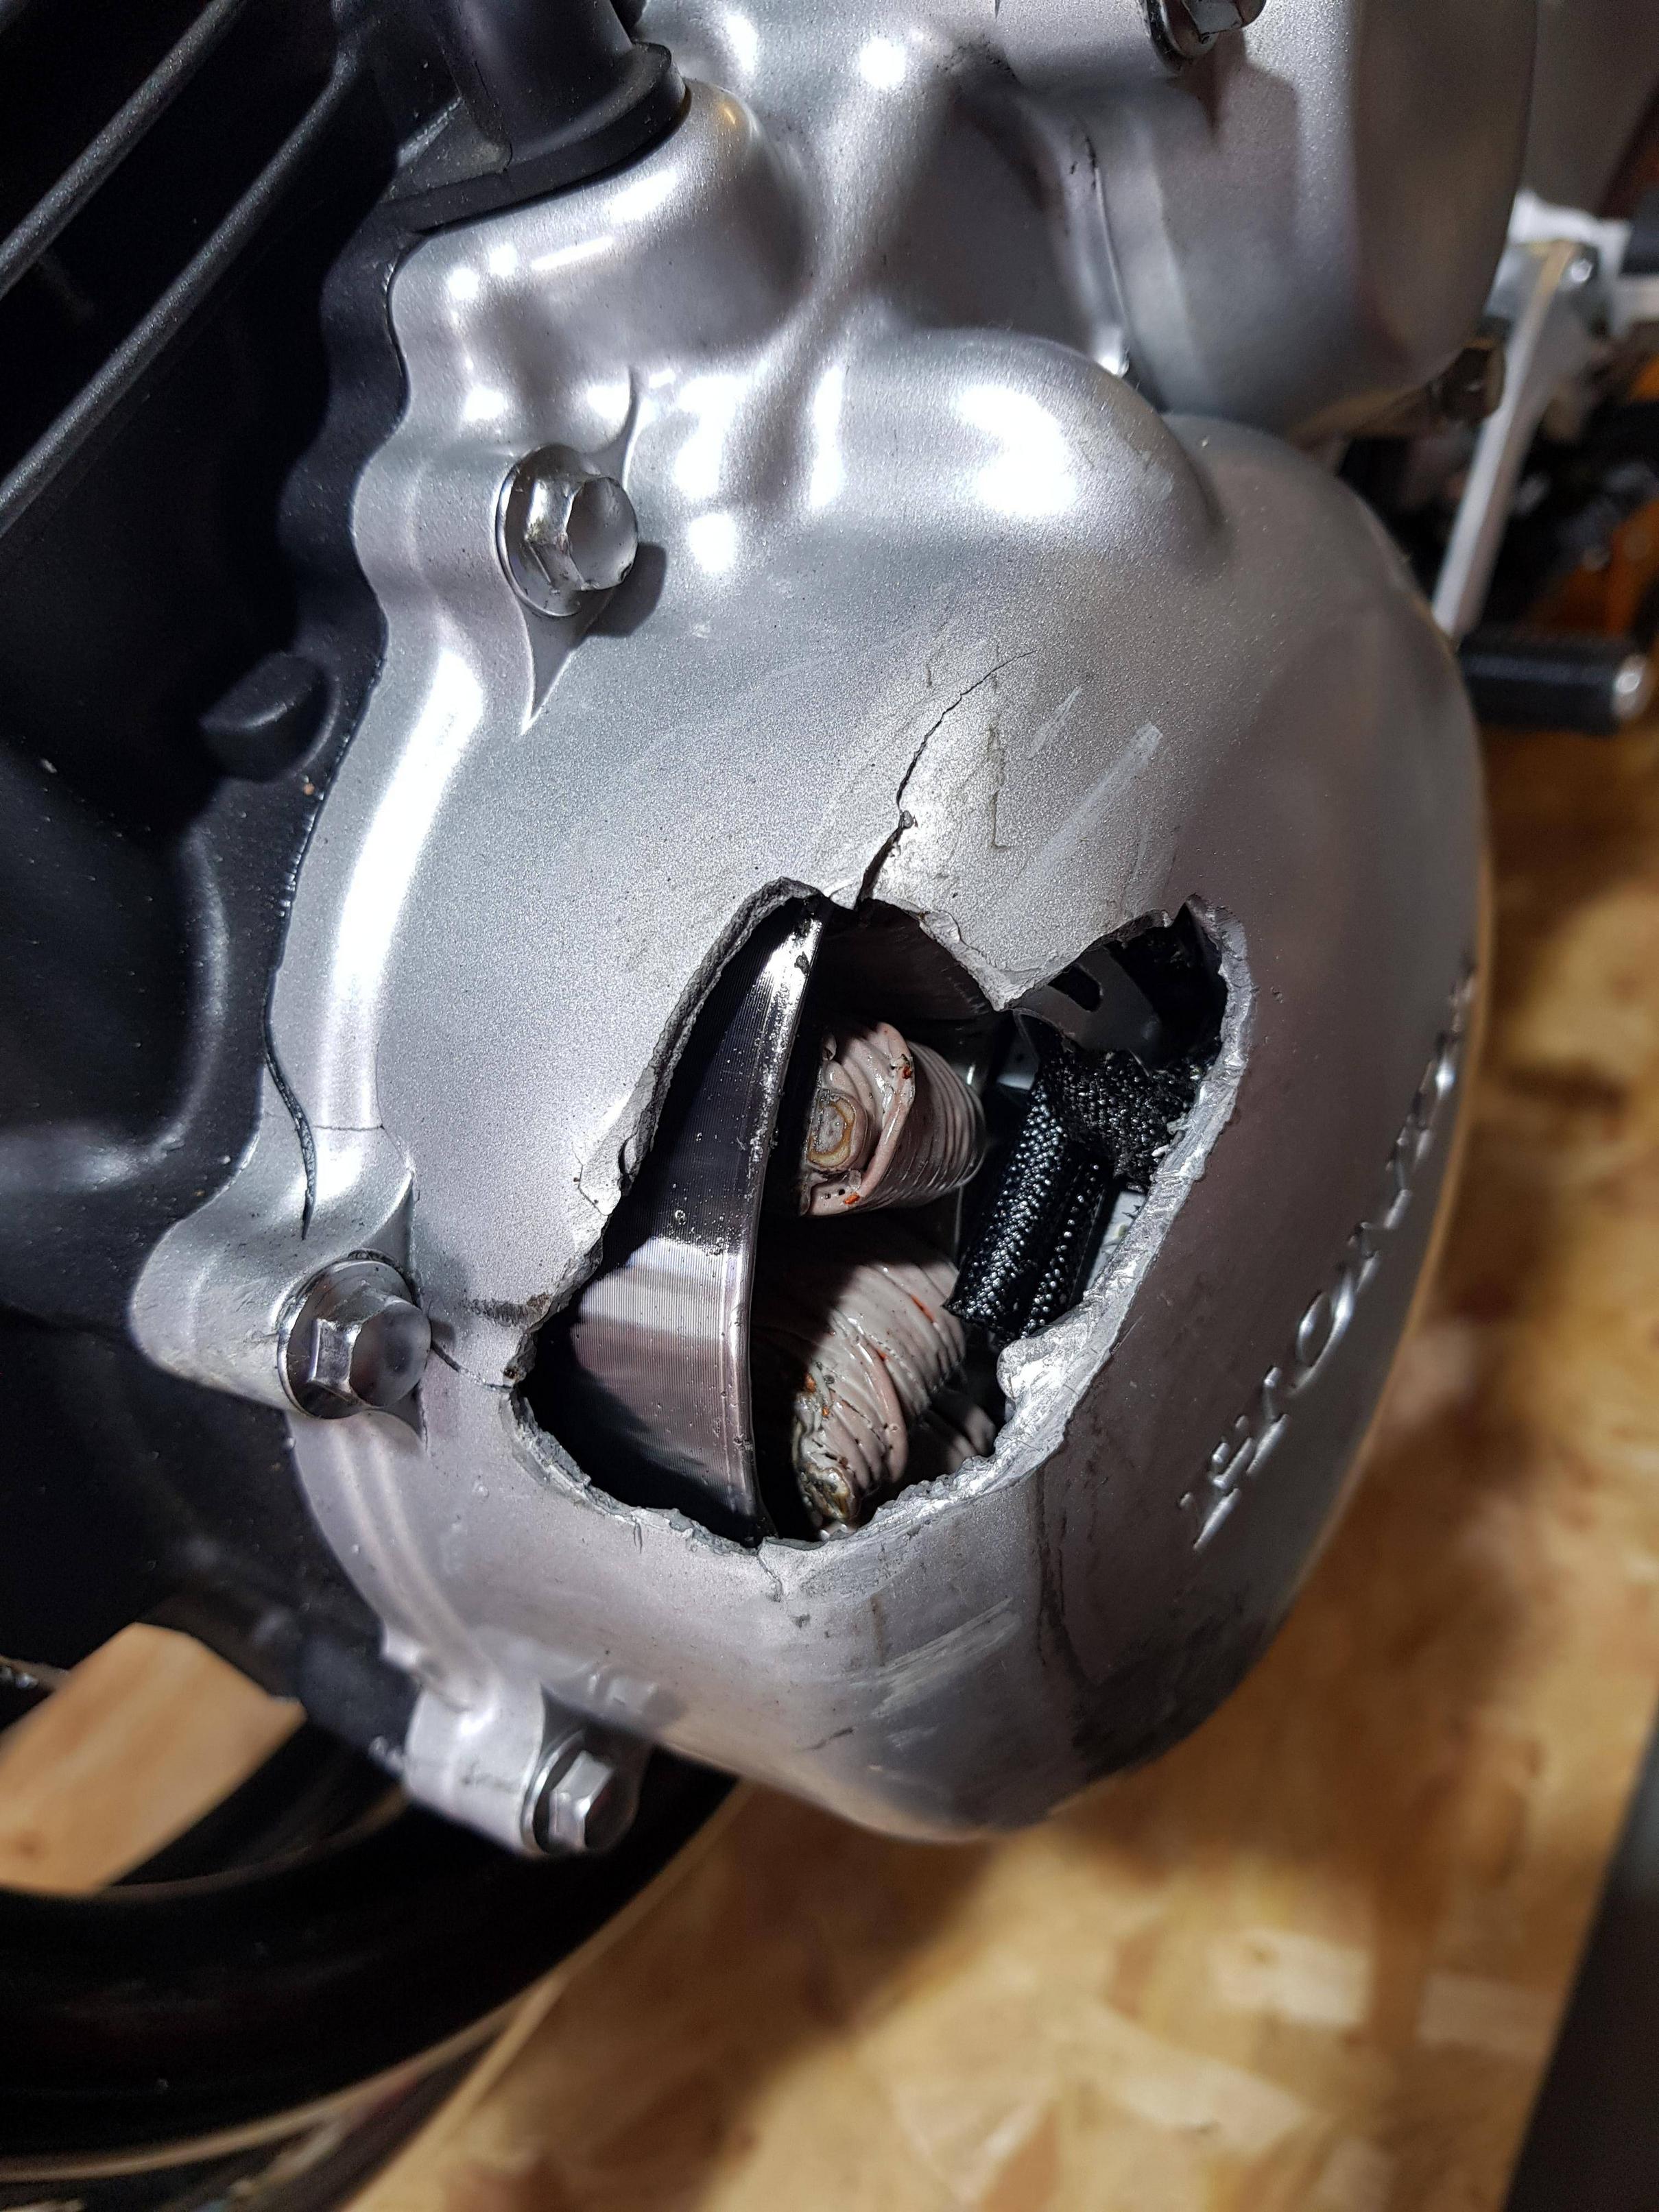
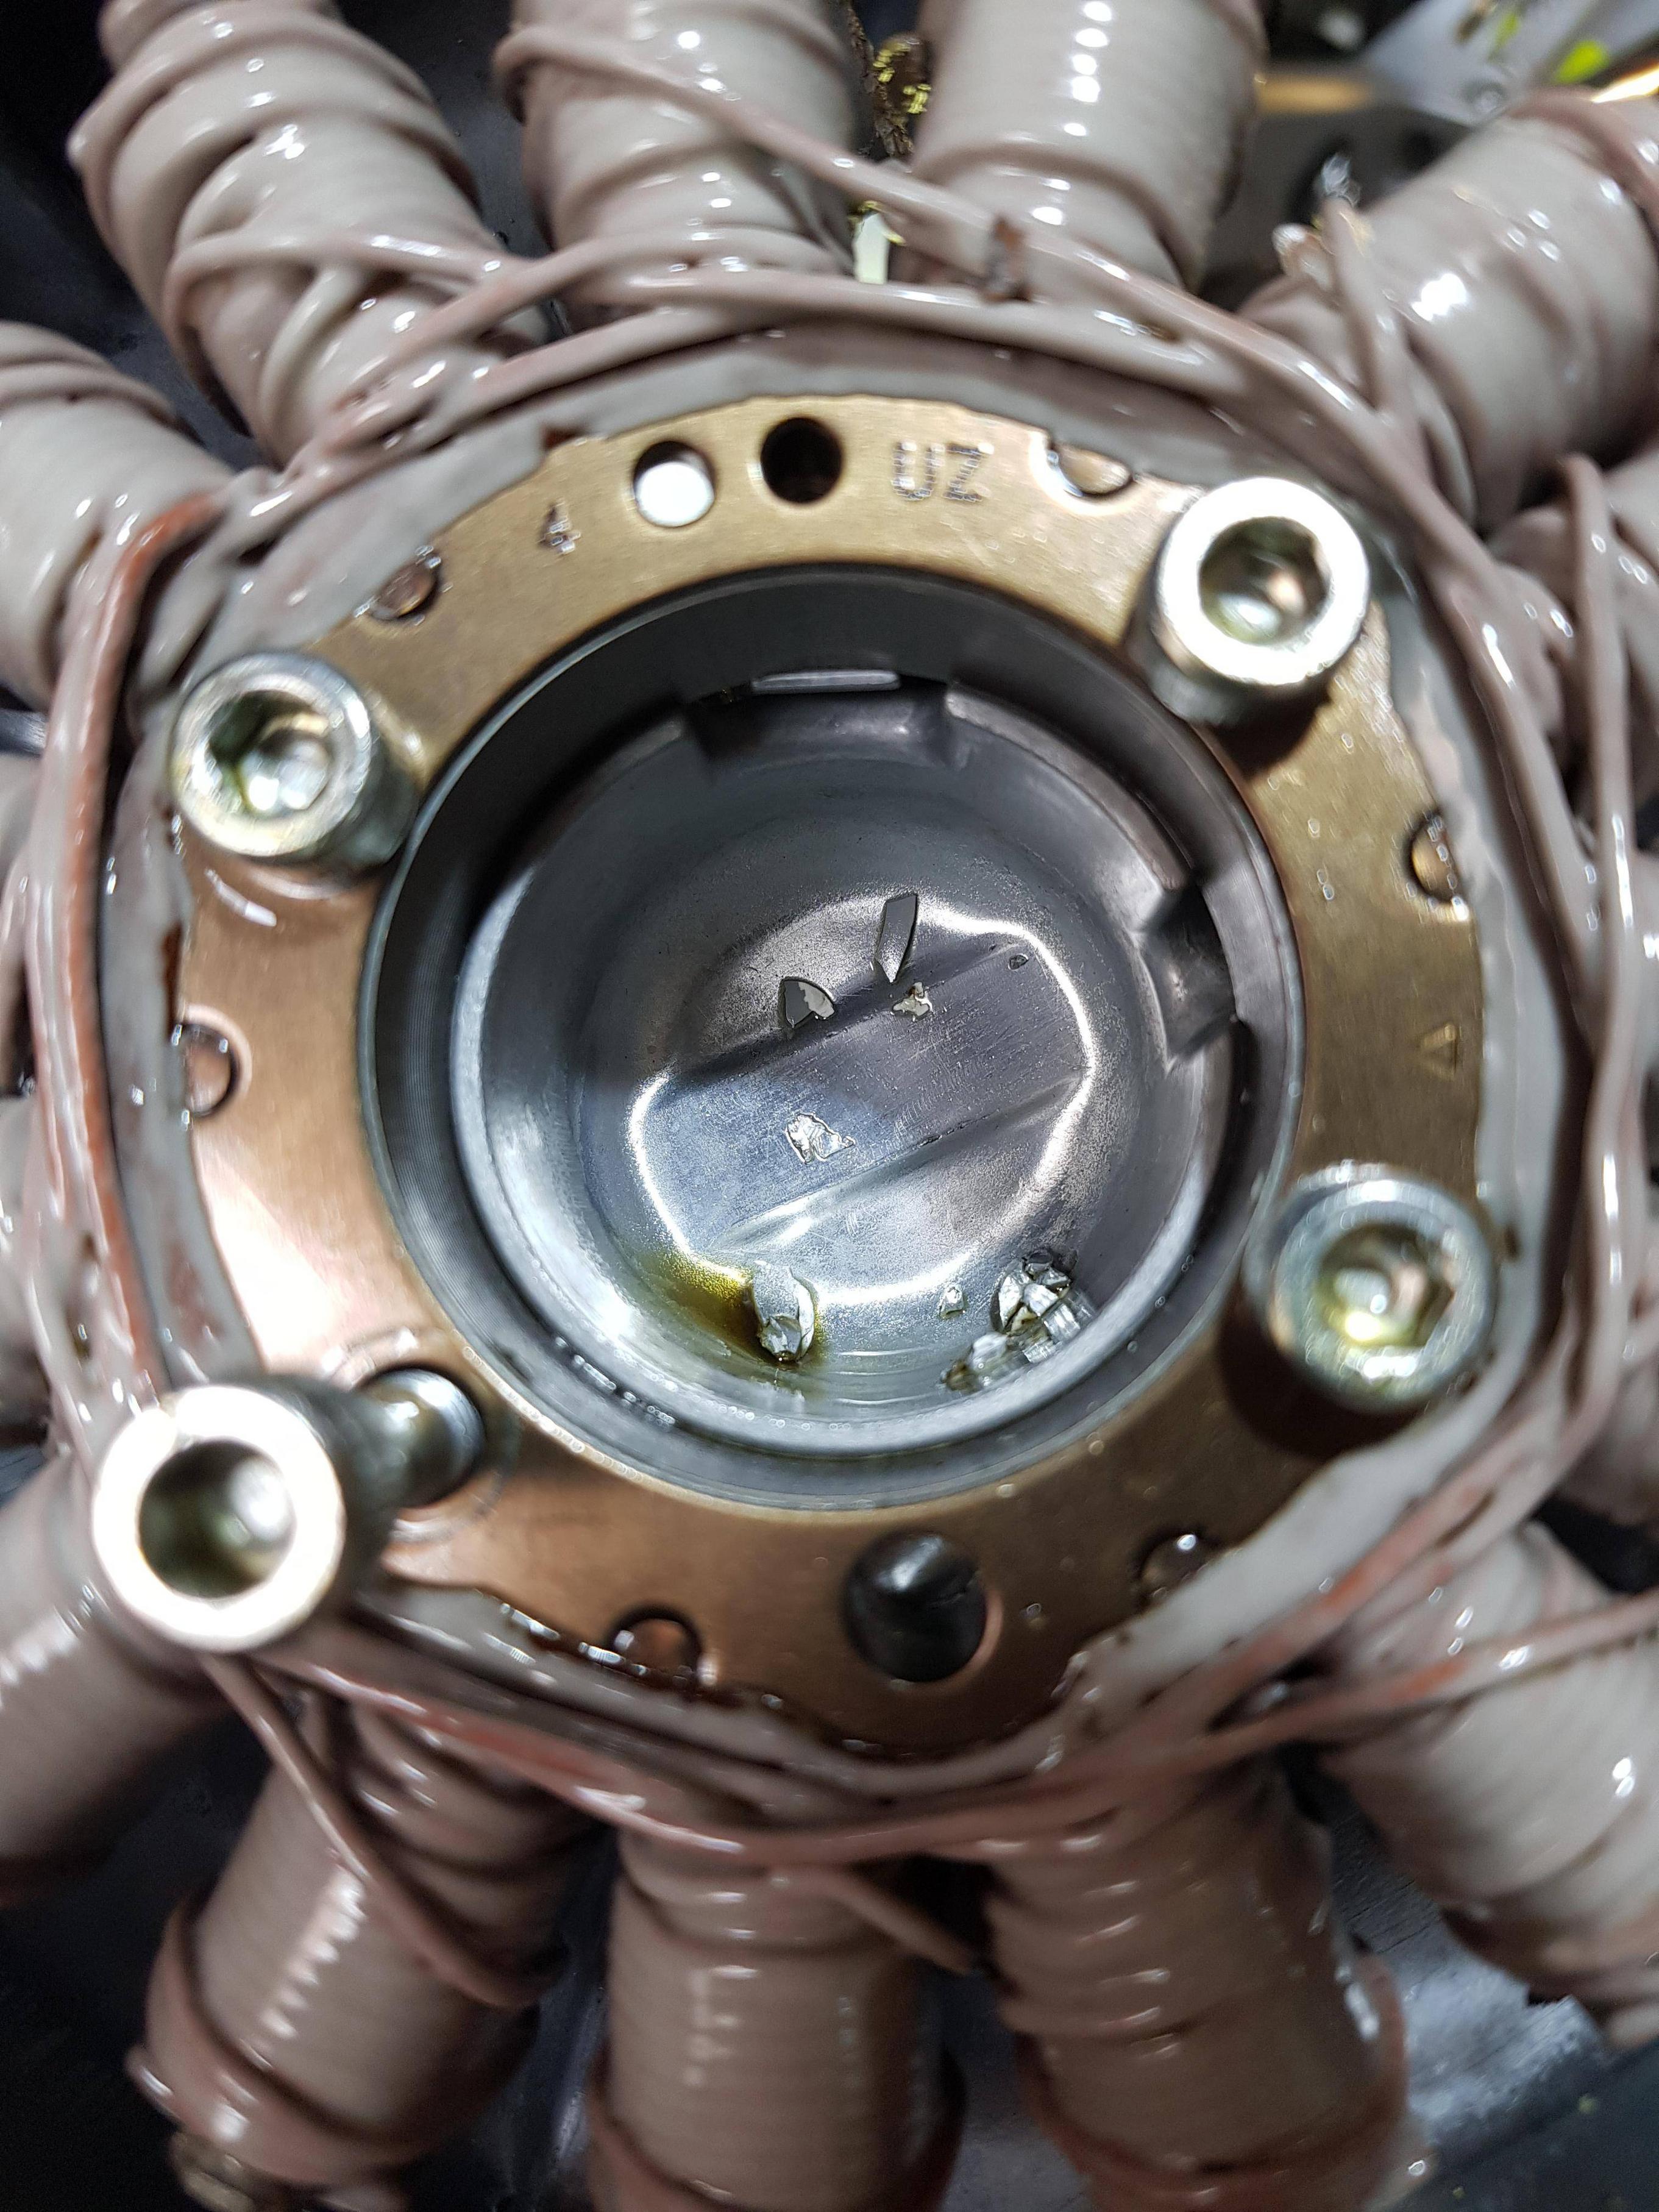
This had taken a hefty whack in the accident, resulting in a hole in the cover and fortunately only very slight damage to the generator itself - one coil slightly moved and a small ding in the rotor. I took a chance buying the 'bike with the potential for expensive damage here, but I struck lucky. It would have cost about £400+/$500 to fix if it had been damaged.

05c1f10be02dce343d00a217bf371e27.jpg


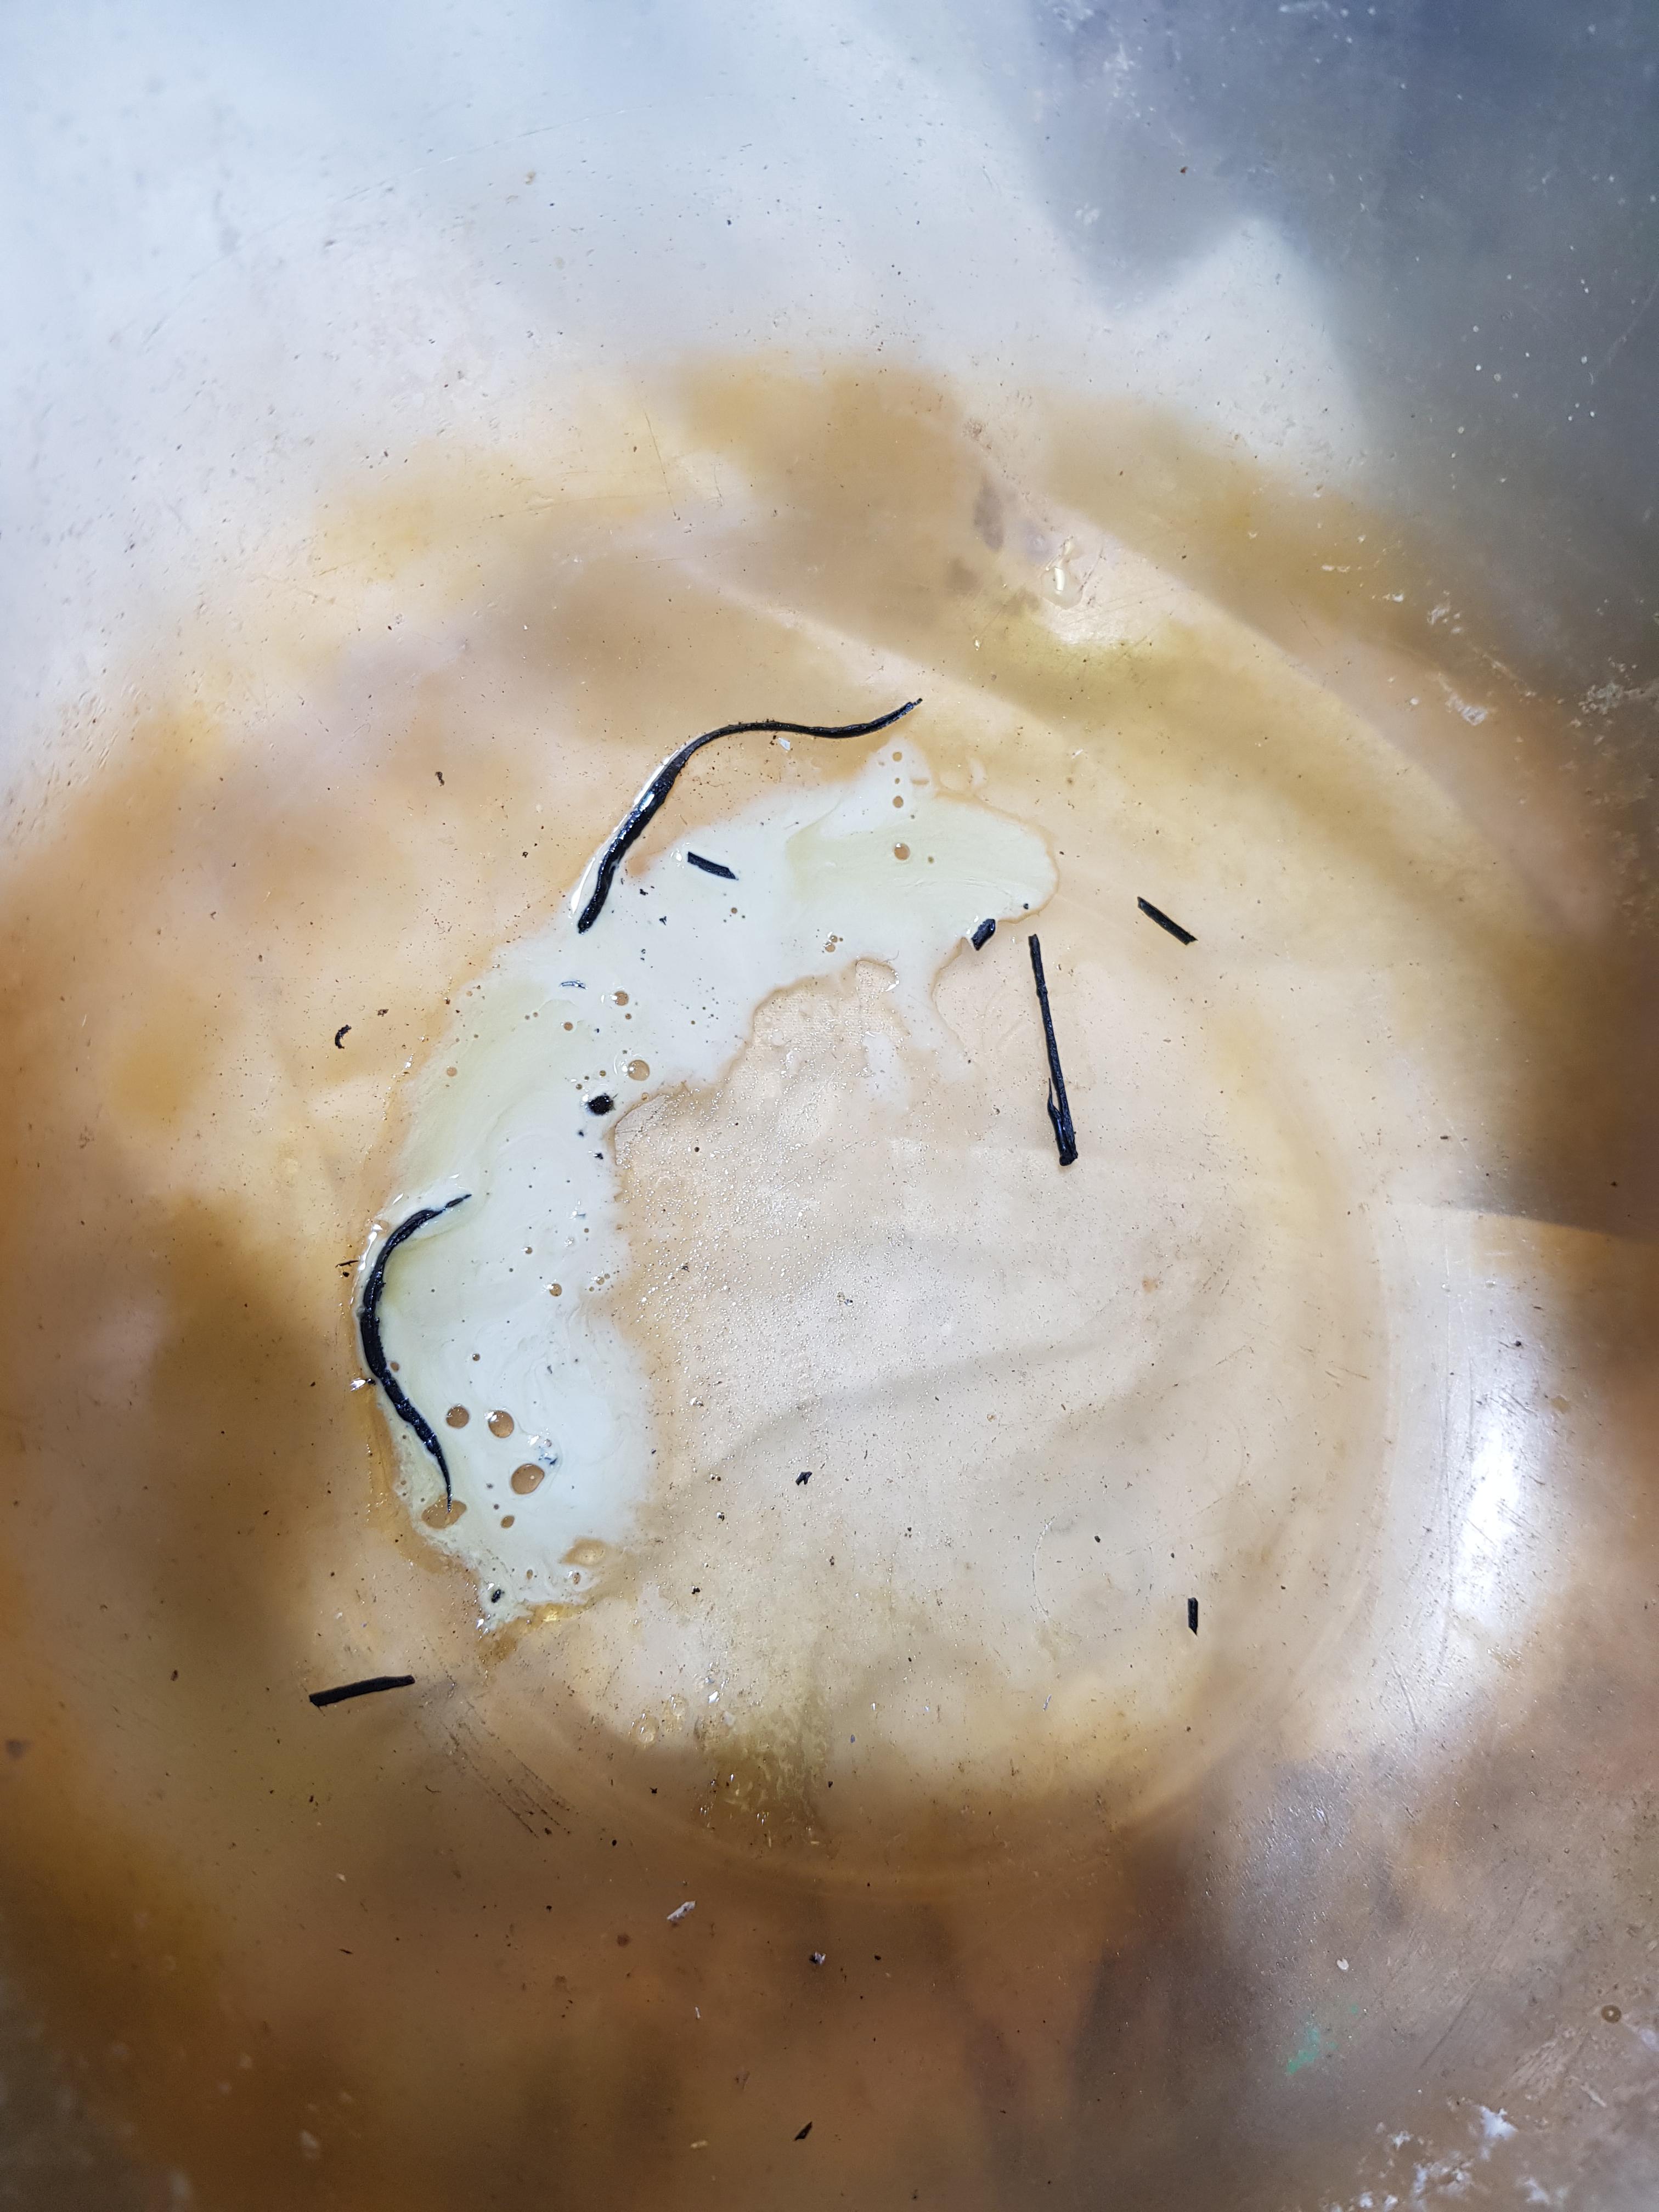
The manual says undo all the wiring, but that's not necessary to just replace the cover. It also says to place a bowl under to catch engine oil, but only the minutest drop of emulsified oil came out, maybe because the engine's not run for so long?

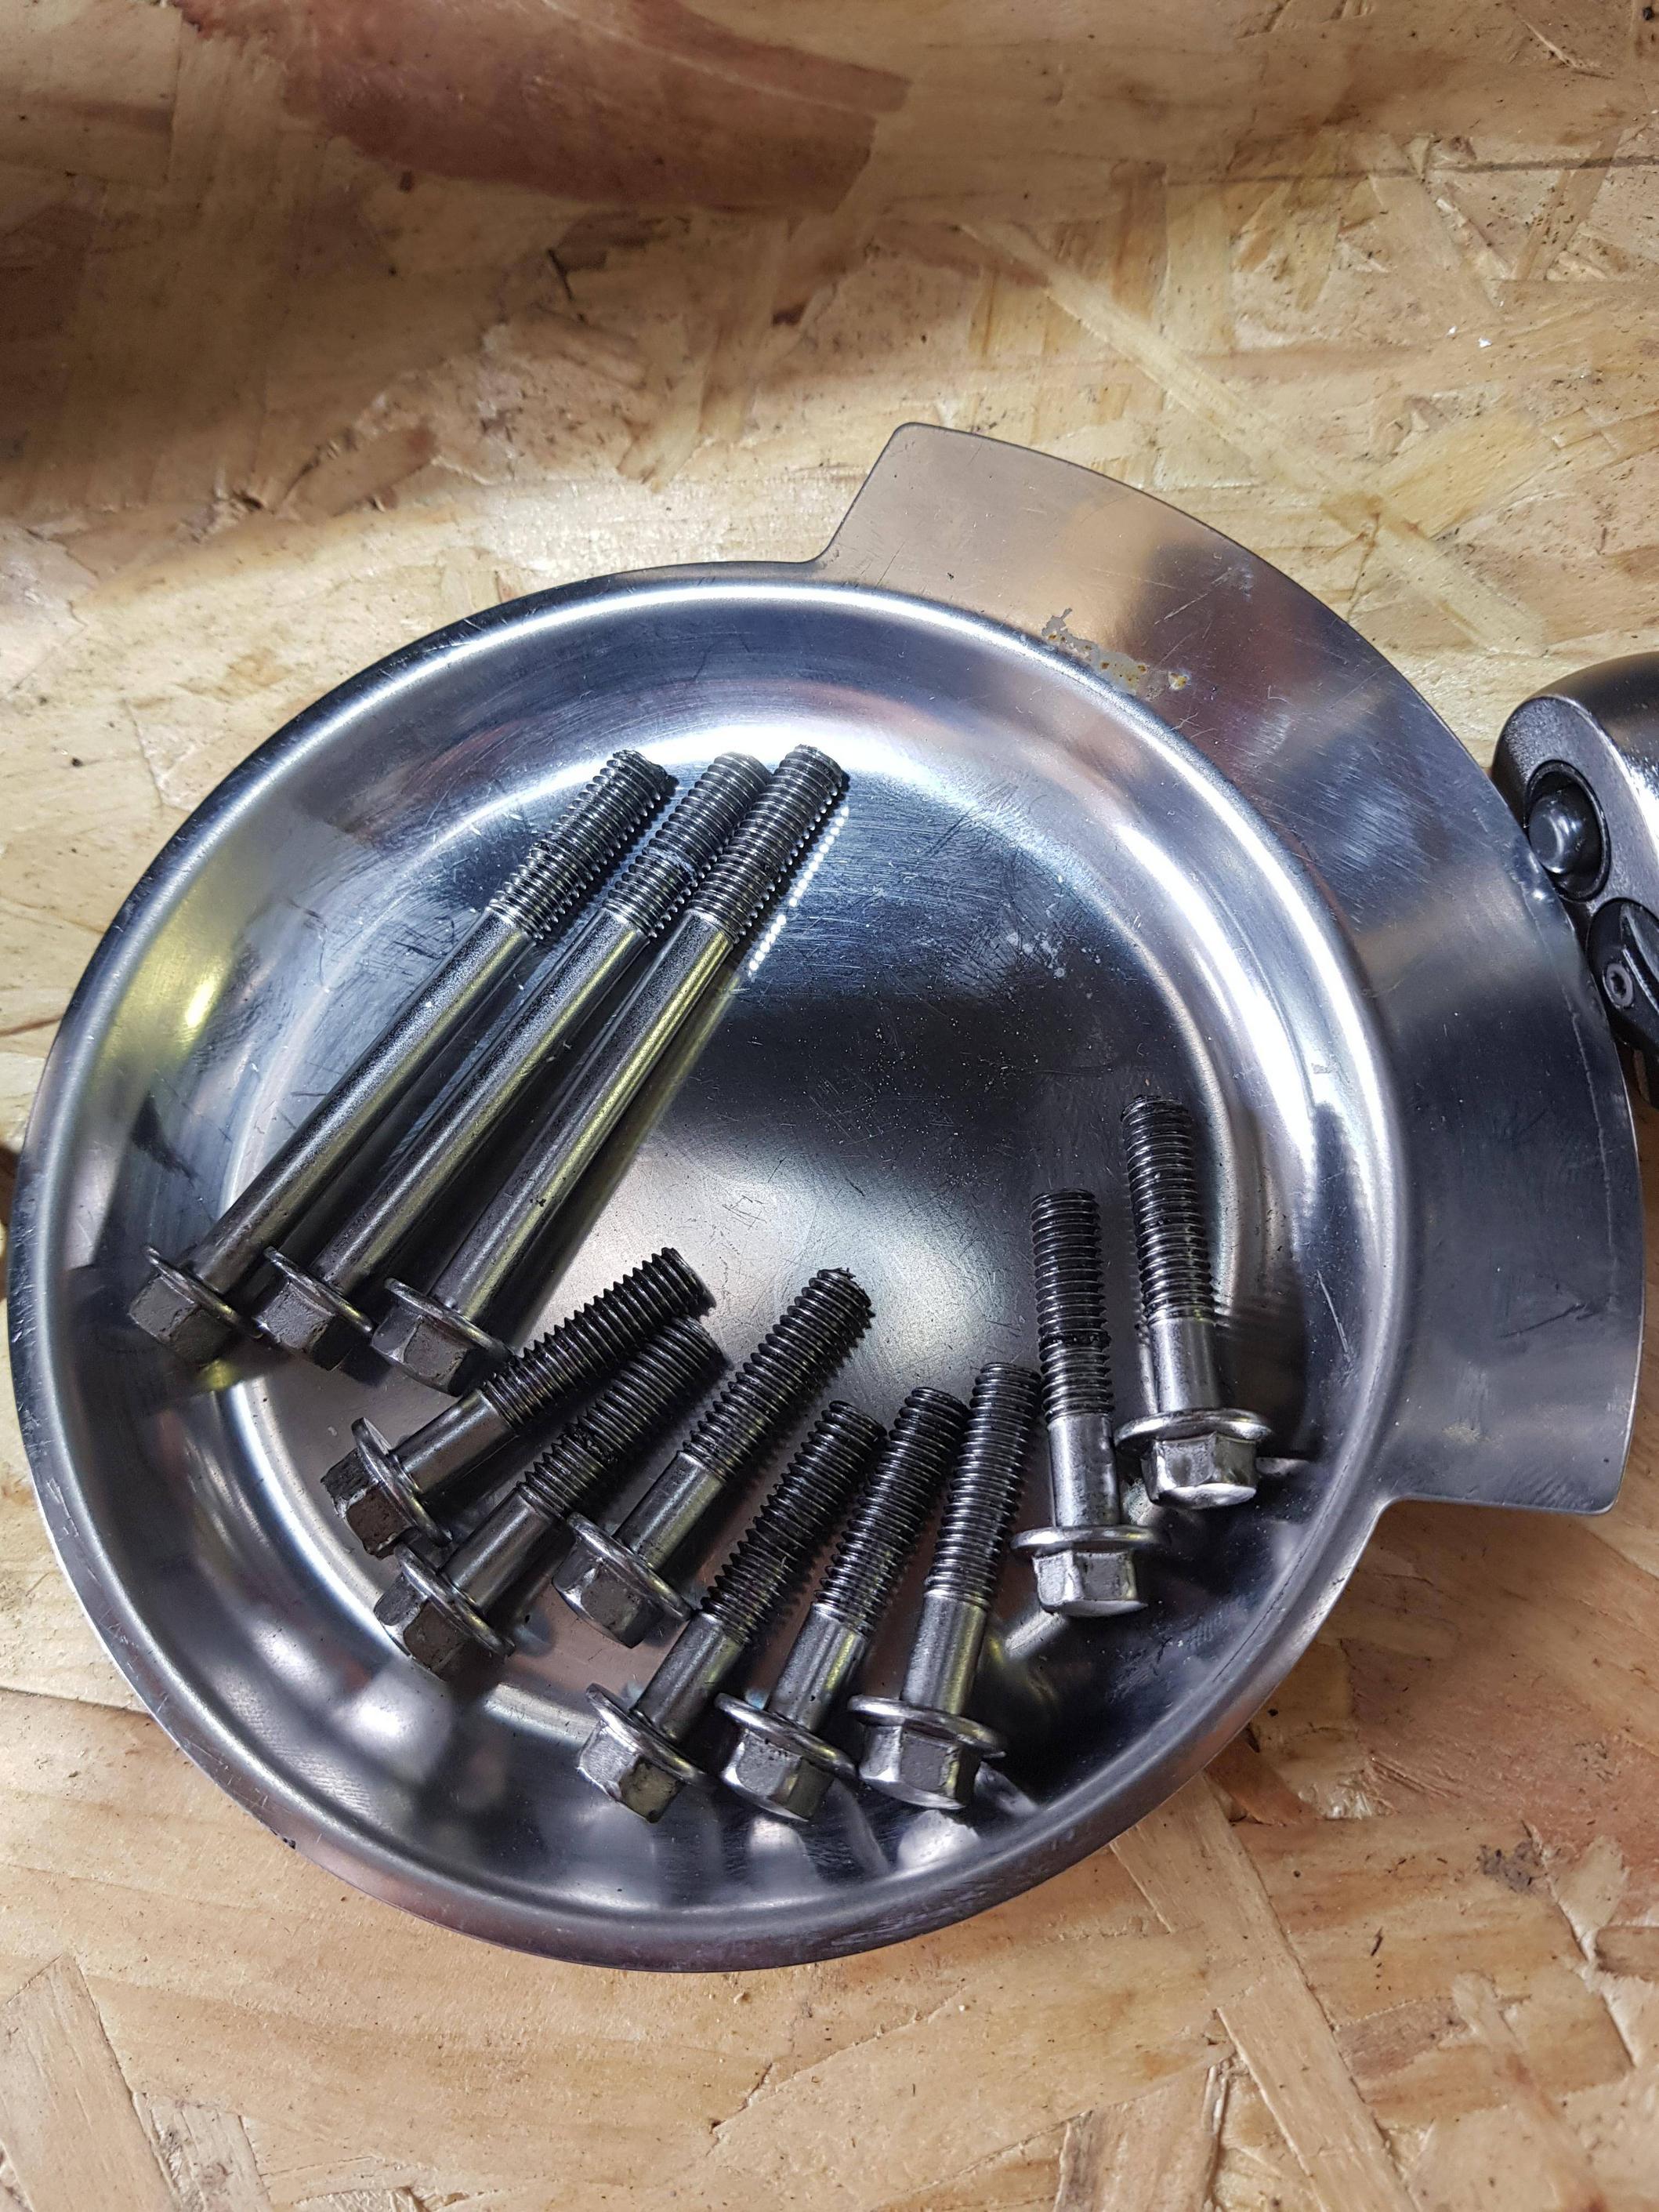
First, remove the starter gear cover - three long 8mm bolts.

47954f107320548edd8c87c9b4733cb6.jpg


The cover is sealed with an 'O' ring so you have to overcome 'stiction' to pull it off.

77fc69623b4e291d24ccf4b6db79fd33.jpg


Pull out the centre shaft...

d2c68d6332e8253d0d0ce12b875b449f.jpg


...and the large gear - they both just slide out. Put to one side.

e556865d305925387069ffb19dc24e97.jpg


dff75116c86269c6461a7f0e5b8b3c00.jpg


Next, remove the eight 8mm bolts holding the cover on.

b08ea89fbfcc51ff186415ae11257b5d.jpg


They're all the same length but much shorter than the starter gear cover.

6f868ab20a8eaa51022e9f30f55859fa.jpg


As you pull the cover off, beware...
a) the rotor is magnetised and exercises a 'pull' on the stator bolted inside the cover
b) there is a small, loose dowel pin at the bottom that must be retrieved, and
c) the cover is still attached by the generator wiring onto the 'bike, so you have little room to manoeuvre the side cover.
Part Two...

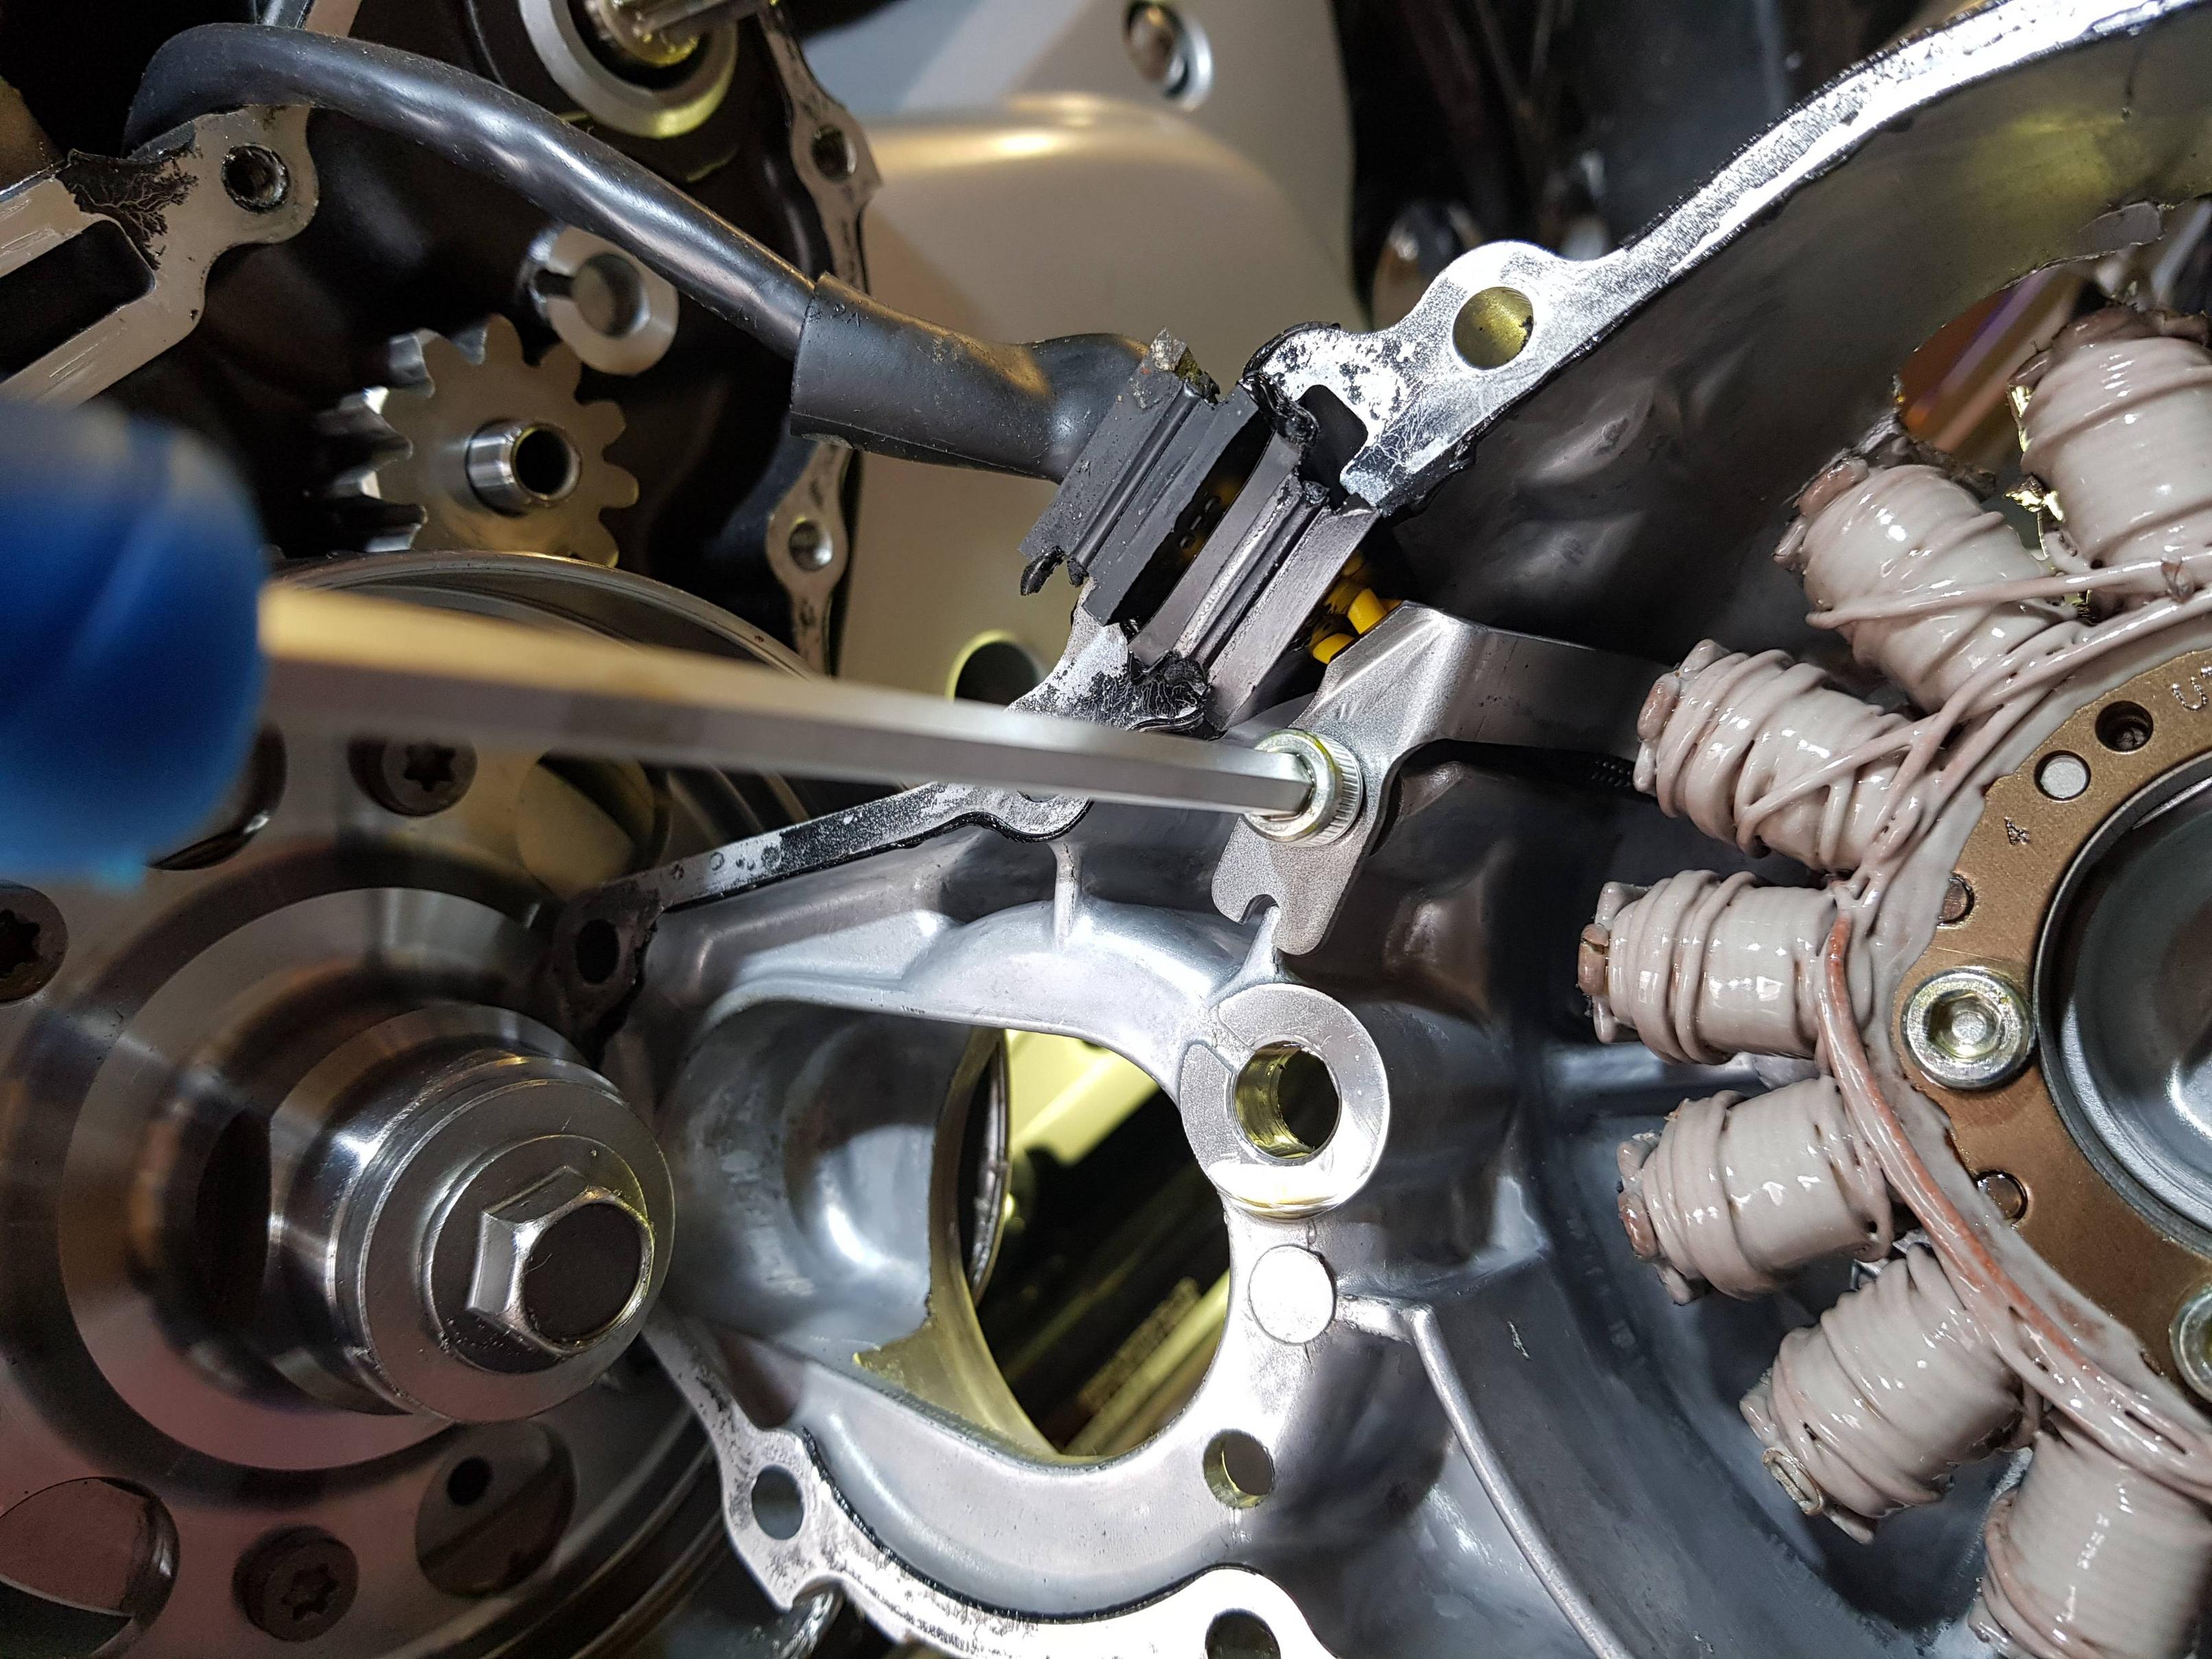
Undo the clip holding the wiring to the cover.

2f2eaf3b963ca27f7ddbfc6fc1e21056.jpg


Then undo the four hexagon bolts holding the stator onto the outer case.

acf6636ec54cba57147534803999bb2f.jpg


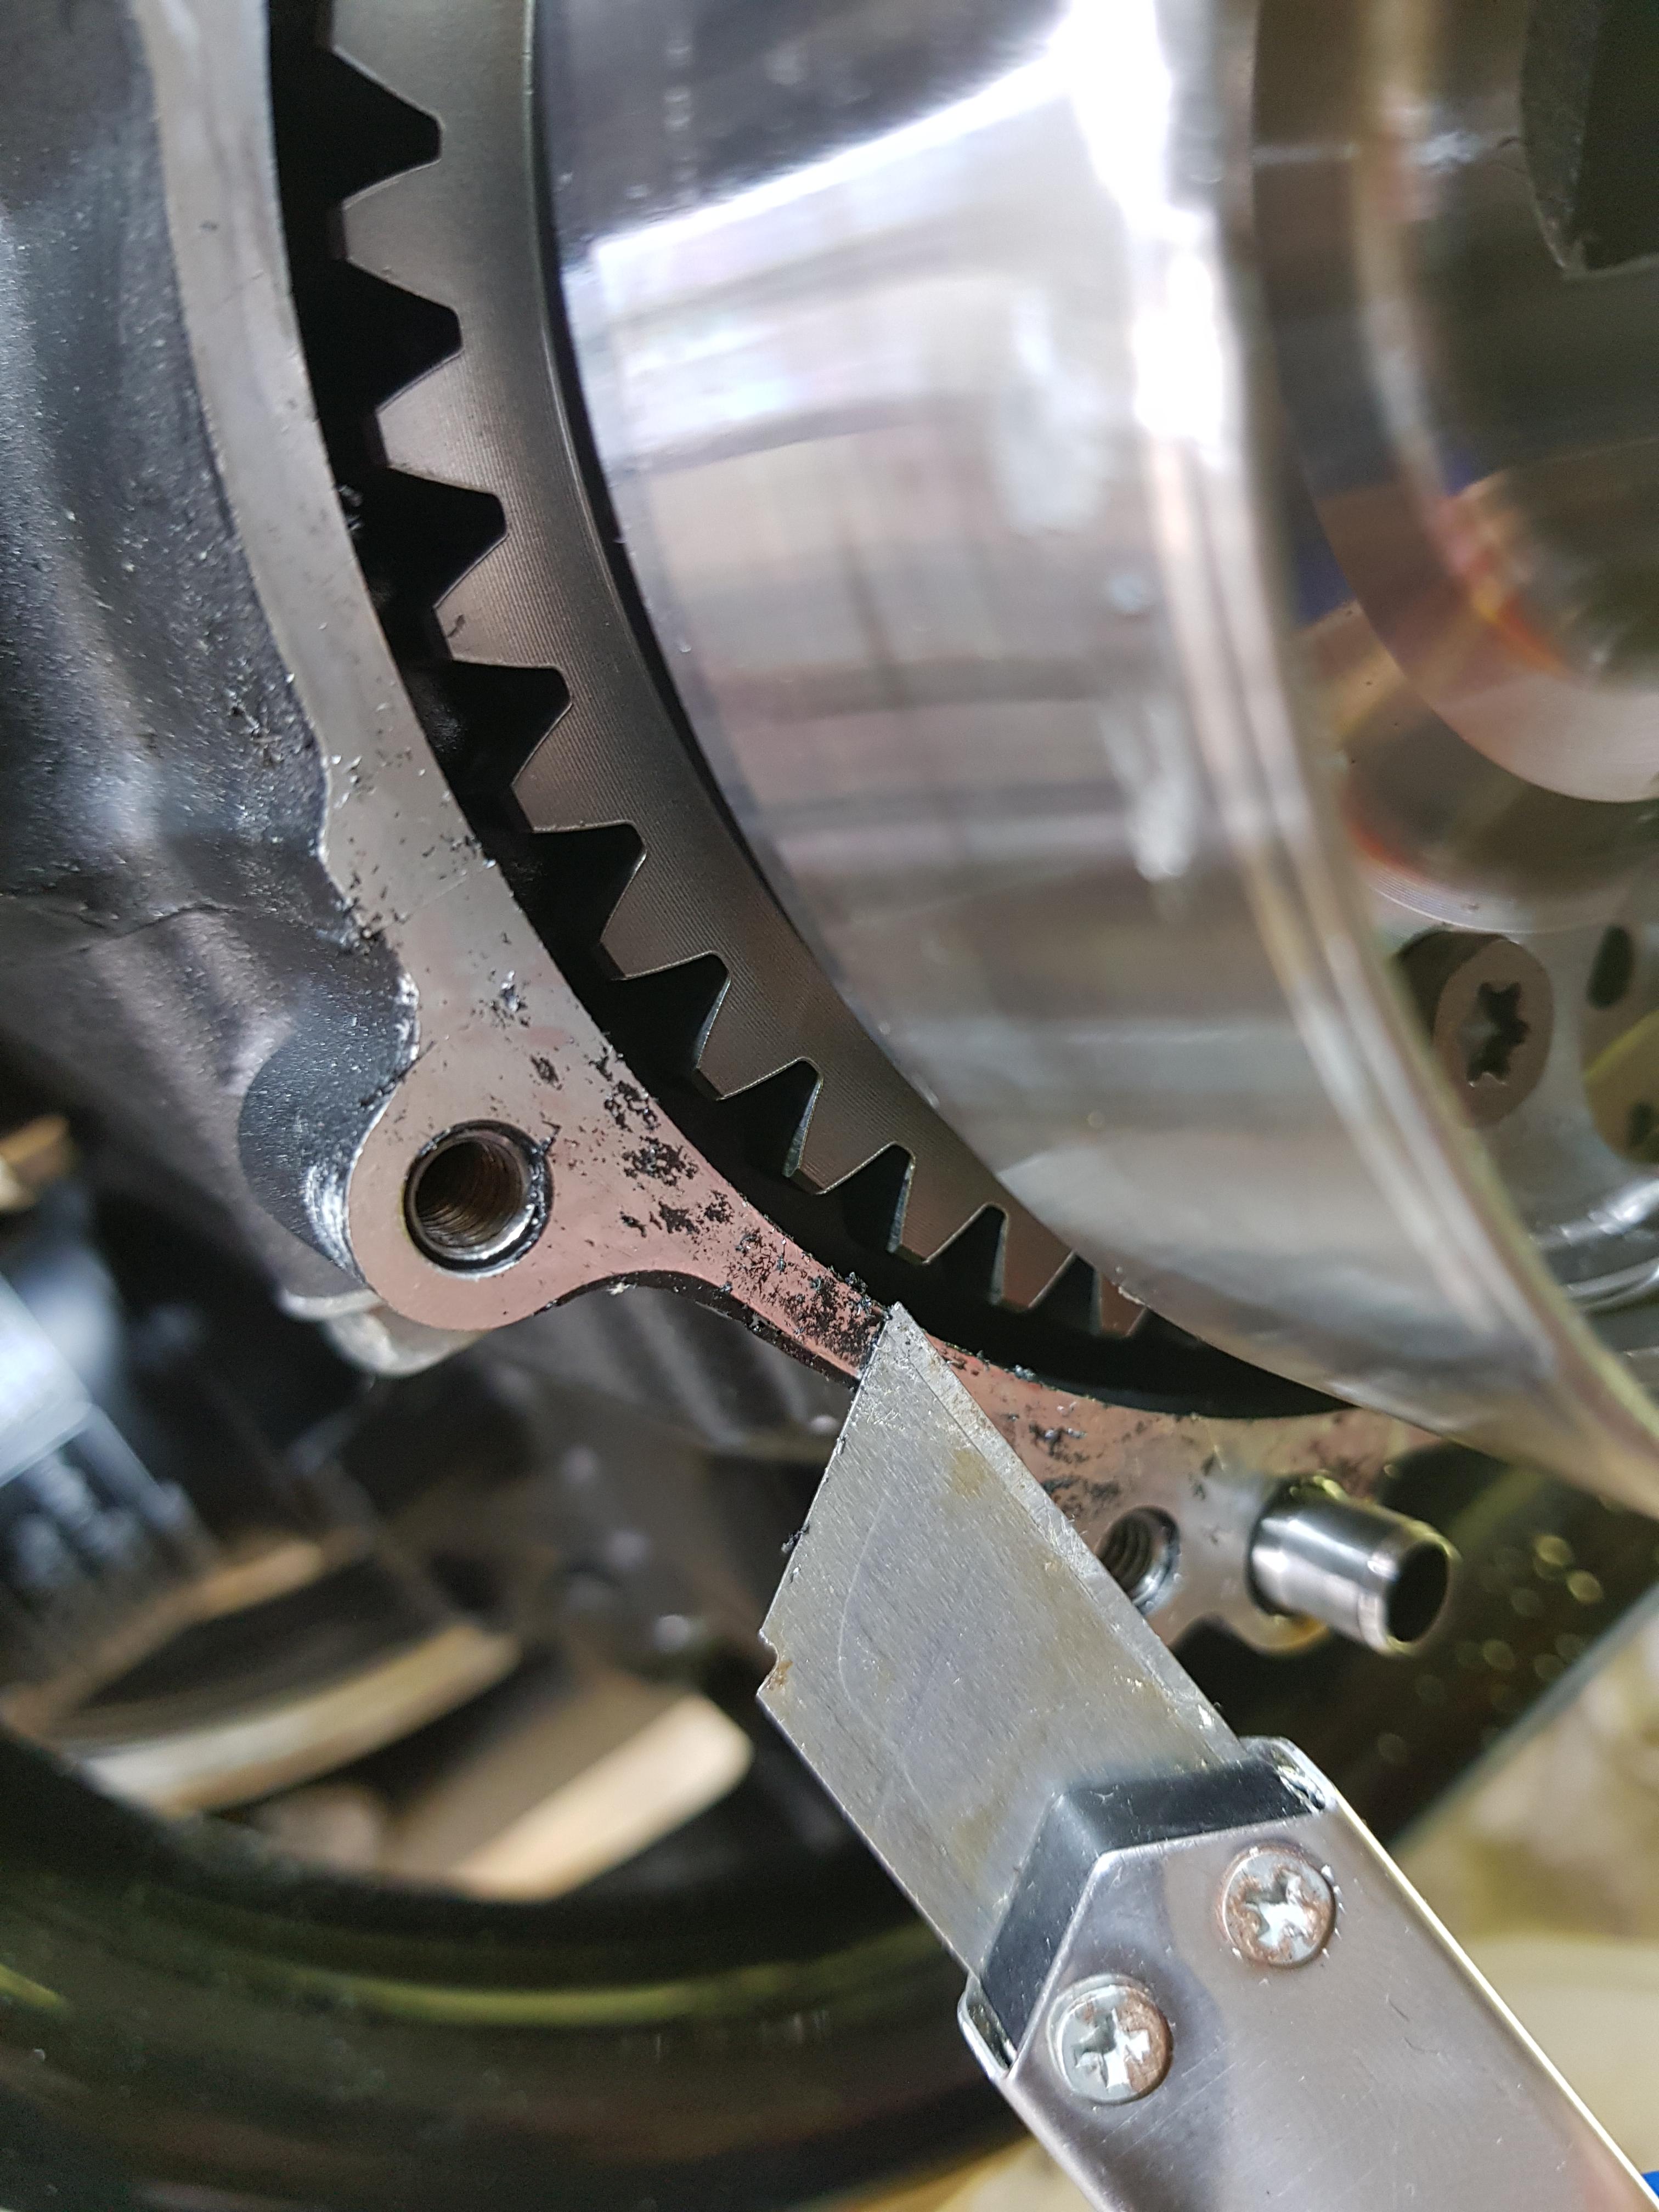
You can now remove the cover and put it to one side. I wrapped the stator in a small towel and placed it on top of the engine - it just wedges there nicely. I set to, VERY gently, scraping off the old gasket sealant from round the mating surface. I found it safest to drag a blade backwards so as not to mar the soft alloy surface. I occasionally resorted to a finger nail! I finally used brake cleaner to clean the entire mating surface, prior to using Honda's gasket cement (Three Bond 1207B).

eb5e5427e6c778b04159e52548e08271.jpg


I was concerned that small pieces of old gasket cement were clinging to the inside of the crankcase. They came out with the drips of oil and as I was cleaning and I imagined what would happen if they got caught in an oilway... I was careful to ensure that none were left.

ff900bc424baf7a75042538fb3ef9b7e.jpg


949c2447bd267f612c0559dacb27b16b.jpg


Bolt the wiring into the new cover and then the stator, torqued to 12Nm, before applying the liquid gasket and finally fitting the cover gently onto the rotor/crankcase.
I cut the smallest size nozzle on the tube of liquid gasket and put a continuous bead all round the edge of the new cover. The manual also wants two further beads, midway up the crankcase. No pictures of this - I was in too much danger of getting into a black sticky mess!! Dont forget to fit the small dowel pin.

64ebf35e572acff2ad9c965d6fd949c7.jpg


4afeabe3045e03d77e6642db4bc2ce0b.jpg


Bolt up the cover, working on diagonal bolts, gently tightening more and more as you nip up the opposite bolts, the same as tightening cylinder head bolts. Torque to 6Nm.

1399c18dcedbee8f6478e3926e850af7.jpg


Finally, refit the starter gear and shaft, after applying engine oil to both. A drop of oil on the 'O' ring, too, before pushing on and bolting up the cover - torque to 6Nm. The manual says to fit a new 'O' ring but I don't think that's necessary after just 165 miles! If it leaks, then I'll fit a new one.

14a38aca1ae5564a31f0e02c3cb44c94.jpg


And that's it! With battery now charged, I started it up for the first time (in my ownership). It started first jab on the starter (it last ran in January, after the accident some time in October, I think) and settled to a (fastish?) tickover of 1500-2000rpm. In danger of being gassed to death from the exhaust, I shut it off, but I'm pretty confident that as it warms, it will settle down to a 1000-ish rpm tickover.

b1c49c78c6698009d5c1ecbdf3db3381.jpg


In all, I am a very happy CB1100 owner! :D
 
Excellent, Bazbro. Isn't is great when it starts first up?
 
Thread starter
Yes! And I had a double reason for elation... It was the first time ever that I'd heard it fire up, and secondly, after performing work on the engine, it's very gratifying to hear it all still working!! Unlike the broken alarm clocks I used to "repair" when I was a kid!! :D
 
Mate, just wait until you ride it! It looks to my—albeit untutored—eyes like you've done a great job.
 
I think I could do that. I confess: I was looking the service manual the other day to try to answer a question on this forum. I read through it carefully, then read through it again, then read through it again. I couldn't understand any of it.

I'm full of admiration.
 
Thread starter
It's my pleasure, John. I hope they're not boring - 'real' mechanics already know most of this guffand don't need telling. I'm hoping that those inexperienced at "mechanics" will take encouragement and maybe have a go themselves when they see it laid out like this

It goes without saying that I'm thoroughly enjoying this, mainly because it doesn't involve "technical knowledge" - it's just unbolting and then bolting stuff up again. I do know my limitations, which is important
 
Cormanus/Ferret

Brazbro's post should be in the How-To section for easy future reference.

I respectfully request it be moved or copied there.
 
Back
Top