Whitehouse K17 mods...

who can't appreciate a CB 1100 that has been given the Whitehouse treatment?
 
The ferret_imp said:
who can't appreciate a CB 1100 that has been given the Whitehouse treatment?
Yes, they do look a treat. You can get your own mini slice of one from Tamiya much cheaper if you get the itch! It is a 1/6th scale, a pretty big model. They say limited edition so not sure if these are still around?

Oh crap, very limited! Just seen a new one on EBAY for £400 eek!

 
Thread starter
Tev62_imp said:
The ferret_imp said:
who can't appreciate a CB 1100 that has been given the Whitehouse treatment?
Yes, they do look a treat. You can get your own mini slice of one from Tamiya much cheaper if you get the itch! It is a 1/6th scale, a pretty big model. They say limited edition so not sure if these are still around?

Oh crap, very limited! Just seen a new one on EBAY for £400 eek!
Yes, they do look a treat. You can get your own mini slice of one from Tamiya much cheaper if you get the itch! It is a 1/6th scale, a pretty big model. They say limited edition so not sure if these are still around?

Oh crap, very limited! Just seen a new one on EBAY for £400 eek!
Oh wow! I actually bought and made one of these Tamiya kits back in the '70s!
A beautiful kit, I kept it under a glass display dome for many years.

I don't know if I've got the patience, steady hand or dexterity to make one now! It's easier to make the real thing!! :D
And here are the Instructions to making it...

Adobe Acrobat

It seems to be "Out of stock" everywhere... :(
 
Thread starter
.
FITTING A 'RETRO' CB750 MUDGUARD TO A CB1100...

In this case, it is a 2018 CB1100EX.

I have used a genuine Honda CB750 1972 patten front mudguard (fender, m/guard).

After removing the front wheel ( http://cb1100forum.com/forum/showthread.php?tid=15104&pid=257750#pid257750 ), remove the front m/guard. 4x 12mm bolts.

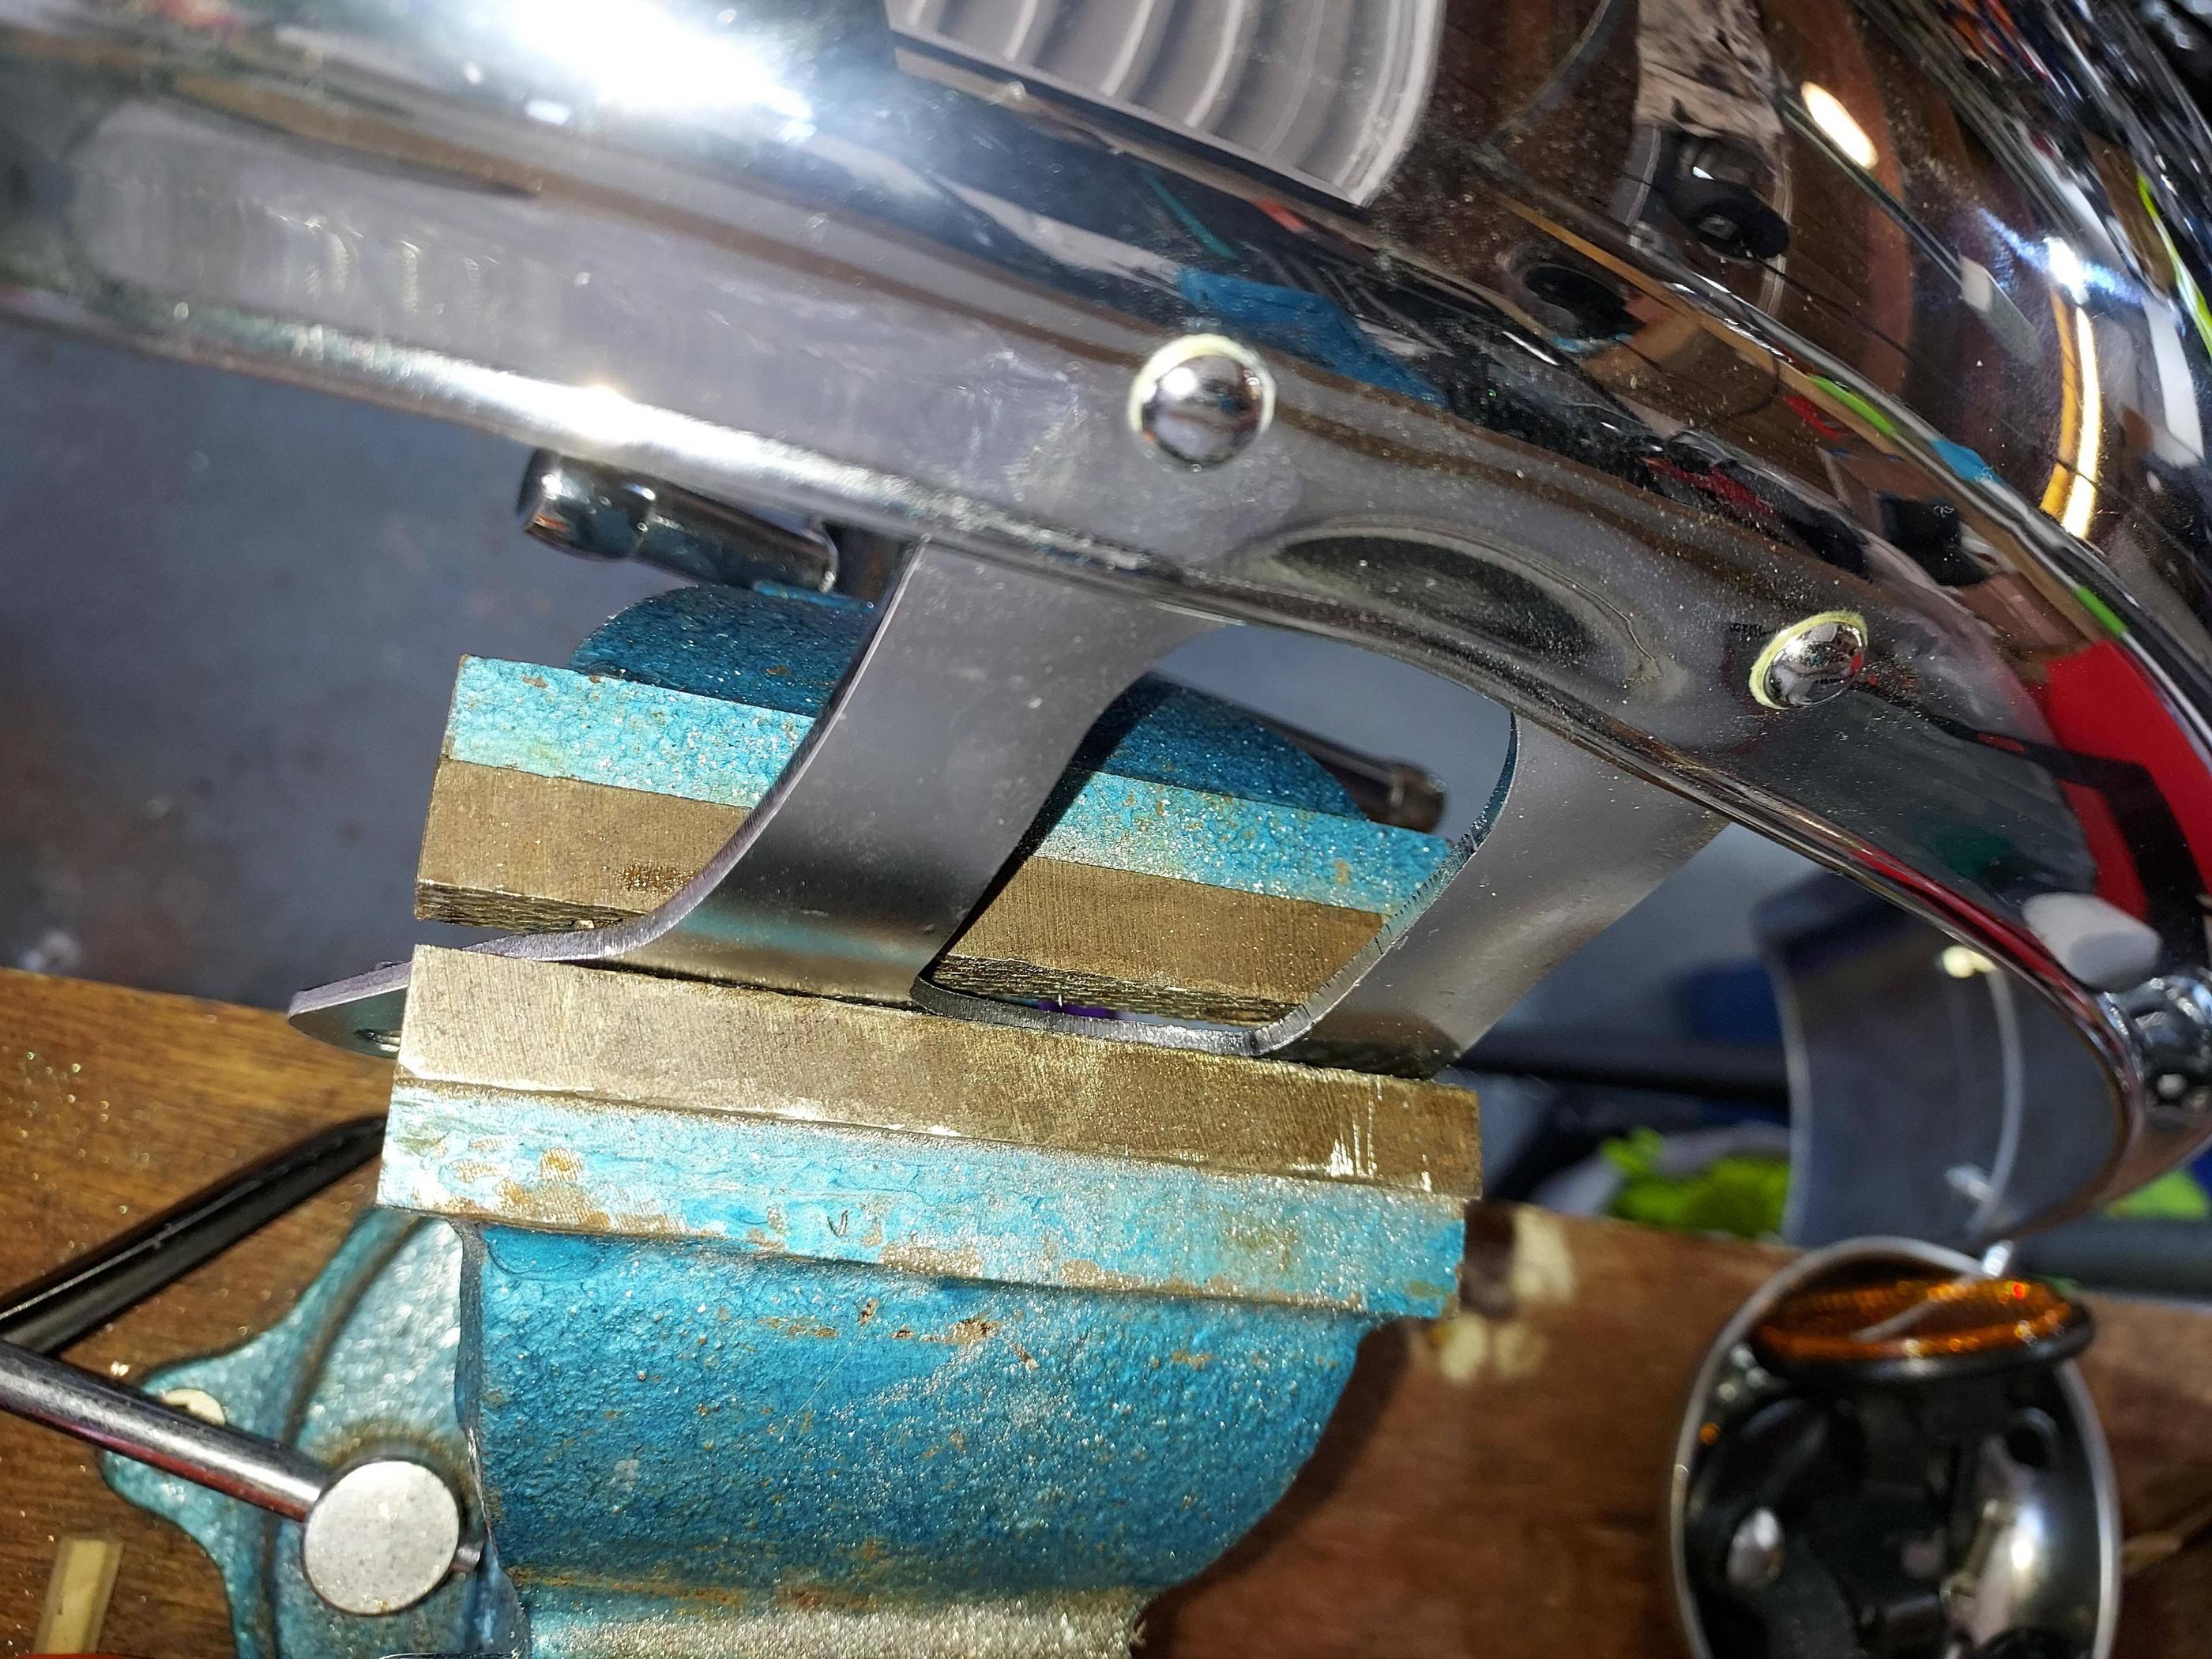
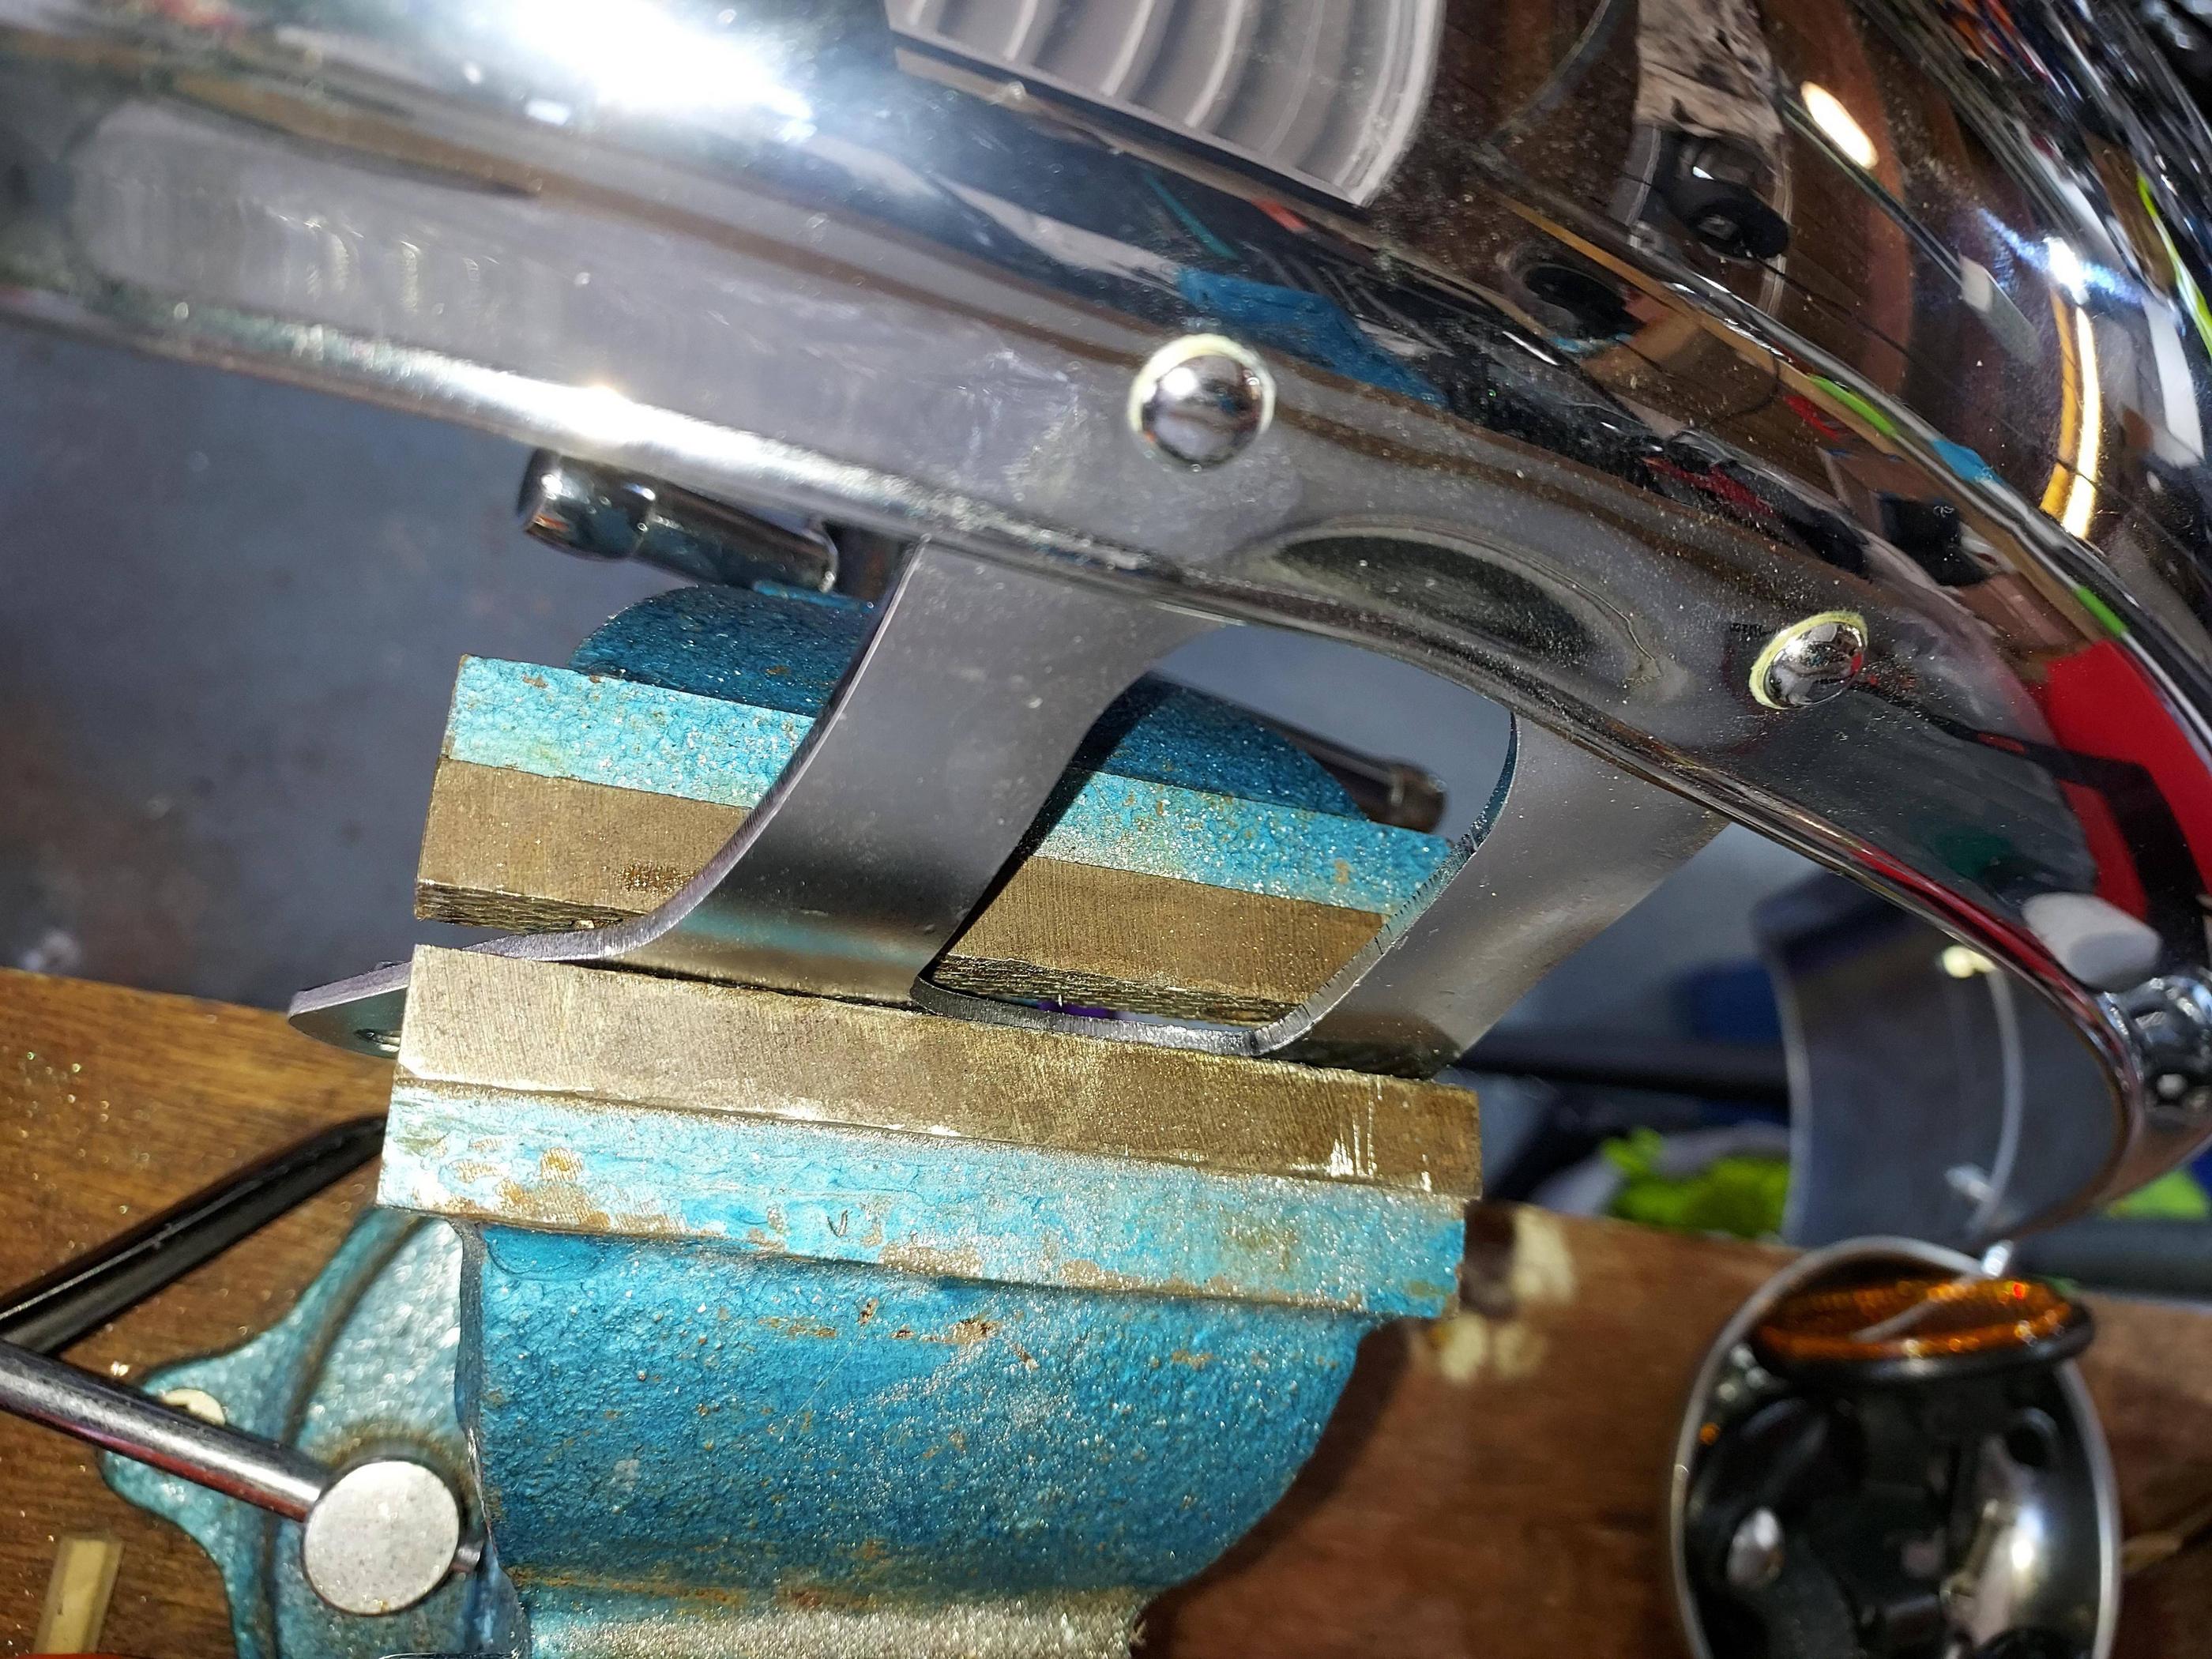
Position the m/guard roughly between the forks, to see what you have and what you need to alter.  I needed to bend the large brackets to make them fit between the (wider apart) forks. I did this using a vice (vise).  CAREFULLY bend or straighten as necessary until you're happy. You may need to.keep coming back to do this.

c9248aa0c37e049456750c5dae943512.jpg


I found it easier at this stage to temporarily remove the front, upper stay (two 8mm bolts/nuts)

Cut off the redundant cable guide.

91d893bf142a3321fe6fd3f151199fc0.jpg


Rustproof/paint this when you paint the central brackets, later.

The lower, rear, stays need to be modified to fit round the brake calipers /discs.
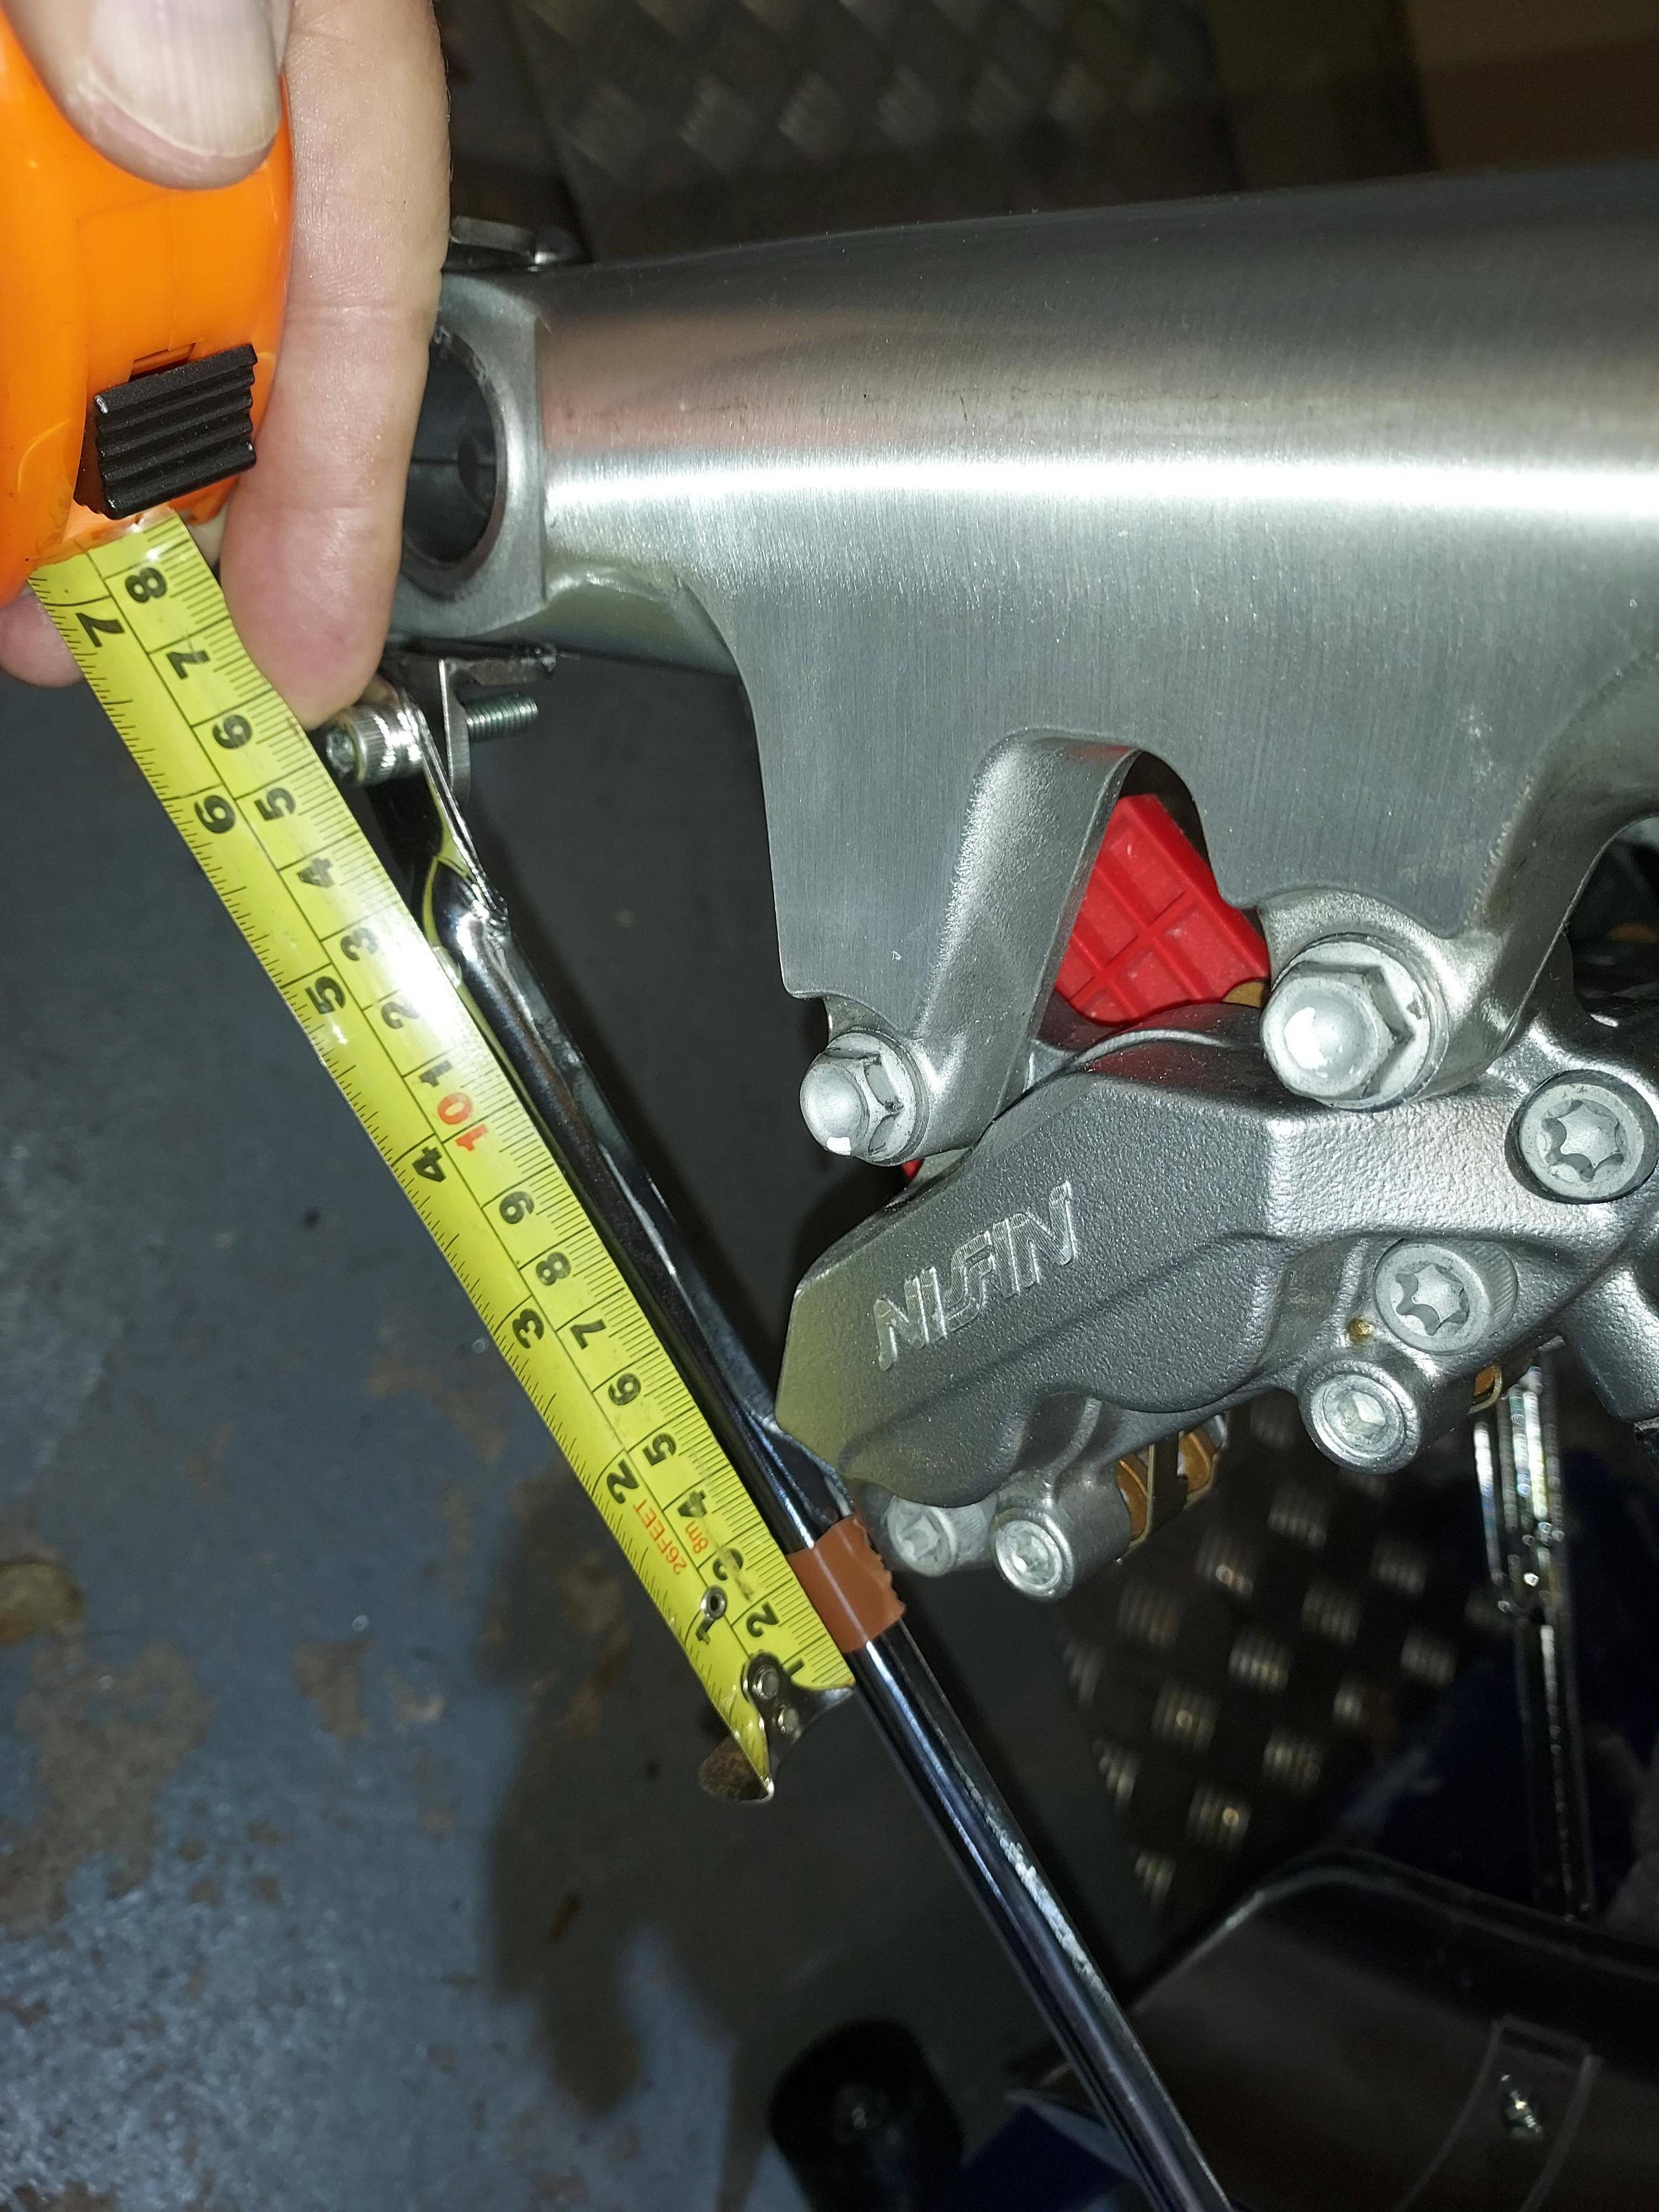
Measures 15cm along the stays, from the centre of the securing bolt hole on the end of the stay, and mark that position with tape. 

035c708c5f2c726e3caa0a77a653968e.jpg


I am NOT a metalworker and I'm  not entirely happy with what I've done here... it's OK but could be better.  A metalworker would certainly offer a better method.  Anyway, read and weep, metalworkers of the world!

CAREFULLY and slowly bend out the arms of the rear, lower stay, equally on each side - do this on the one rear, lower stay ONLY; the other stay remains intact.  Try not to bend solely at the screw securing point - it is weak there and could snap outwards or upwards. 

Bend outwards,  equally on each side, until the tape marks are 25cm apart - this will enable the stays to clear the brake calipers.

59453fd99d2213bf88c5b2d79d893a32.jpg


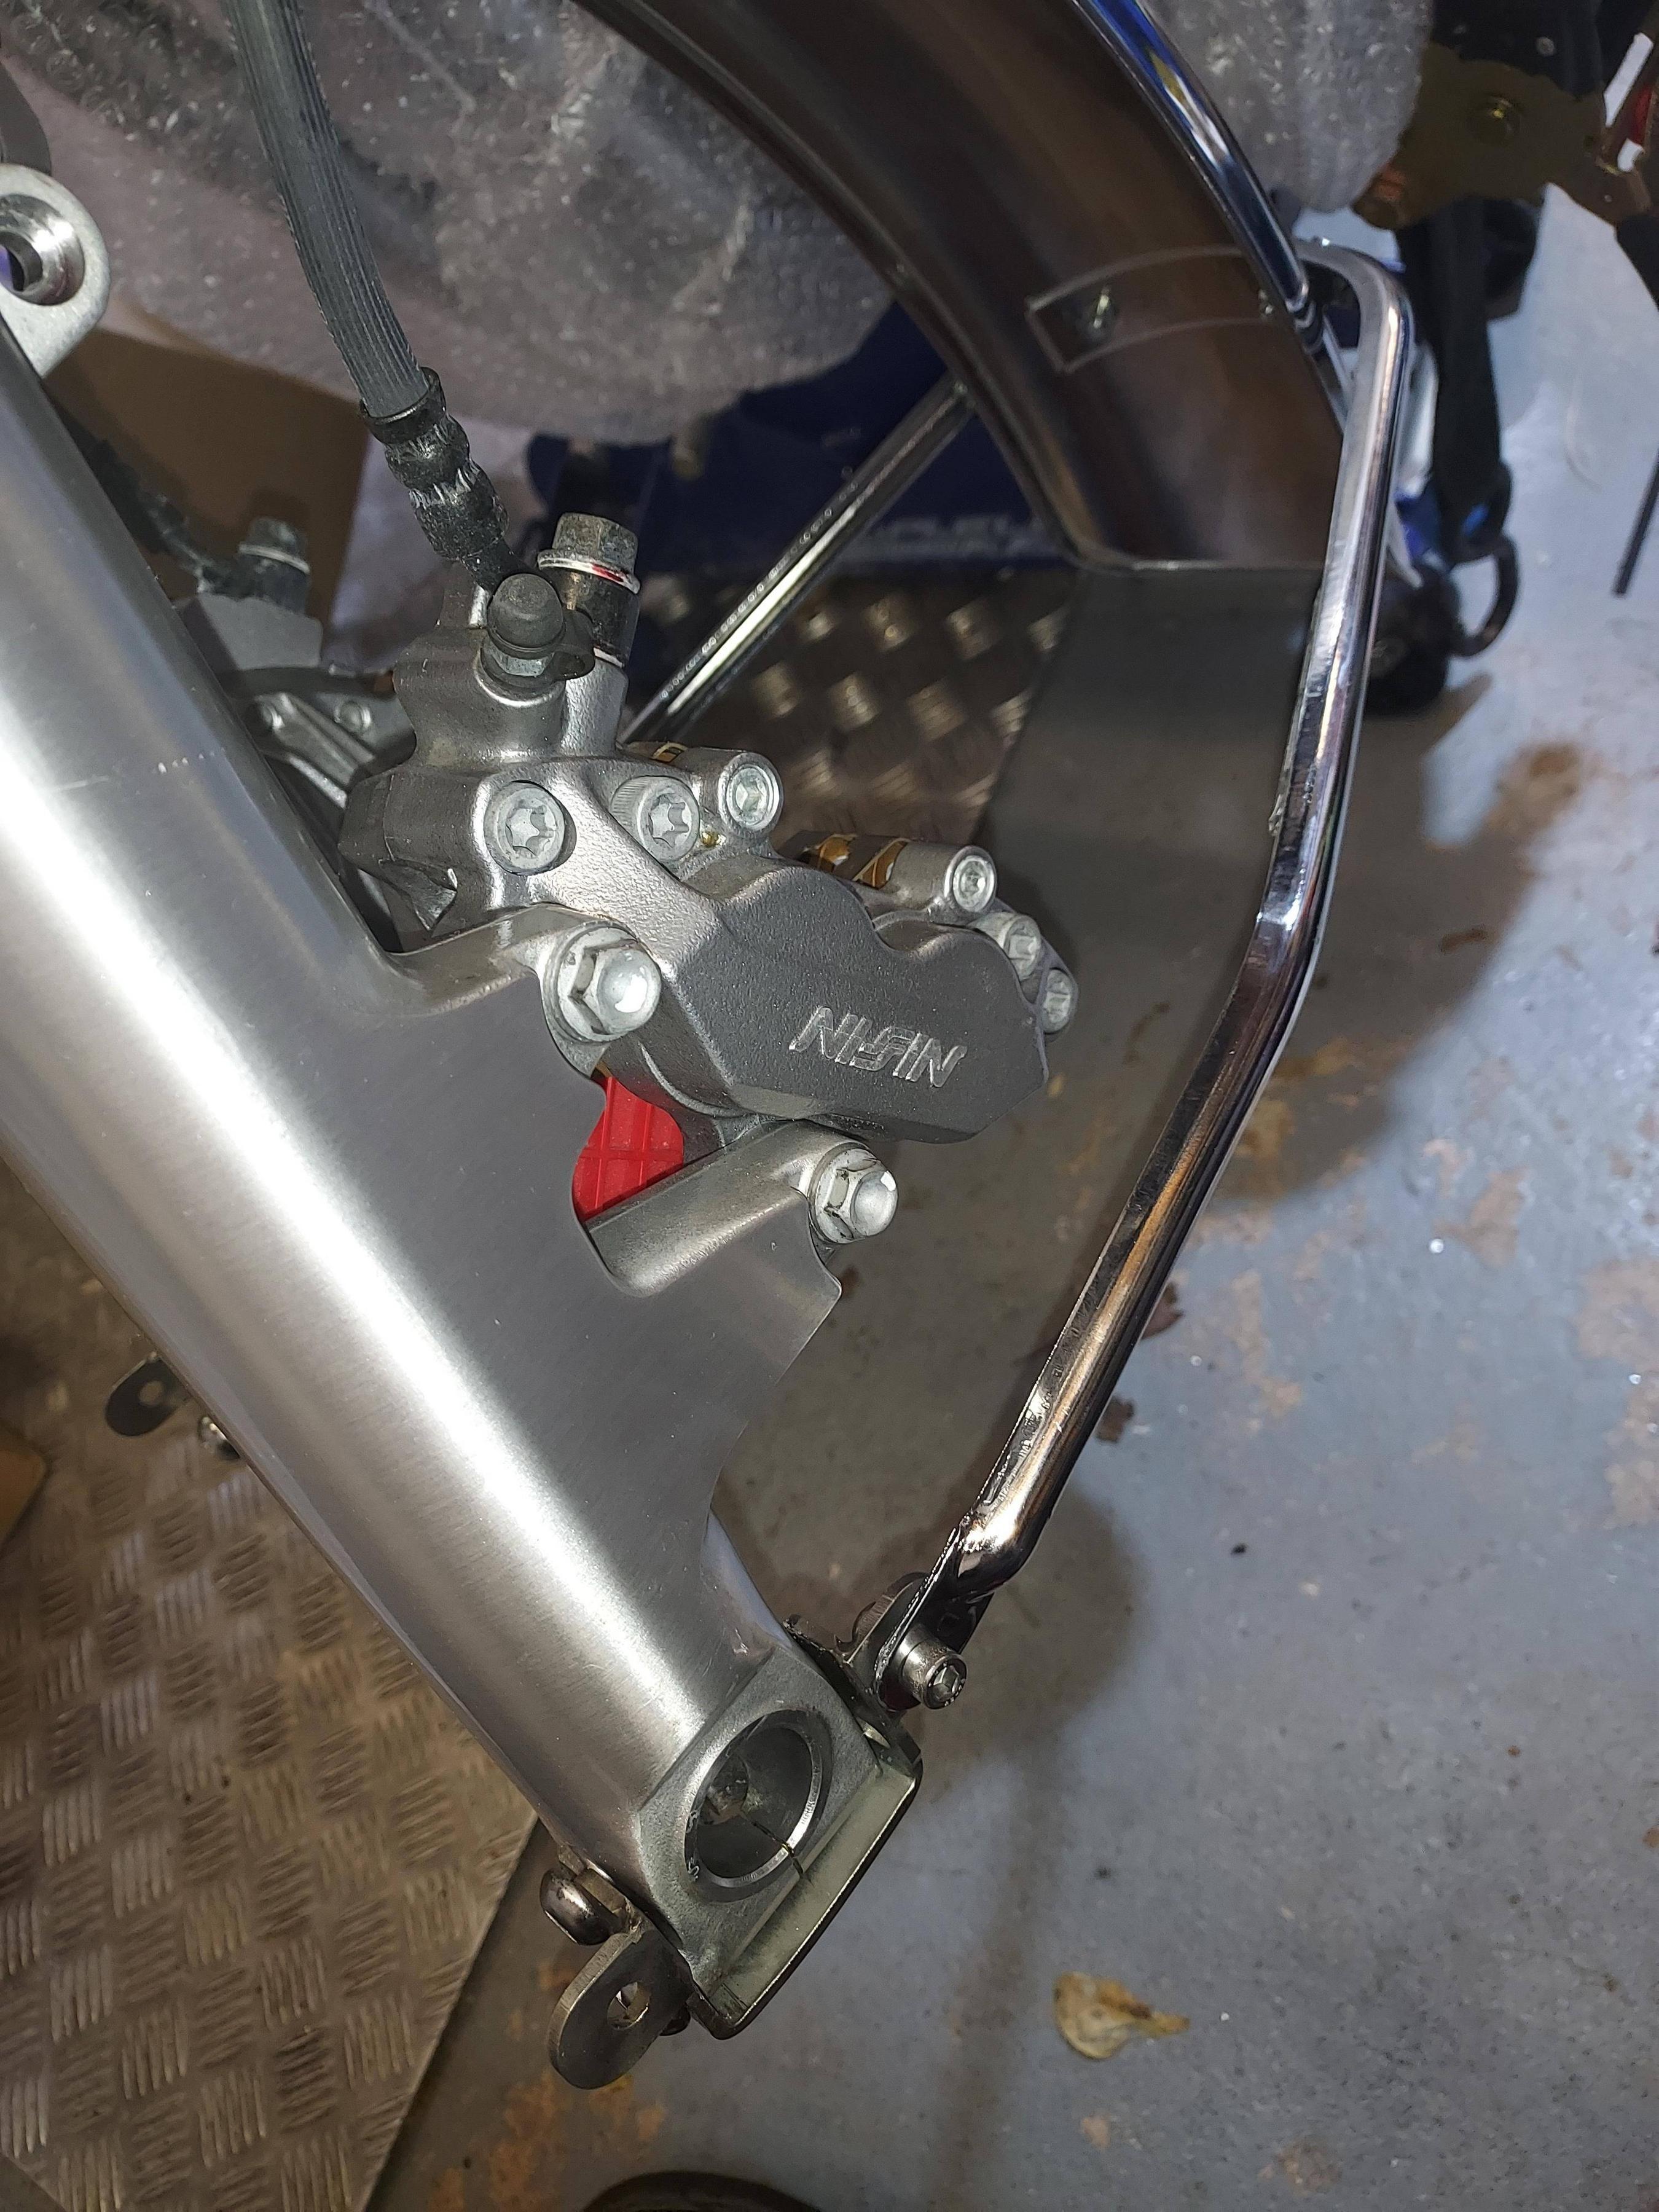
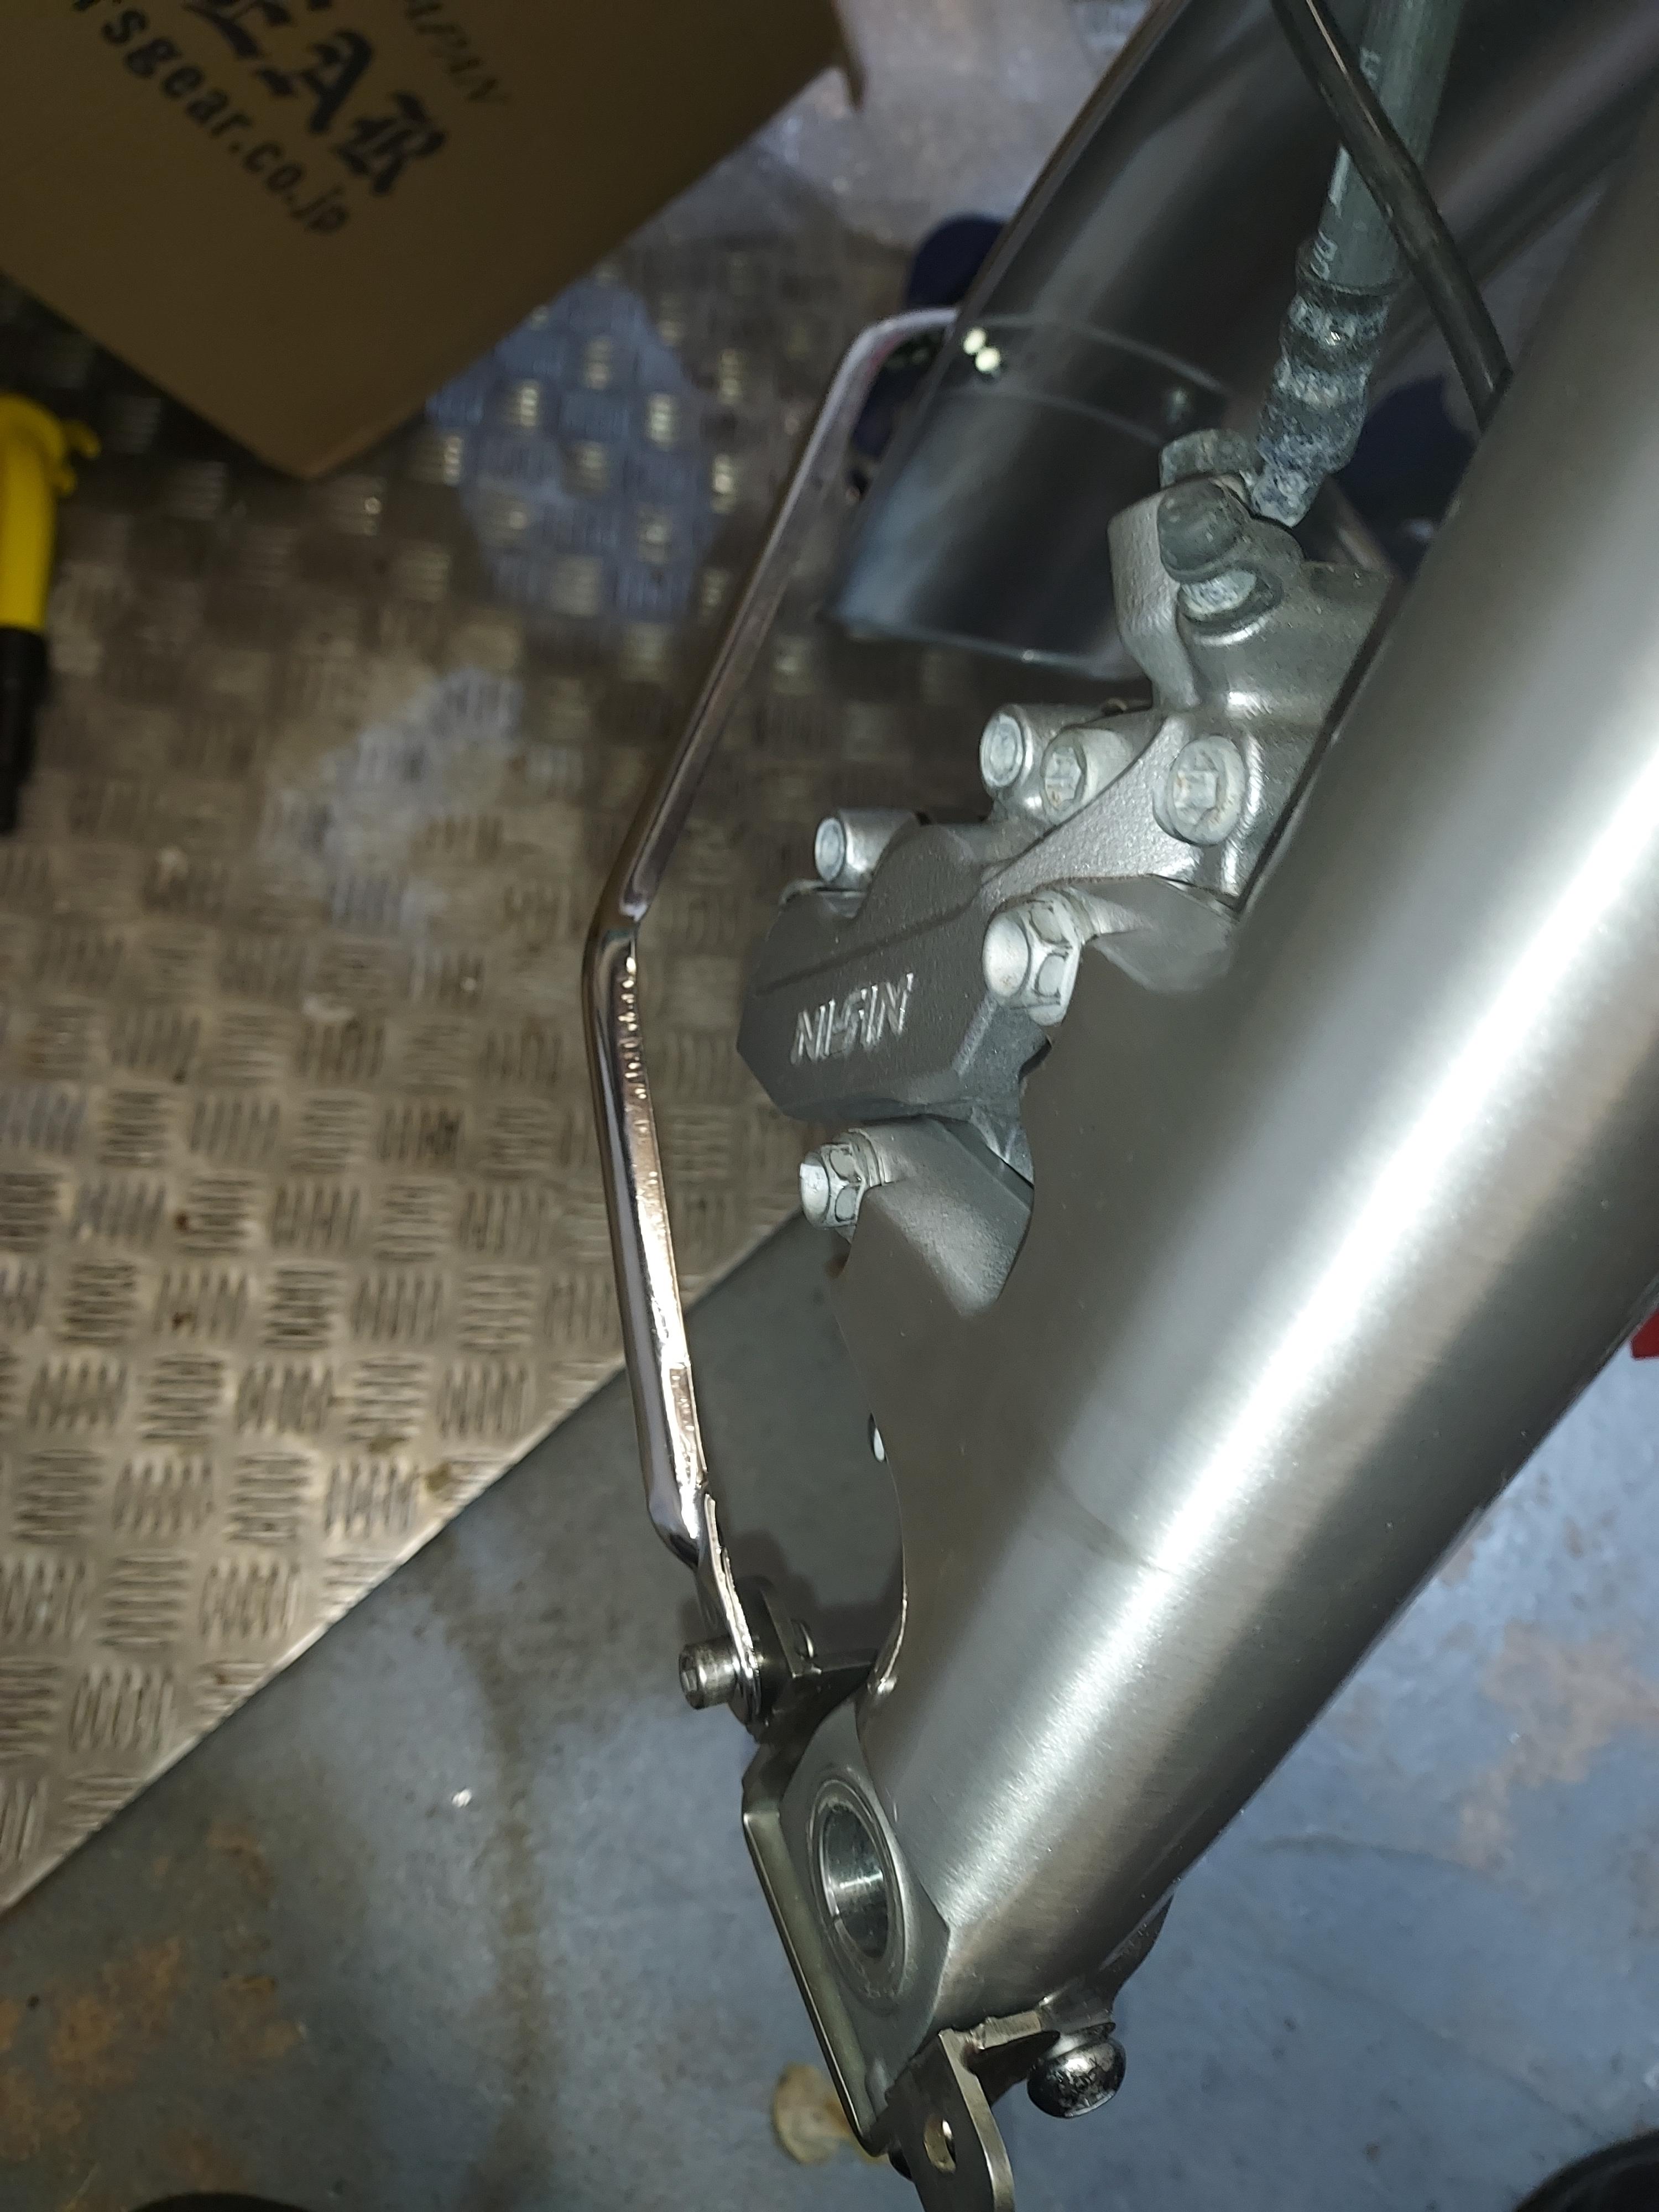
Then, put the stay in a vice and, using a tube to bend it round, slowly and gently straighten the stay so that the tips are "about" 25cm apart (I stopped when they were 26cm - half a centimeter "spring" each side, I felt was acceptable).
They now clear the brake calipers on each side.

43e0ec5ebfb0c2b97437999a92ab0af5.jpg


1065f65e6fe9aac27a379c510e563a66.jpg


6d2682dfe910a6e2608c49817475c528.jpg


Loosely bolt the stays onto the Special Brackets on the bottom of the forks - Note: these Special Brackets have to be made specially (they are supplied if you buy the Whitehouse front mudguard... at £430 ($560), whereas this genuine Honda mudguard is just £190 ($210) plus the bracket cost!).   I will supply dimensions below.  Any engineering shop could manufacture these if you are not able to do so yourself.  This is with many, many thanks to, and courtesy of, Ninemeister, on this Forum. 

58251e3937cbb60a6446614e8bb89b92.jpg


f8fee8ab7fb7a282d867d0f48752fef2.jpg


0c1f63a33545a6a596204eda37a7e316.jpg


90b1da62911eeb47be41d346c1a35179.jpg


Line up the entire m/guard squarely in the forks, and temporarily clamp in position.  Refit the wheel, temporarily if necessary, to get the final position of the m/guard "just right".  Mark where securing holes need to be drilled.  It may be that only two bolts can be used, one on each side.  This is the case with my m/guard because the existing mounting bracket is so small.  This should not create a problem, provided the bolts are fitted securely.  Fabricating a completely new bracket is possible, of course, but I don't consider it necessary.

I used G-cramps to hold the m/guard in position while measuring.  I needed to straighten and then bend again, the central bracket, using my vice.

e825e0df487025b5e1592db665d18ab9.jpg


4f9f30f50b8c6b812829d9fa911ce2a9.jpg


Positioning of the new bolt holes is CRITICAL, and can affect the appearance of the entire m/guard, so be careful.

I am also concerned that removal of some of the bracing of the forks via the m/guard bracket (just two bolts instead of four securing the m/guard) 'may' affect handling.  Again, experience will tell me if an additional arch of bracing, under the m/guard, between the forks, will be necessary.

Finally, cut off the excess of the central brackets (if you consider necessary), dress down the sharp edges, undercoat,  paint, and fit back on the 'bike. 

Step back and admire!

I'll post a picture when it's all painted and fitted.
 
Bazbro, I will likely never do this, but I must tell you I sure enjoy your write-up and photos of this project. Thank you.
 
Thread starter
Thanks, GO and Nacho'. I'm glad this is appreciated.

I've said elswhere that I'm really doing these "How To's" for those who would LIKE to 'fettle' or service their 'bikes but are nervous about it. I hope these Posts will give guys the encouragement to 'have a go'. The only BIG caution I would give is to 'know your limitations'.
 
Lol when it comes to wrenching my limitations are quite high. You folks that can take things apart and put them back together again amaze and impress me.
 
The ferret_imp said:
Lol when it comes to wrenching my limitations are quite high. You folks that can take things apart and put them back together again amaze and impress me.
(+1)

" ... dang. ... I dropped a set screw into the engine block ... "


" ... again. "
 
Thread starter
GoldOxide_imp said:
The ferret_imp said:
Lol when it comes to wrenching my limitations are quite high. You folks that can take things apart and put them back together again amaze and impress me.
(+1)

" ... dang. ... I dropped a set screw into the engine block ... "


" ... again. "
(+1)

" ... dang. ... I dropped a set screw into the engine block ... "


" ... again. "

:D :D :D. :thumbsup:

We've all been there... :(
GoldOxide_imp said:
The ferret_imp said:
Lol when it comes to wrenching my limitations are quite high. You folks that can take things apart and put them back together again amaze and impress me.
(+1)

" ... dang. ... I dropped a set screw into the engine block ... "


" ... again. "
(+1)

" ... dang. ... I dropped a set screw into the engine block ... "


" ... again. "

My best one was after I changed the clutch on my Range Rover. Last job, topping up the oil via a small dipstick hole, I squeezed the bottle a bit too hard and the nylon nozzle shot off the end of the bottle and disappeared down the hole into the gearbox innards! I was distraught!!

I noticed on a cutaway drawing in the Workshop Manual, a cast-in rib, with a small inspection plate almost next to it. I hoped and prayed...

Yup! After undoing the plate, I could JUST get a couple of fingers in and around the bit of tibe, and everso g-e-n-t-l-y eased it out...

"Home mechanics"... you've gotta love it! :D
 
Bazbro_imp said:
GoldOxide_imp said:
The ferret_imp said:
Lol when it comes to wrenching my limitations are quite high. You folks that can take things apart and put them back together again amaze and impress me.
(+1)

" ... dang. ... I dropped a set screw into the engine block ... "


" ... again. "
(+1)

" ... dang. ... I dropped a set screw into the engine block ... "


" ... again. "

:D :D :D. :thumbsup:

We've all been there... :(
GoldOxide_imp said:
The ferret_imp said:
Lol when it comes to wrenching my limitations are quite high. You folks that can take things apart and put them back together again amaze and impress me.
(+1)

" ... dang. ... I dropped a set screw into the engine block ... "


" ... again. "
(+1)

" ... dang. ... I dropped a set screw into the engine block ... "


" ... again. "

My best one was after I changed the clutch on my Range Rover. Last job, topping up the oil via a small dipstick hole, I squeezed the bottle a bit too hard and the nylon nozzle shot off the end of the bottle and disappeared down the hole into the gearbox innards! I was distraught!!

I noticed on a cutaway drawing in the Workshop Manual, a cast-in rib, with a small inspection plate almost next to it. I hoped and prayed...

Yup! After undoing the plate, I could JUST get a couple of fingers in and around the bit of tibe, and everso g-e-n-t-l-y eased it out...

"Home mechanics"... you've gotta love it! :D


Well- a shop mech would have put the fill cap on and went on to start the next job.

Not that you probably would have ever had an issue or noticed either way- but do NOT ever confuse paying a shop, even a 'factory service' to put the same care, attention to detail or time that someone would on their own product.
 
Thread starter
PowerDubs_imp said:
Bazbro_imp said:
GoldOxide_imp said:
The ferret_imp said:
Lol when it comes to wrenching my limitations are quite high. You folks that can take things apart and put them back together again amaze and impress me.
(+1)

" ... dang. ... I dropped a set screw into the engine block ... "


" ... again. "
(+1)

" ... dang. ... I dropped a set screw into the engine block ... "


" ... again. "

:D :D :D. :thumbsup:

We've all been there... :(
GoldOxide_imp said:
The ferret_imp said:
Lol when it comes to wrenching my limitations are quite high. You folks that can take things apart and put them back together again amaze and impress me.
(+1)

" ... dang. ... I dropped a set screw into the engine block ... "


" ... again. "
(+1)

" ... dang. ... I dropped a set screw into the engine block ... "


" ... again. "

My best one was after I changed the clutch on my Range Rover. Last job, topping up the oil via a small dipstick hole, I squeezed the bottle a bit too hard and the nylon nozzle shot off the end of the bottle and disappeared down the hole into the gearbox innards! I was distraught!!

I noticed on a cutaway drawing in the Workshop Manual, a cast-in rib, with a small inspection plate almost next to it. I hoped and prayed...

Yup! After undoing the plate, I could JUST get a couple of fingers in and around the bit of tibe, and everso g-e-n-t-l-y eased it out...

"Home mechanics"... you've gotta love it! :D


Well- a shop mech would have put the fill cap on and went on to start the next job.

Not that you probably would have ever had an issue or noticed either way- but do NOT ever confuse paying a shop, even a 'factory service' to put the same care, attention to detail or time that someone would on their own product.


Well- a shop mech would have put the fill cap on and went on to start the next job.

Not that you probably would have ever had an issue or noticed either way- but do NOT ever confuse paying a shop, even a 'factory service' to put the same care, attention to detail or time that someone would on their own product.

Yes, spot on, I'm afraid, Dubs. The number of horror stories regarding 'sharp practices' in garages is legend. :-/
 
Thread starter
The final fit of the modified CB750 front mudguard...

The excess of the brackets were cut off, buffed and shaped.  I decided to paint the brackets because of this scarring of the chrome.  But... silver or black paint??

The first coat of red oxide primer, ensuring that it gets into all the nooks and crannies where the brackets attach to the mudguard and where rust would otherwise form...

1397a3dcfebd77cec5625066b9096328.jpg


c7e3209be9bec1b98968ab71fb7933ac.jpg


I decided,  while I was about it, to paint all the seams round the edge, underneath the m/guard, to properly rust proof it.  By not bothering to mask all of the underside, overspray will get all over the underneath of the m/guard, but I'm not worried about appearance - it's those cracks and seams where rust starts, that I need to cover and protect with paint.

600ddb54e2465173f2aec095c9c84b28.jpg


Don't forget the cable guide that was cut off the strut... that needs the red oxide rust preventer, followed by a topcoat too.

f110f41acedab64c6a2cfe0cbab4683d.jpg


Silver it is!  I have some 'Truck Bed Liner' spray, but that's a bit over-the-top, I think.  So a couple of passes of spray silver it is, maybe followed by a couple of coats of clear matte lacquer to make the brackets look nice.

0a86b72f9208a49abcd15e64c2bd7ab5.jpg


The finished job...

add17b7fd06ab88ab739fcd3811d1387.jpg
 
Bazbro_imp said:
The final fit of the modified CB750 front mudguard...

The excess of the brackets were cut off, buffed and shaped.  I decided to paint the brackets because of this scarring of the chrome.  But... silver or black paint??

The first coat of red oxide primer, ensuring that it gets into all the nooks and crannies where the brackets attach to the mudguard and where rust would otherwise form...

1397a3dcfebd77cec5625066b9096328.jpg


c7e3209be9bec1b98968ab71fb7933ac.jpg


I decided,  while I was about it, to paint all the seams round the edge, underneath the m/guard, to properly rust proof it.  By not bothering to mask all of the underside, overspray will get all over the underneath of the m/guard, but I'm not worried about appearance - it's those cracks and seams where rust starts, that I need to cover and protect with paint.

600ddb54e2465173f2aec095c9c84b28.jpg


Don't forget the cable guide that was cut off the strut... that needs the red oxide rust preventer, followed by a topcoat too.

f110f41acedab64c6a2cfe0cbab4683d.jpg


Silver it is!  I have some 'Truck Bed Liner' spray, but that's a bit over-the-top, I think.  So a couple of passes of spray silver it is, maybe followed by a couple of coats of clear matte lacquer to make the brackets look nice.

0a86b72f9208a49abcd15e64c2bd7ab5.jpg


The finished job...

add17b7fd06ab88ab739fcd3811d1387.jpg
Very nice. Silver or black - hard choice, but really, either would be great and the finish looks very professional.
 
Thread starter
Fitting Wyvern 4-into-4 exhausts/silencers, Part 2...

You'll remember that I had to pause fitting the middle two silencers because my jack was in the way.  I had to wait until I could refit the front wheel/mudguard (fender) and lower the front wheel to the ground, before I could remove the jack and finish the exhausts.
So.... here we go on Part 2.
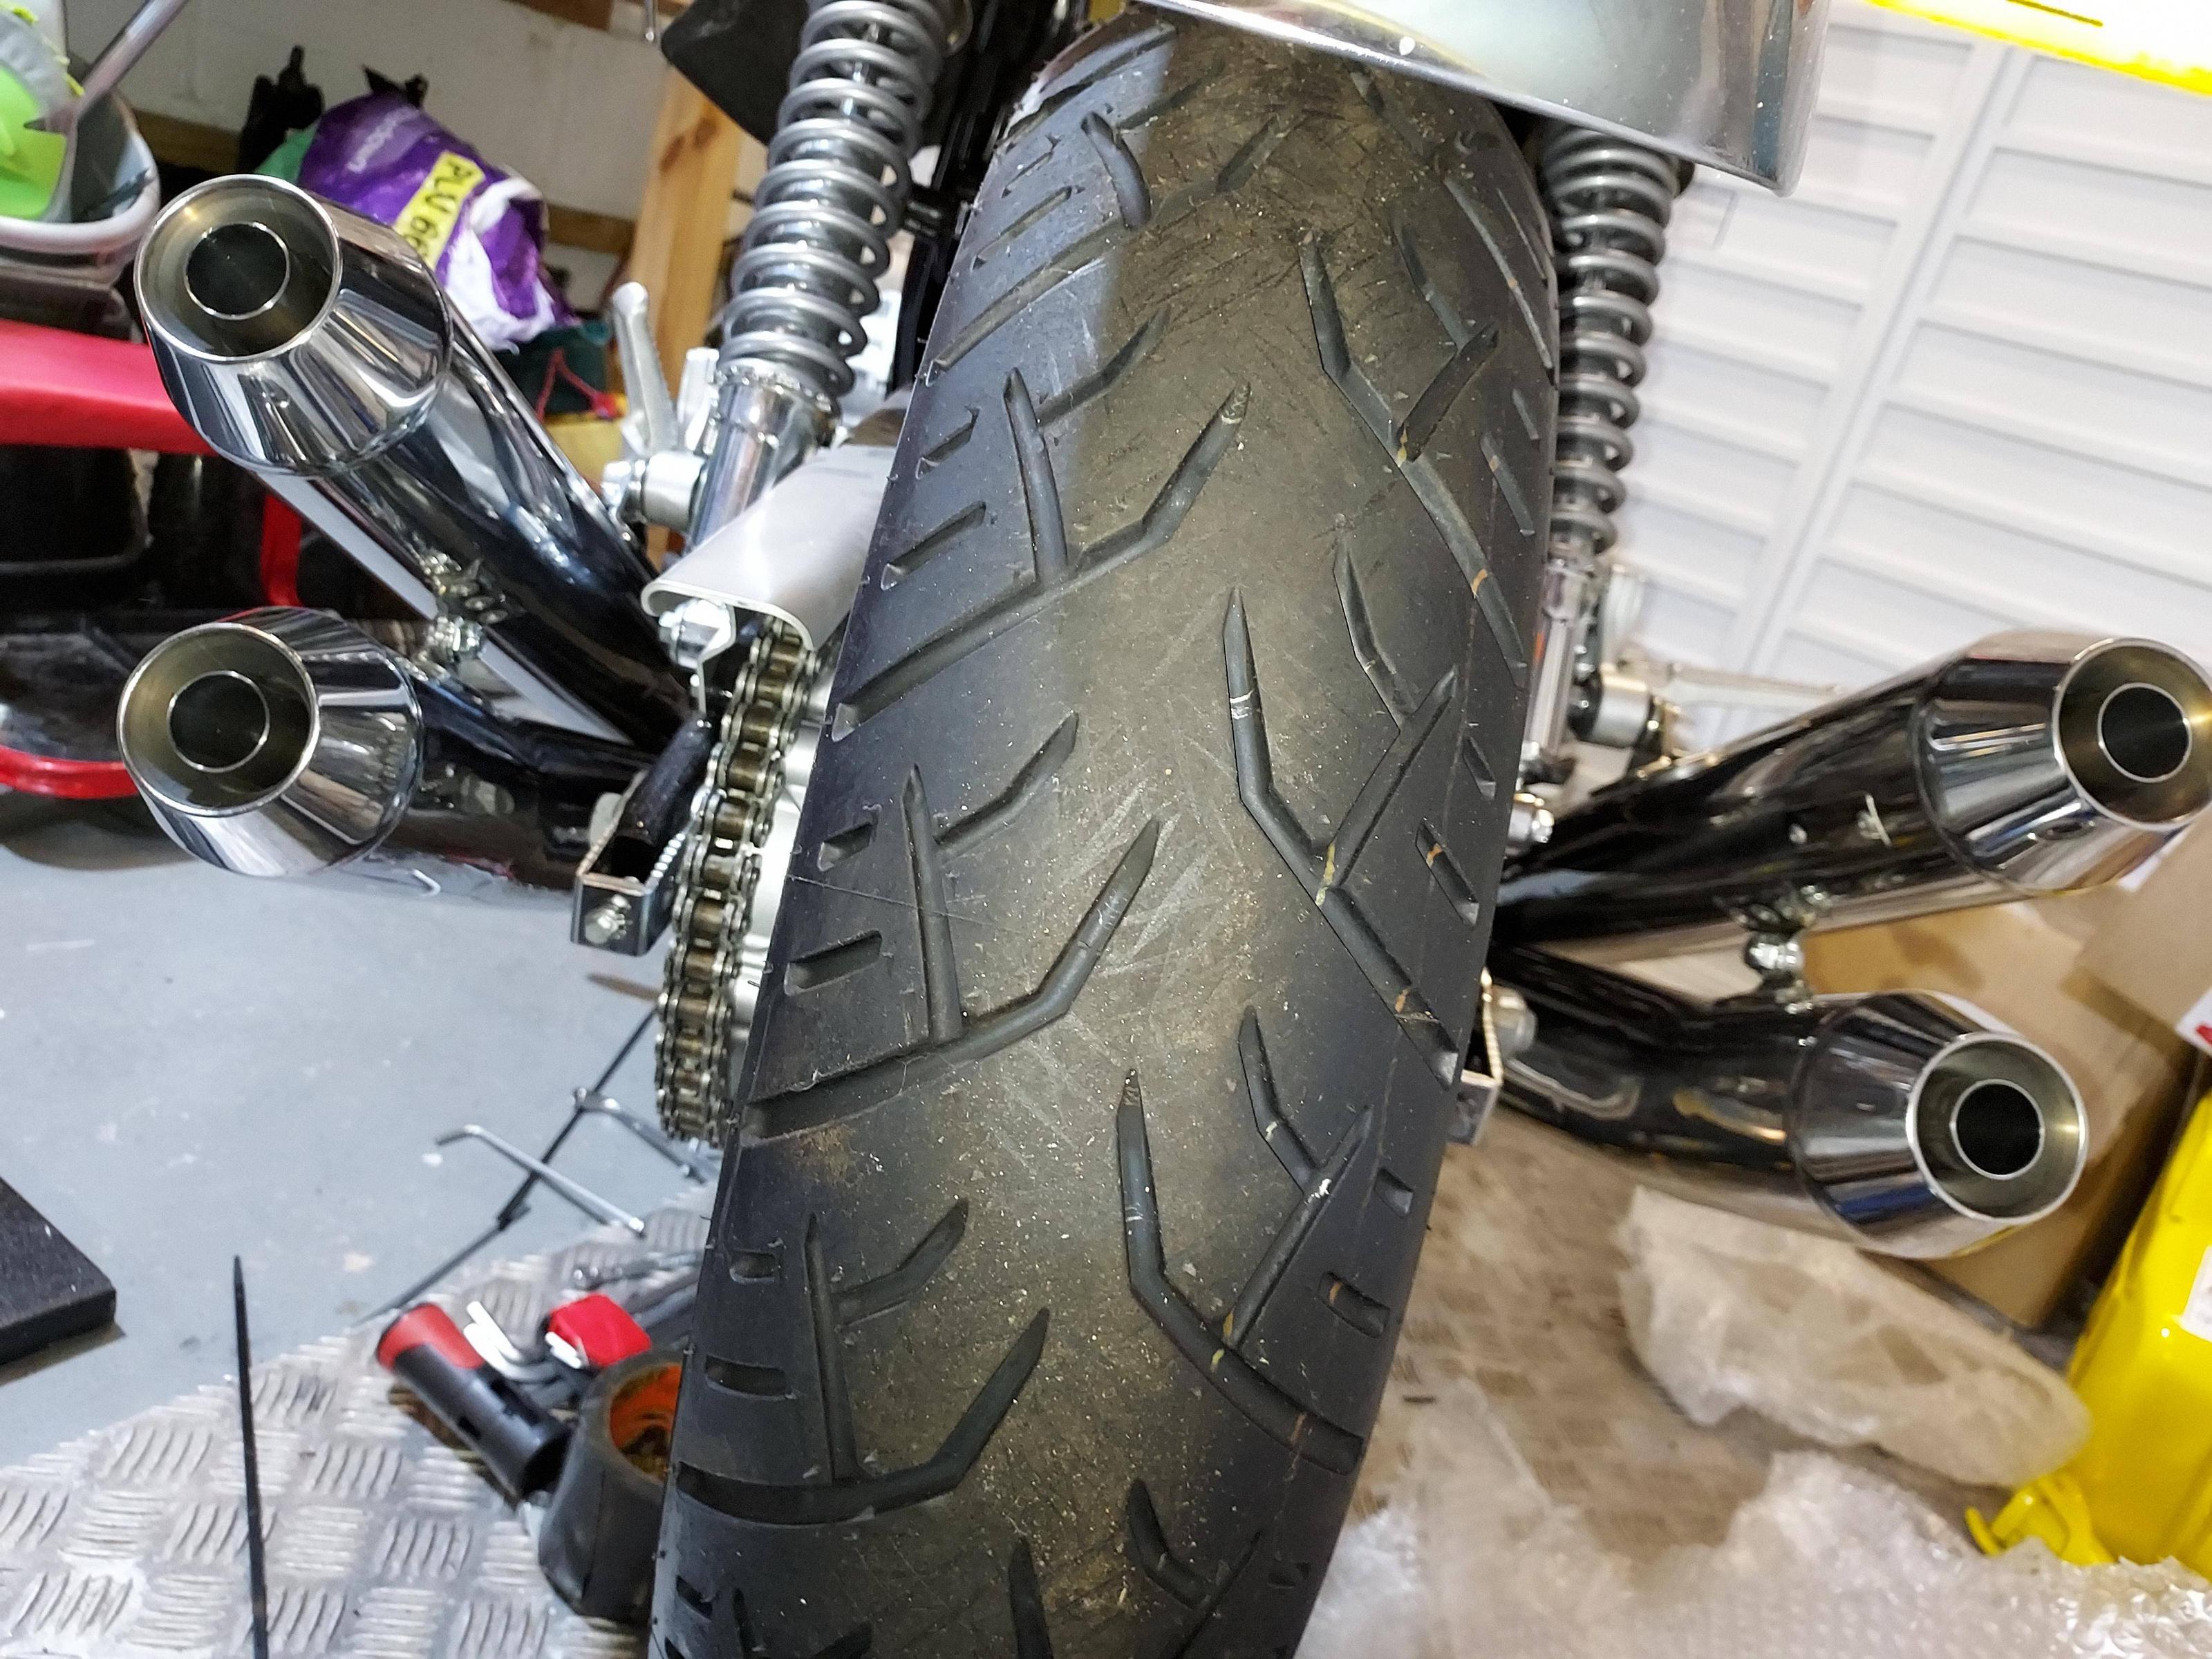
Before fitting the 'H'-section joining the middle two exhausts, I needed to safely route the O2 Sensor's cables.  The right-hand one is OK, but the left-hand cable runs dangerously close to, and could be snagged by, the rear drive chain.
I cable-tied the two cables together as far as possible,  then secured them to the main stand spring  hook on the frame, now unused ('3' in the pic).  Other cable-ties were added, especially where the cable needed to be guided near the centre line of the 'bike ('2' in the pic) and then as it went into the cavity occupied by the chain ('1' in the pic).
Cable-tied Gaffer tape was added where the cable passed any sharp edges.

e47c3b37a414e83af52b34c1cc7c6a5a.jpg


039d55ea3ec2e8d0ea97092eb5e626a4.jpg


With foresight, this could have been done better maybe, with shrinkwrap tube or stout rubber tubing.  This is satisfactorily, though.

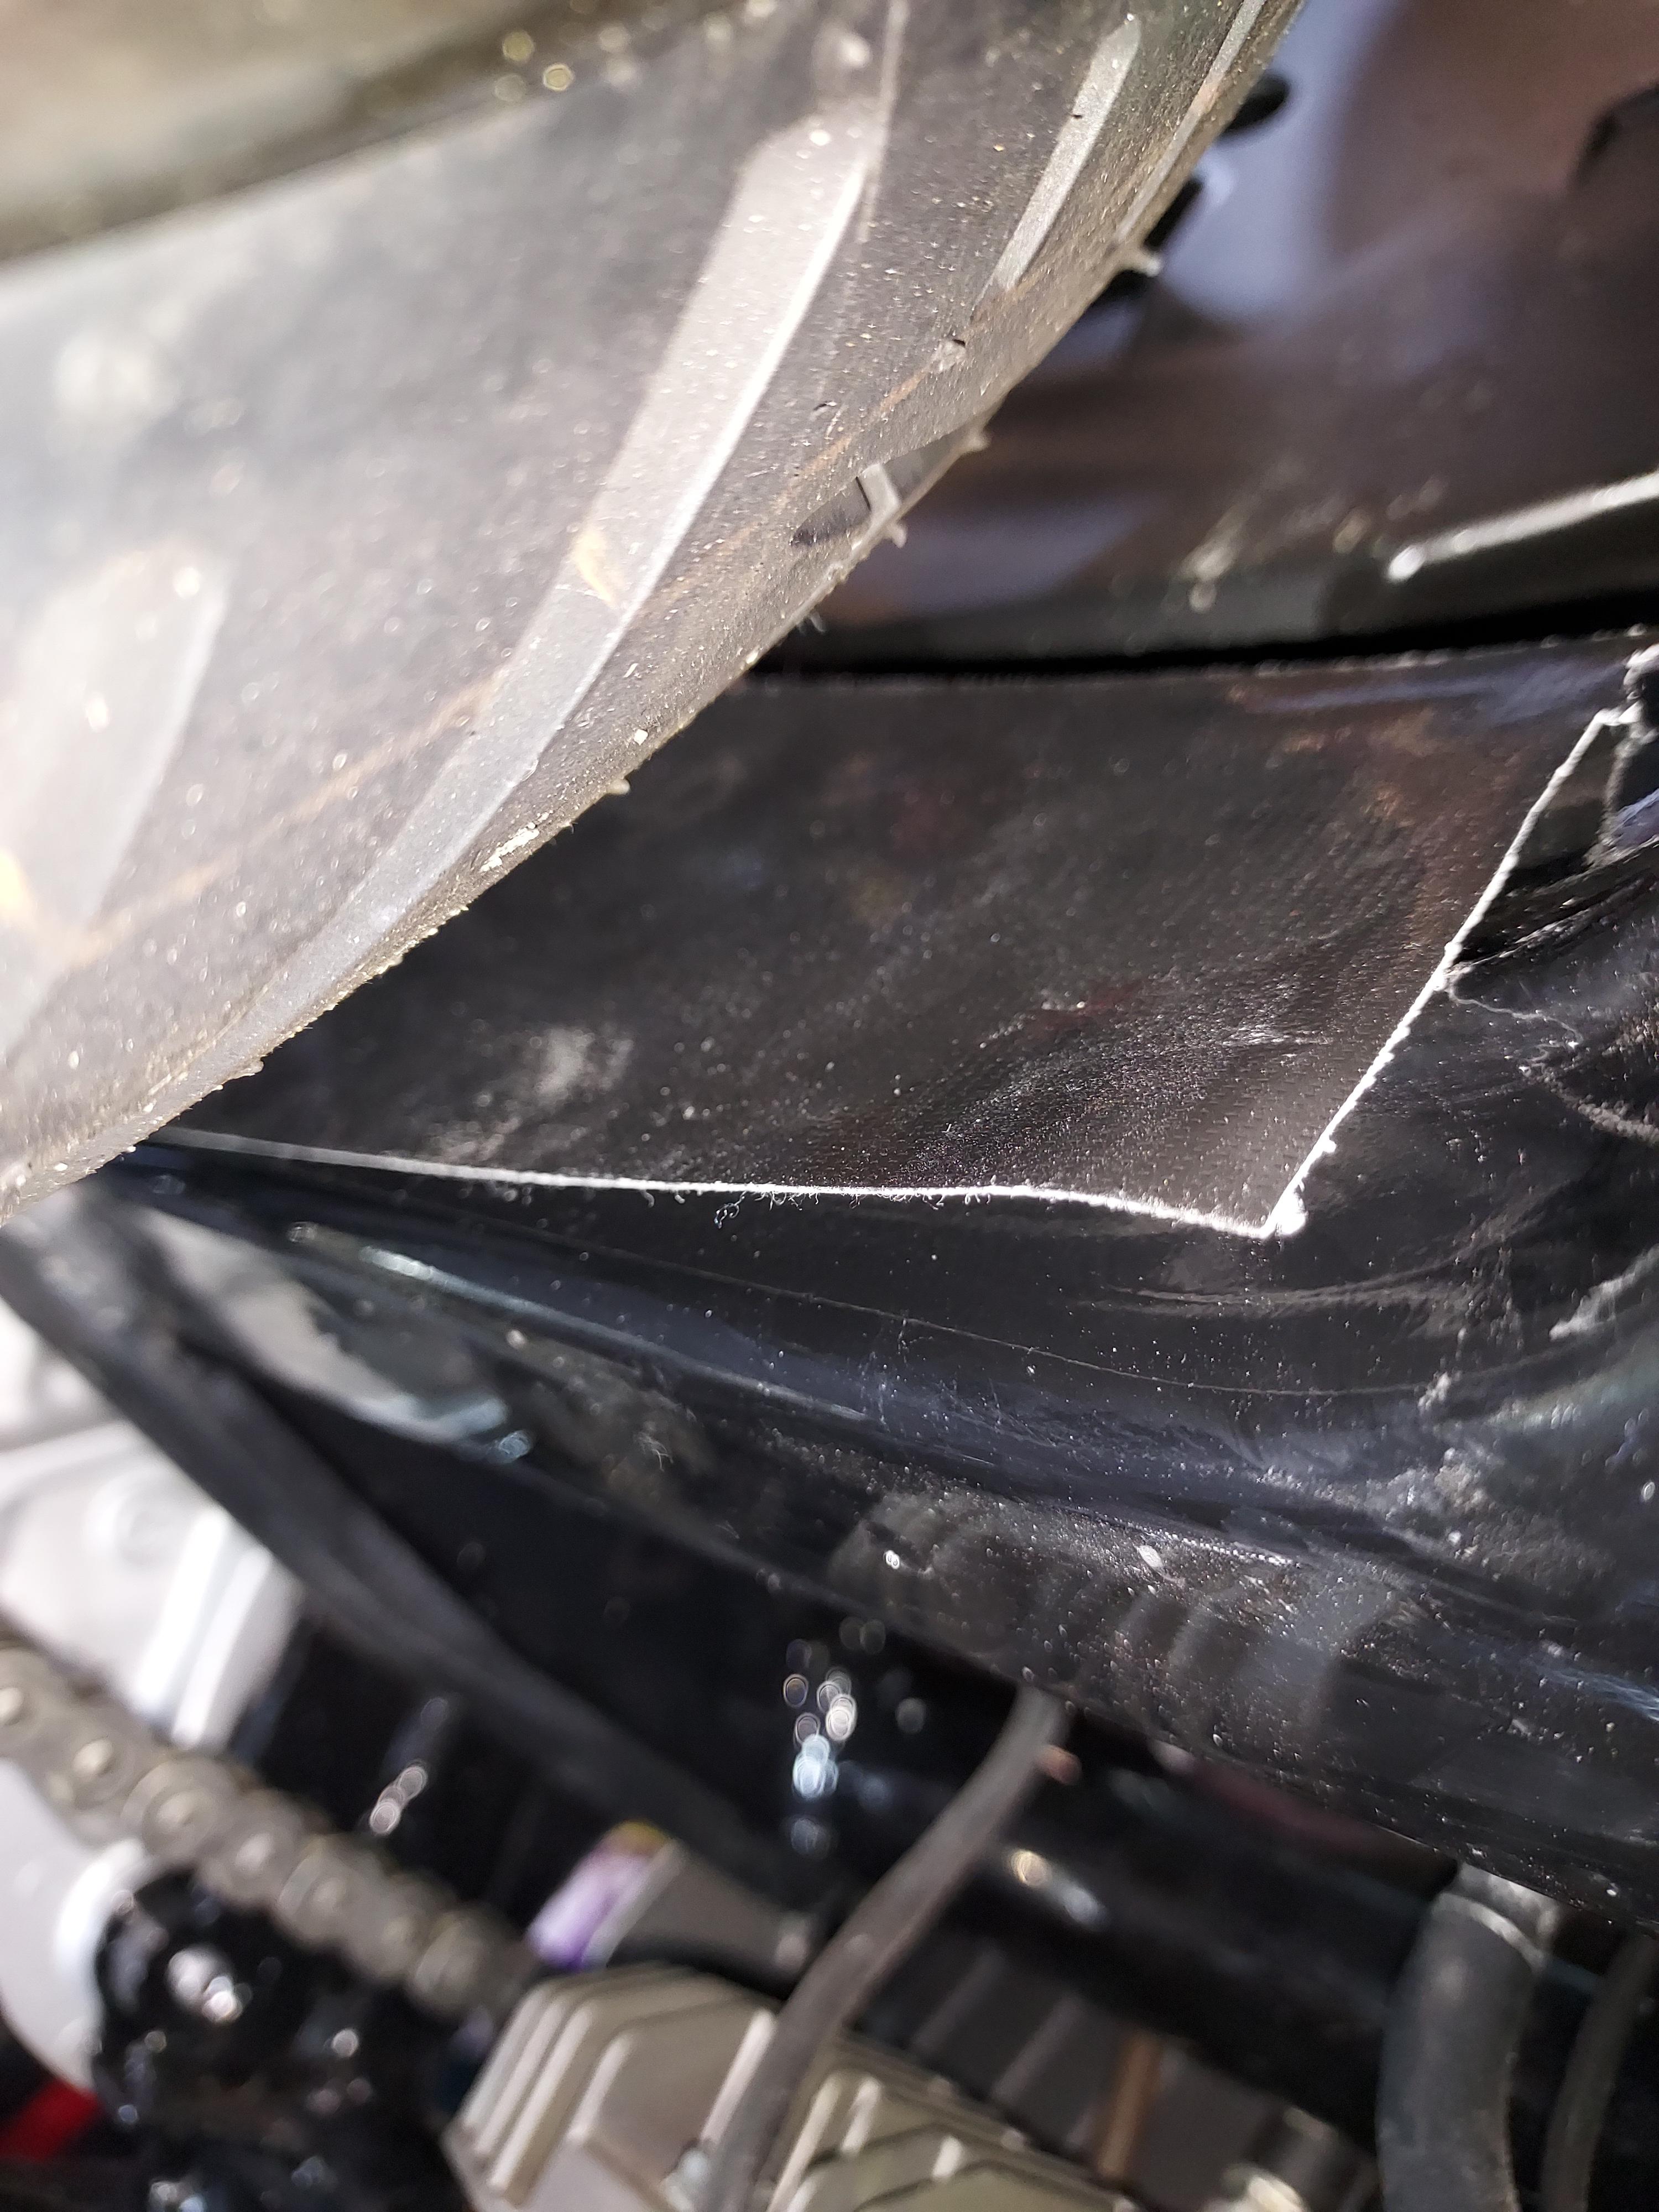
While under the 'bike, and before the exhausts were fitted, I put tape on the swing arm bearing, to prevent stone damage and subsequent corrosion - a great idea by Max on this Forum.  Thanks Max!  

833262420ea8e91e607e840262719be5.jpg


The kit comes with a small 'adapter plate' that, when adjusted properly, keeps the sidestand from hitting the exhaust.  Neat!

df2af315c6d13e0e314b3ab541690757.jpg


The 'H'-section middle exhaust joiner was tightened (socket bolts and 10mm nuts) and the inner silencers fitted and bolted up.

a180dcd1515846d40635c90bb6a2f940.jpg


Leftside done...

bff1dea26c2b553ff0cab26d8ad675fc.jpg


The right side...

71e394f5a71cd302cfe8c6989c7168be.jpg


And both sides!

c7be55748041ee4bd713a4c92c2fa21d.jpg


That's enough for today.  Tidying up tomorrow; finishing off small bits I've left, checking tightness of all fasteners I may have touche and so on.  And then... starting on the tank (fitting fuel pump and filler cap, etc).
Thanks for the kind comments, guys - they're all appreciated. :thumbsup:

Yup, GO... I envy the guys that live in a climate where the dreaded "rust" isn't an issue! ;)
 
Very nice job!! Looks great!
 
Looking good Bazbro. That looked to be quite the job to me
 
Back
Top