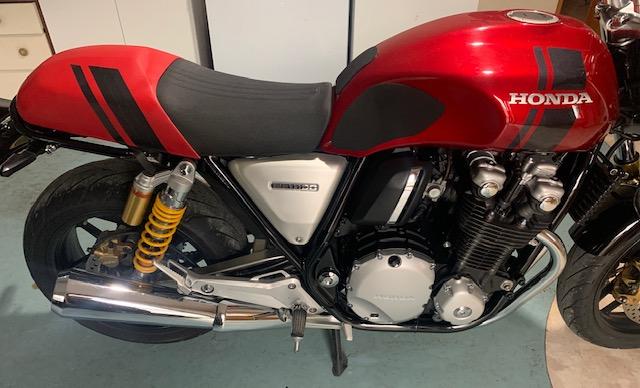
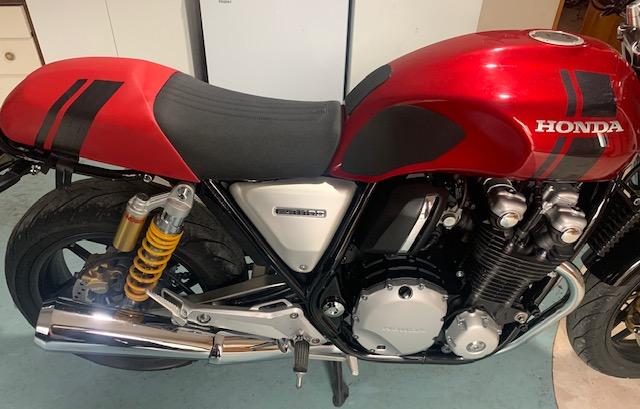
Seat cowl

treedoc_imp

Running like a top
Thread starter
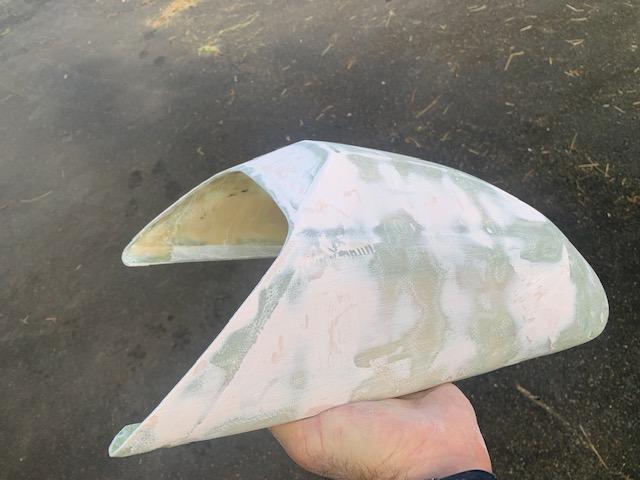
Hi all, I have been looking at the bless r seat cowl recently, but I am too cheap to spend $500+ and too impatient to wait 3 months, so I thought I would have a crack at making one.

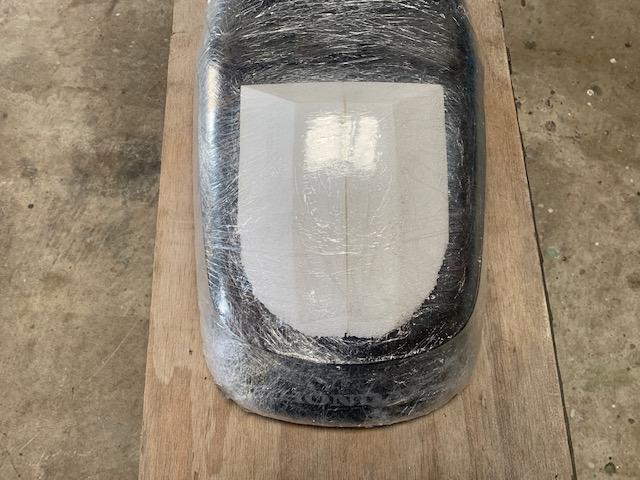
I have never done any fibreglassing before and I had a failed attempt at making a mold, so I thought I would use the seat for the mold.

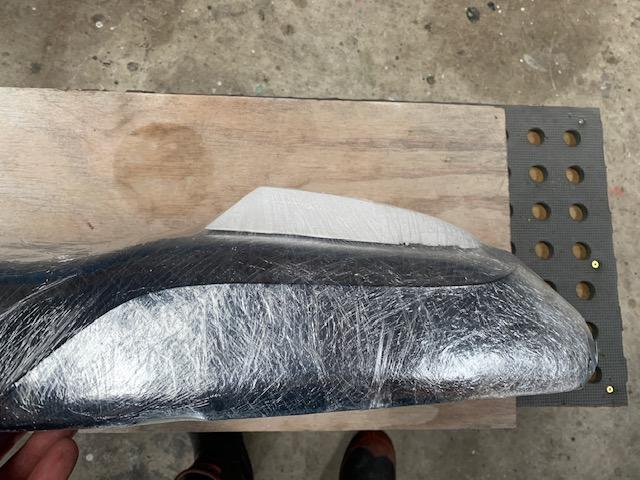
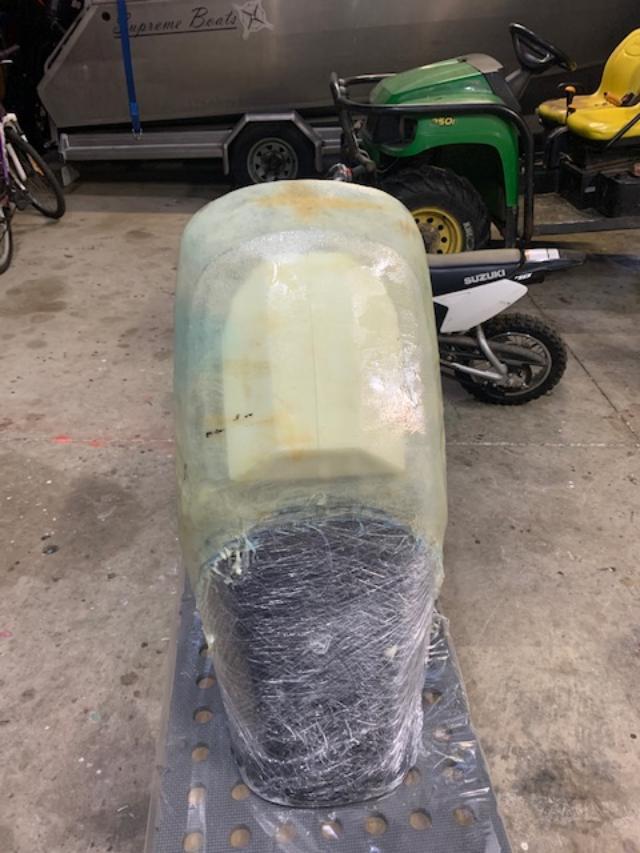
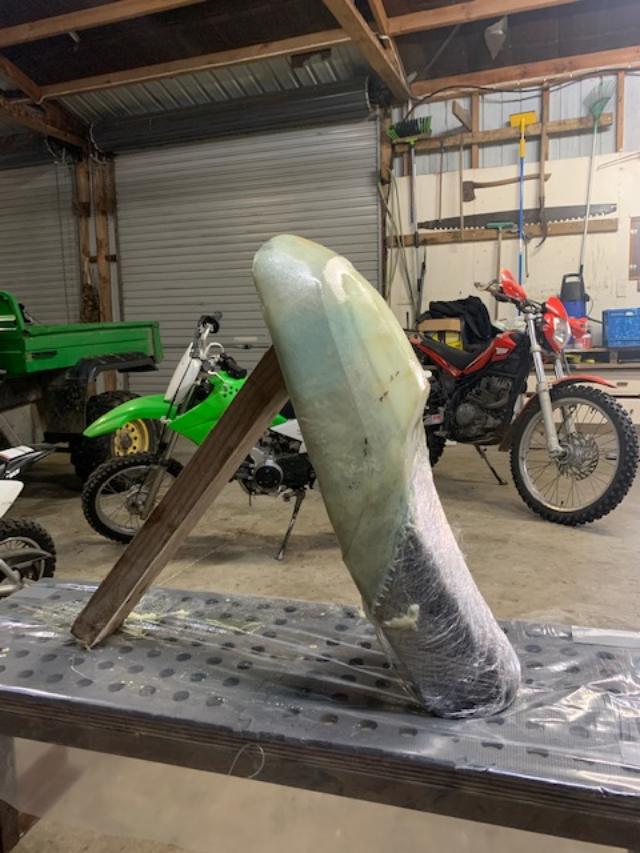
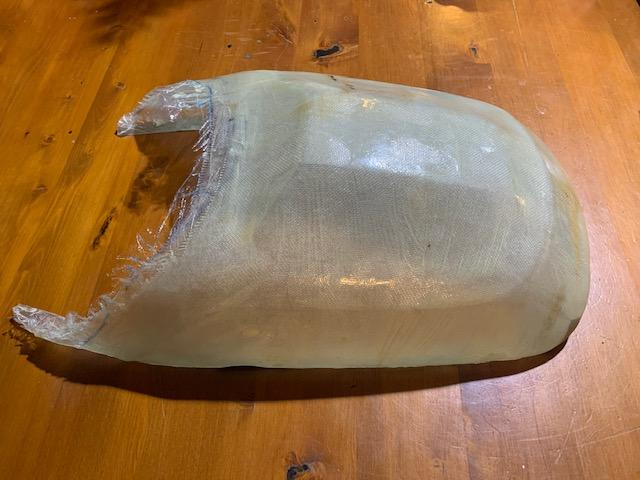
I covered the seat with glad wrap, and glued a couple of pieces of polystyrene together which I shaped to make the hump.

I then glad wrapped the hump to the seat and glassed over it.

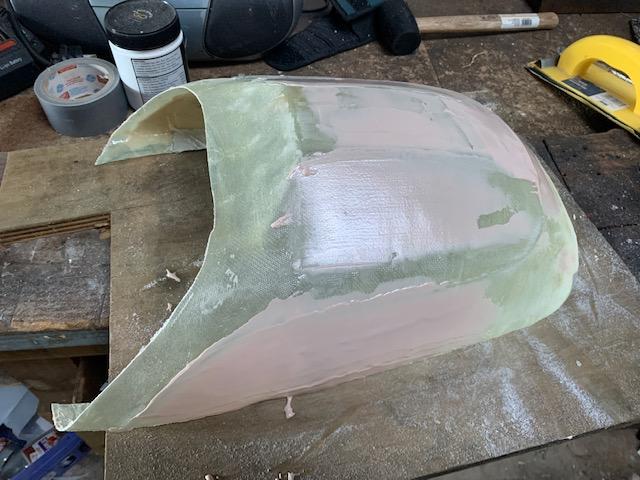
Once it is set, if everything goes to plan I will be able to get it off the seat (fingers crossed), bog the crap out of it and paint it and it will look halfway decent.

Or I might have to cut it off the seat and throw it in the bin :s

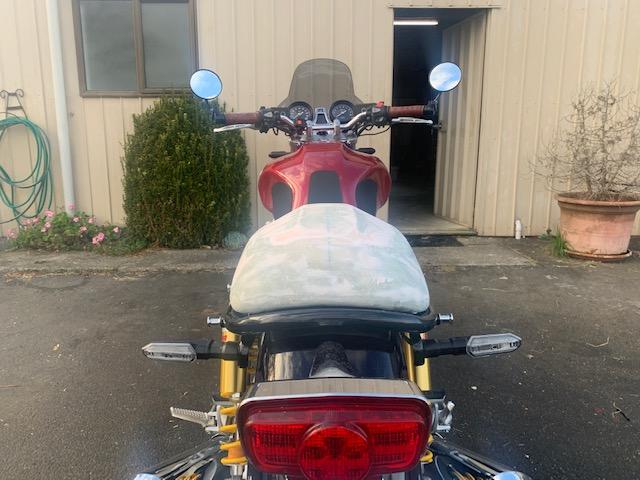
So far it looks better than I had hoped, there is three layers of cloth on it, I am planning on another layer one I get it off the seat, but I have no idea what I am doing and am just making it up as I go. Maybe it will need more layers?

At the end of the day, as long as I don't ruin my seat I will be happy...

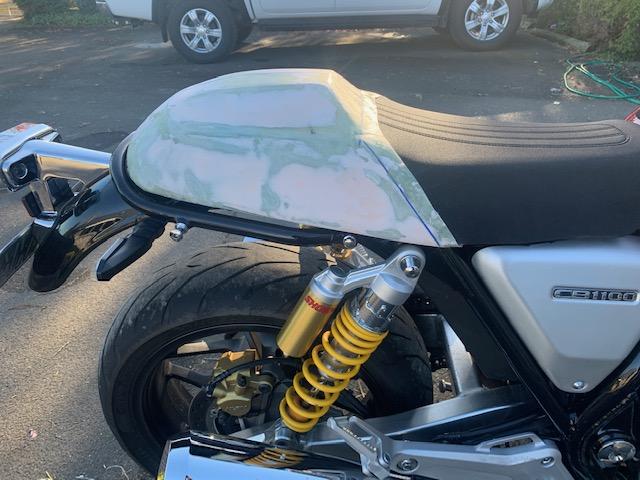
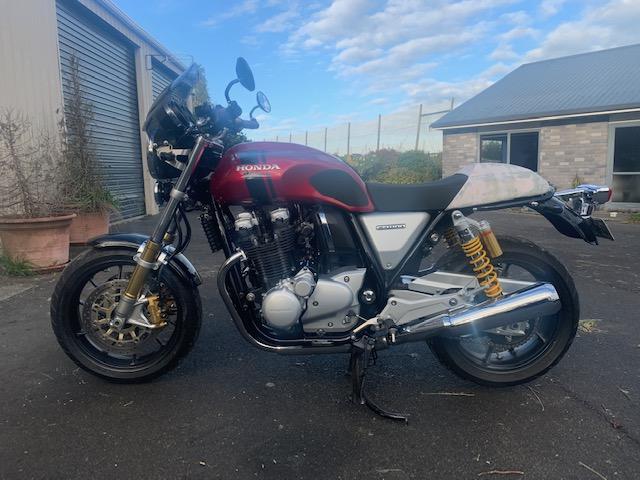
Couple of pics
2c4d39dd1e64f9becf586a6818b585bf.jpg


f6a2806883ea2b8ede94e98972405d70.jpg


08266505f6d3eb3f3ec7e1f8bdb8f275.jpg


acd7059fc38e15268d2e83d384ac0d03.jpg


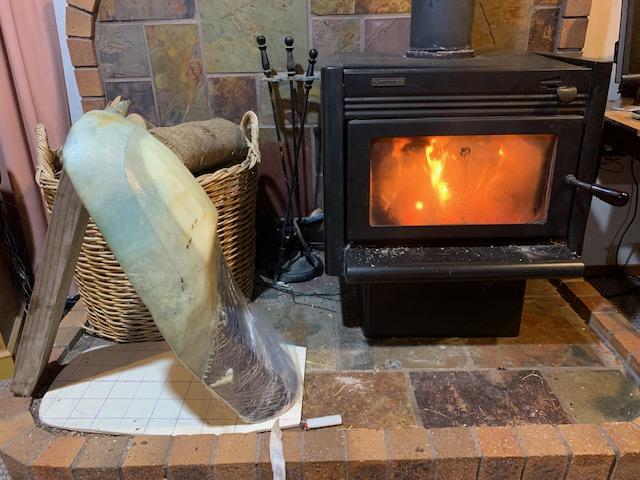
Its now curing by the fire!

91b580e86adb65426806eaf6dad5d73d.jpg


If anyone has any pro tips I'm all ears, cheers.
 
Actually quite like the shape of the cowl, better than my corbin.
It depends what grade of glassmat u are using, 2.5 to 3 mm. should do it and if it breaks it can always be repaired from the inside, from memory it has to be sanded for a good bond after the first layer has cured, there is a waxy finish i think that prevents a good bond, it has been a while since i have done this but that's what i remember.
Have you considered covering with vinyl or leather?

Love the kent, it has 40 kilowatts equivalent heat output and it does work a treat with the right mix of wood, very well implemented design, comfortably heats an entire house and smoulders overnight, just watch for a flue fire, if that happens just open the door and it will cool the flue and stop the ( sometimes roaring ) fire.

Just bought a set of T32 bridgestones, they are a little hard to get in 18 inch so i got some spares now.
 
Thread starter
Cheers Max, I will swap you for the Corbin :D

Thanks for the tip on sanding between layers. I just pulled the seat and everything is looking good so far, it needs a couple more layers of mat before I take to it with the bog.

29a7d59f646f8a506bc81462244cbc0f.jpg


I hadn't considered leather or vinyl, I saw a red RS with a red cowl on Facebook and liked the look, so that's what I had in mind.

Good news on the new hoops :thumbsup:
 
Looking at the way it comes off the seat it could be worth having a look at wrapping a layer of shrink wrap ( the kind they use on building scaffolding and superyachts ) or even automotive wrap in the right color with a heat gun over the final layer to provide a glossy finish, i would try the concept first to see if it works before messing with the wet epoxy.
 
way cool project treedoc. Does bog mean to sand?
 
Many years ago I used to be a laminator making the fibre glass parts for fairground equipment and the giant multi lane slides.
Making a part from scratch we made a wooden pattern first then made a mould from that or by far the easiest way for you would be to buy a corbin cowl and make a mould from that and then make them to order.
The general method usually used is to polish the mould as shiny as possible, paint with a release agent, two layers of colour gel coat which is the final smooth shiny finish, Then start adding the glass, one layer of 1 oz mat (add a little gel to the resin so its the same colour as the finish) then two seperate layers of 2 oz mat. Letting it cure in between stages, it should go off in around 30 mins just after you finish stippling and rollering.
Lift the item from the mould, trim the edges and wash off the release agent to reveal a finish as shiny as the mould was.
 
Thread starter
Progress update, I am really happy with how things are going so far.

I filled a couple of bits and then sorted out the lines I wanted, and cut it down to closer to the final size.

2680e99bc1a02acf0c88c5639fdc4ec6.jpg


72a75c200a032f6ef6d9885598d8471f.jpg


5fd2441cf0df16e120d37ec7432976c6.jpg


Then I put three more layers of glass on. I displayed my ignorance by purchasing chopped fibre mat, which is supposed to be used with polyester resin (I am using epoxy resin).
So I couldn't use the mat and had to use scraps of the glass cloth I had left over.

So instead of laying the final 2 layers in one piece I used multiple odd shaped pieces, which meant the shape suffered a little, although nothing that cant be sanded out, it just made a bit more work.

246c0a411e3d99743630639f53543dc5.jpg


It is nice and sturdy, I dont think there is much risk it will break.

Mixagon I appreciate your advice, I saw videos of your method, which looked good and I tried to make a mold, but my mold wasn't accurate enough, and if it doesn't look good I wouldn't put it on the bike.

Also as you can see above it has a shape that would be hard to get out of a mold, it has a lip that folds under the seat to hold it down.
It slides on from the rear of the seat and it will be attached to the bolts that hold the strap under the seat to stop it sliding back.

ae2b1da8d28be2578c266ad998952f10.jpg


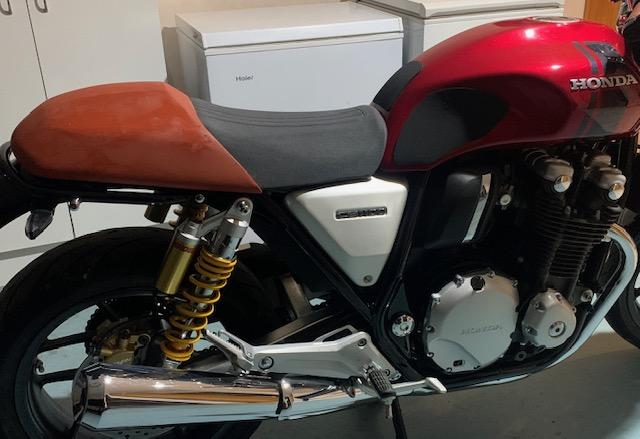
I like the way the shape of the tank is carried through to the cowl, its a bit hard to see with all the bog but I am really happy with the shape.
 
Thread starter
Cheers GO, I thought afterwards that I might have been a bit eager starting this thread, before I got it off the seat.

It would have been embarrassing if I had to cut it off the seat and throw it in the bin :rofl:
 
Its coming on very well so far and when finished I would suggest making a mould from it so you can make a spare and maybe some for other members.
The way to get around non mould friendly shapes is to make a split mould held together by bolts and fill the join with putty or similar leaving a small indent to leave a seam on the product which can be sanded off.
 
Very nice work. It looks amazingly symmetric!

It looks like you know very well what you are doing, but just in case: sometimes, with the fiberglass you don't see any deffects on the surfaces, and then, when painted and polished, some minor deffects are evident.

To avoid this, it's common with clay models to cover them with metal foil, smooth it out, and check how it reflects light (better if it is a line-pattern light as from a tube lamp: on the reflections you can see changes of curvature etc.)

Easier on CAD than on reality, but the same principle:
http://www.bluesmith.co.uk/LW/theoryBuilders/evaluateZebra.htm
 
Thread starter
Thats a very good idea about making a split mold :thumbsup:

jtopiso you are right about imperfections in the fiberglass, I put on a primer and all the tiny defects stand out. I will try your foil trick, cheers.

c67278d82fe4635765ede174c317621c.jpg


I think I need to smooth out the angles a bit to match the curves of the tank.

I am considering vinyl wrapping it instead of painting, there is a bloke who lives down the road who has a signwriting business so I might see if he has anything that will match the tank colour.
 
treedoc_imp said:
Thats a very good idea about making a split mold :thumbsup:

jtopiso you are right about imperfections in the fiberglass, I put on a primer and all the tiny defects stand out. I will try your foil trick, cheers.

c67278d82fe4635765ede174c317621c.jpg


I think I need to smooth out the angles a bit to match the curves of the tank.

I am considering vinyl wrapping it instead of painting, there is a bloke who lives down the road who has a signwriting business so I might see if he has anything that will match the tank colour.
:thumbsup: Hmm, yeah, what an idea.
 
Great little project. You're right to copy the lines and curves of the tank, it really makes the cowl look an integral part of the design. Will be looking forward to seeing it finish painted.

Triumph Thruxton - eat your heart out!
 
Nice work treedoc.
 
treedoc_imp said:
Thats a very good idea about making a split mold :thumbsup:

jtopiso you are right about imperfections in the fiberglass, I put on a primer and all the tiny defects stand out. I will try your foil trick, cheers.

c67278d82fe4635765ede174c317621c.jpg


I think I need to smooth out the angles a bit to match the curves of the tank.

I am considering vinyl wrapping it instead of painting, there is a bloke who lives down the road who has a signwriting business so I might see if he has anything that will match the tank colour.
This looks awesome!
 
Thread starter
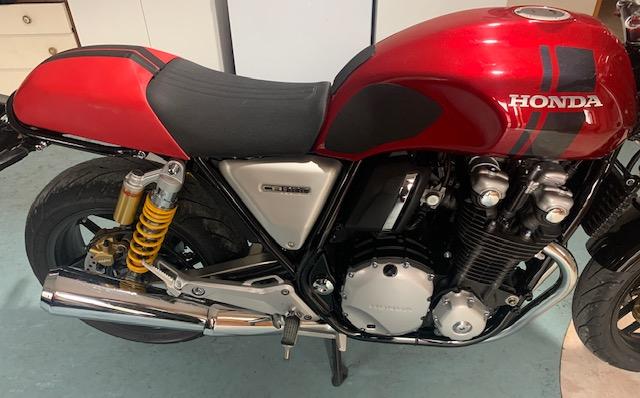
Im pretty much done, I will hopefully get it wrapped this week. Really happy with how it came out, fits perfect and looks good on the bike.

Its only rattle can and electrical tape, but which graphic do you rekon?

Racing stripes

ef31e72a7bd72a929b054c18aa51ff6f.jpg


Match frame/seat angle

7c071f8c4433d8351095e37d3002ed46.jpg


Match tank stripe/shock angle

6b614f09809f0f698b3ca4210dda4385.jpg
 
Back
Top