Swing arm bushing failure

Thread starter
syncronizator_imp said:
egleaves_imp said:
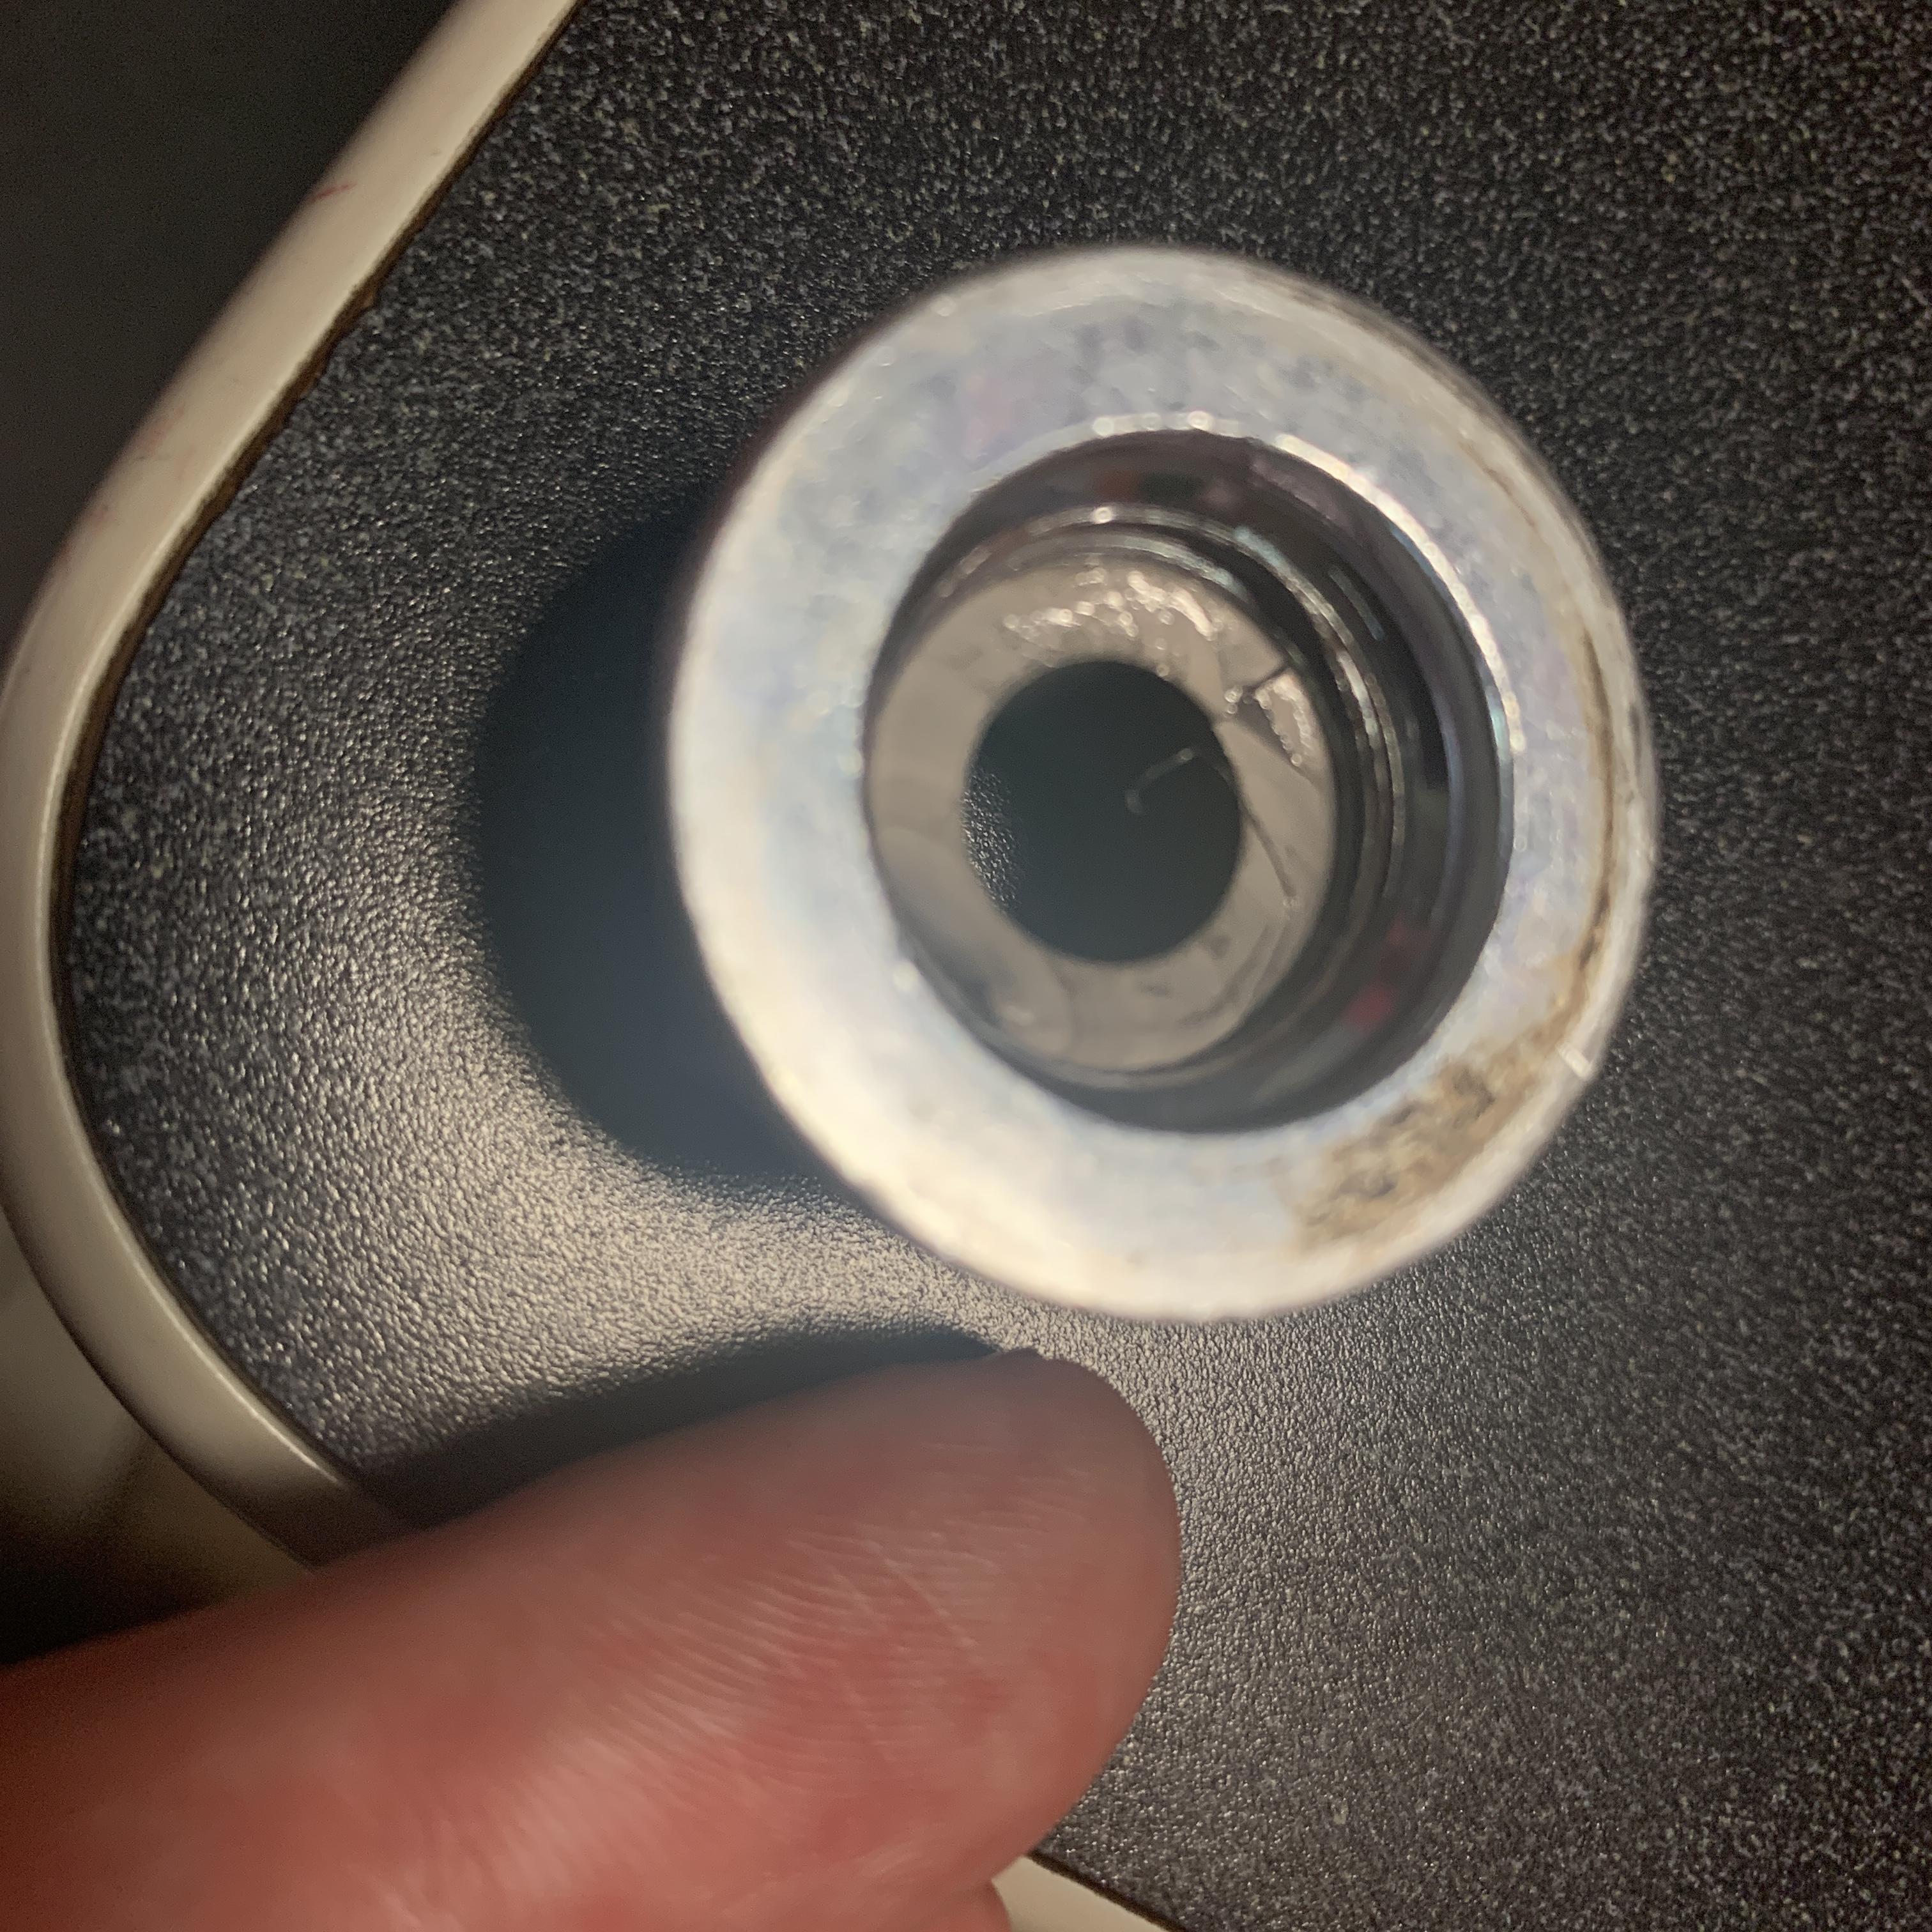
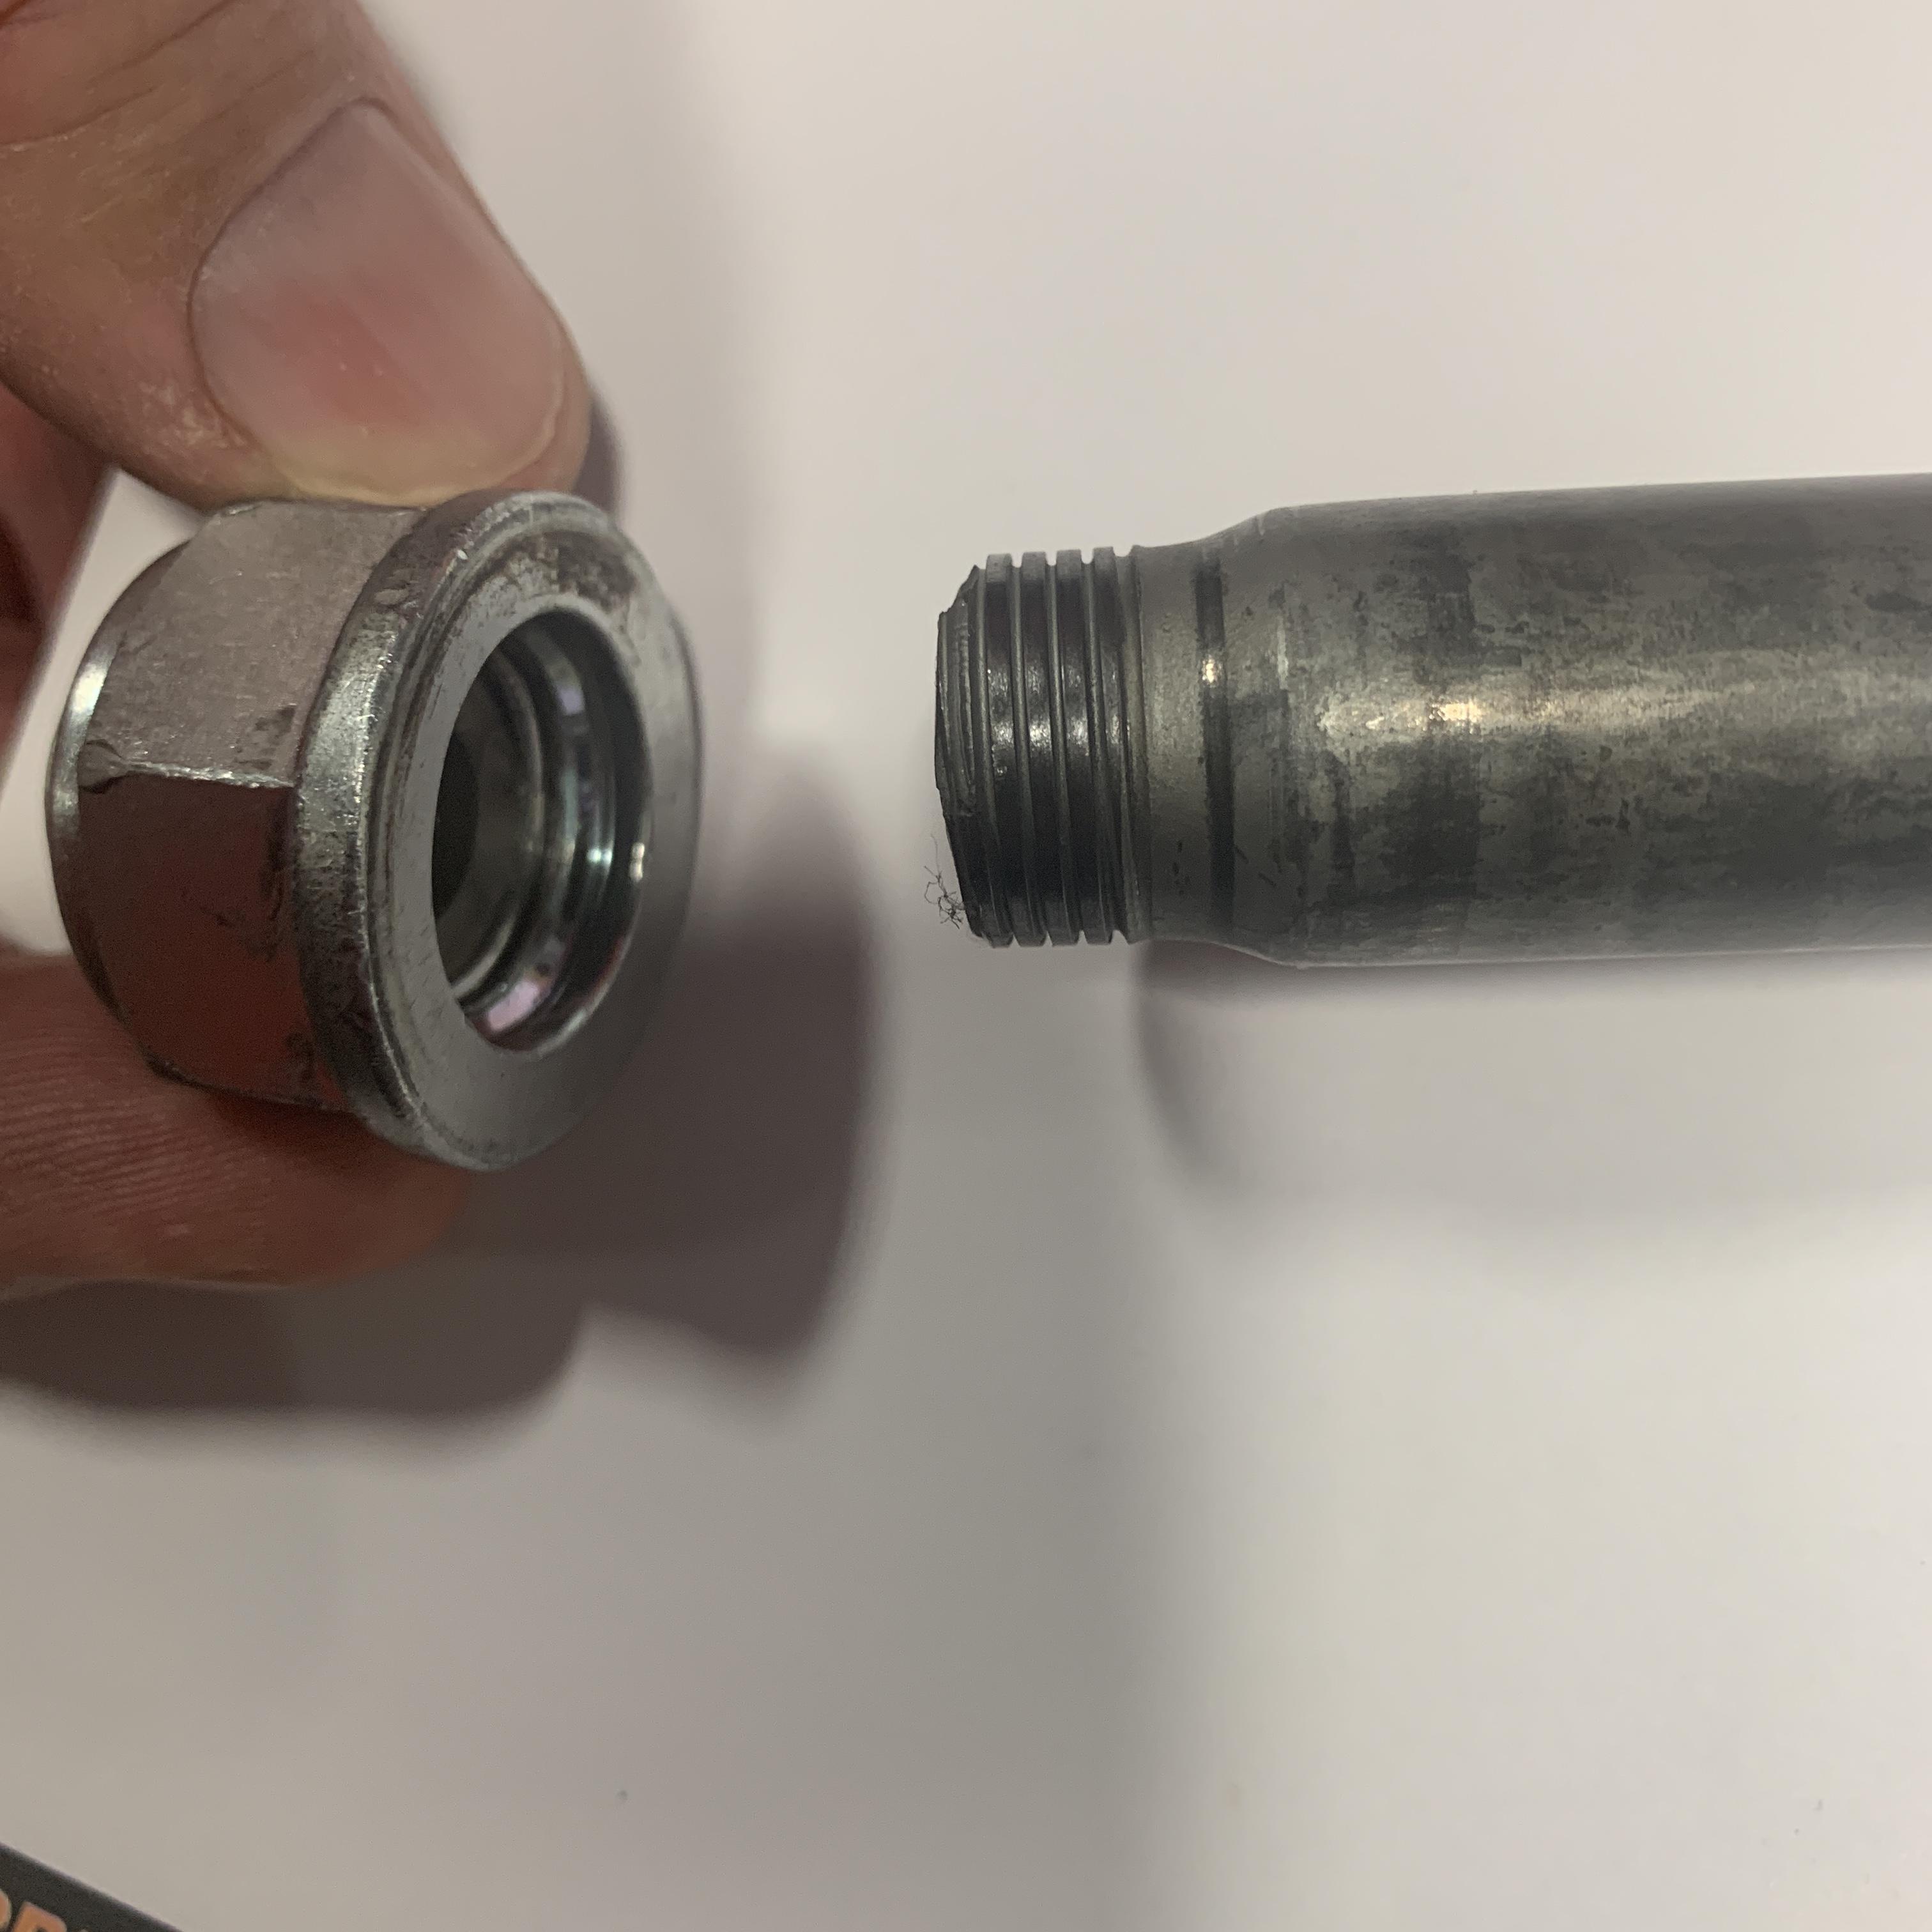
Picked up the bike and was finally able to see the broken bolt. The bolt broke off inside the nut! This is clearly beyond normal wear and tear.

The service manager has a background in....structural inspection...something like that....we didn’t get into it. Anyway, he told Honda that it appeared to be a manufacturing defect and they took him at his word and made good on the warranty. Now they want to see the bolt. Hopefully they’ll be able to do some forensic analysis to deduce whether this was an isolated case, or there’s a broader risk.

Early on I was told I could keep the old parts, but now Honda wants them as evidence. I totally get that. I was “allowed” to take pictures of it so I staged a small photo shoot at the service desk. Sorry for the teaser, but the only way I can manage to post pics is from my work computer. Have to do it tomorrow.
Egleaves
Did you check after Honda replaced the bearings and other elements of the swing arm, is there no play?
Perhaps the new parts were produced badly and the swing arm still has a little play. You have everything new. There is an opportunity to verify it.
Normally no one checks it when buying a new motorcycle.
Good idea, sync. I checked this morning and there is currently zero play in the swing arm to frame connection. It's tight.

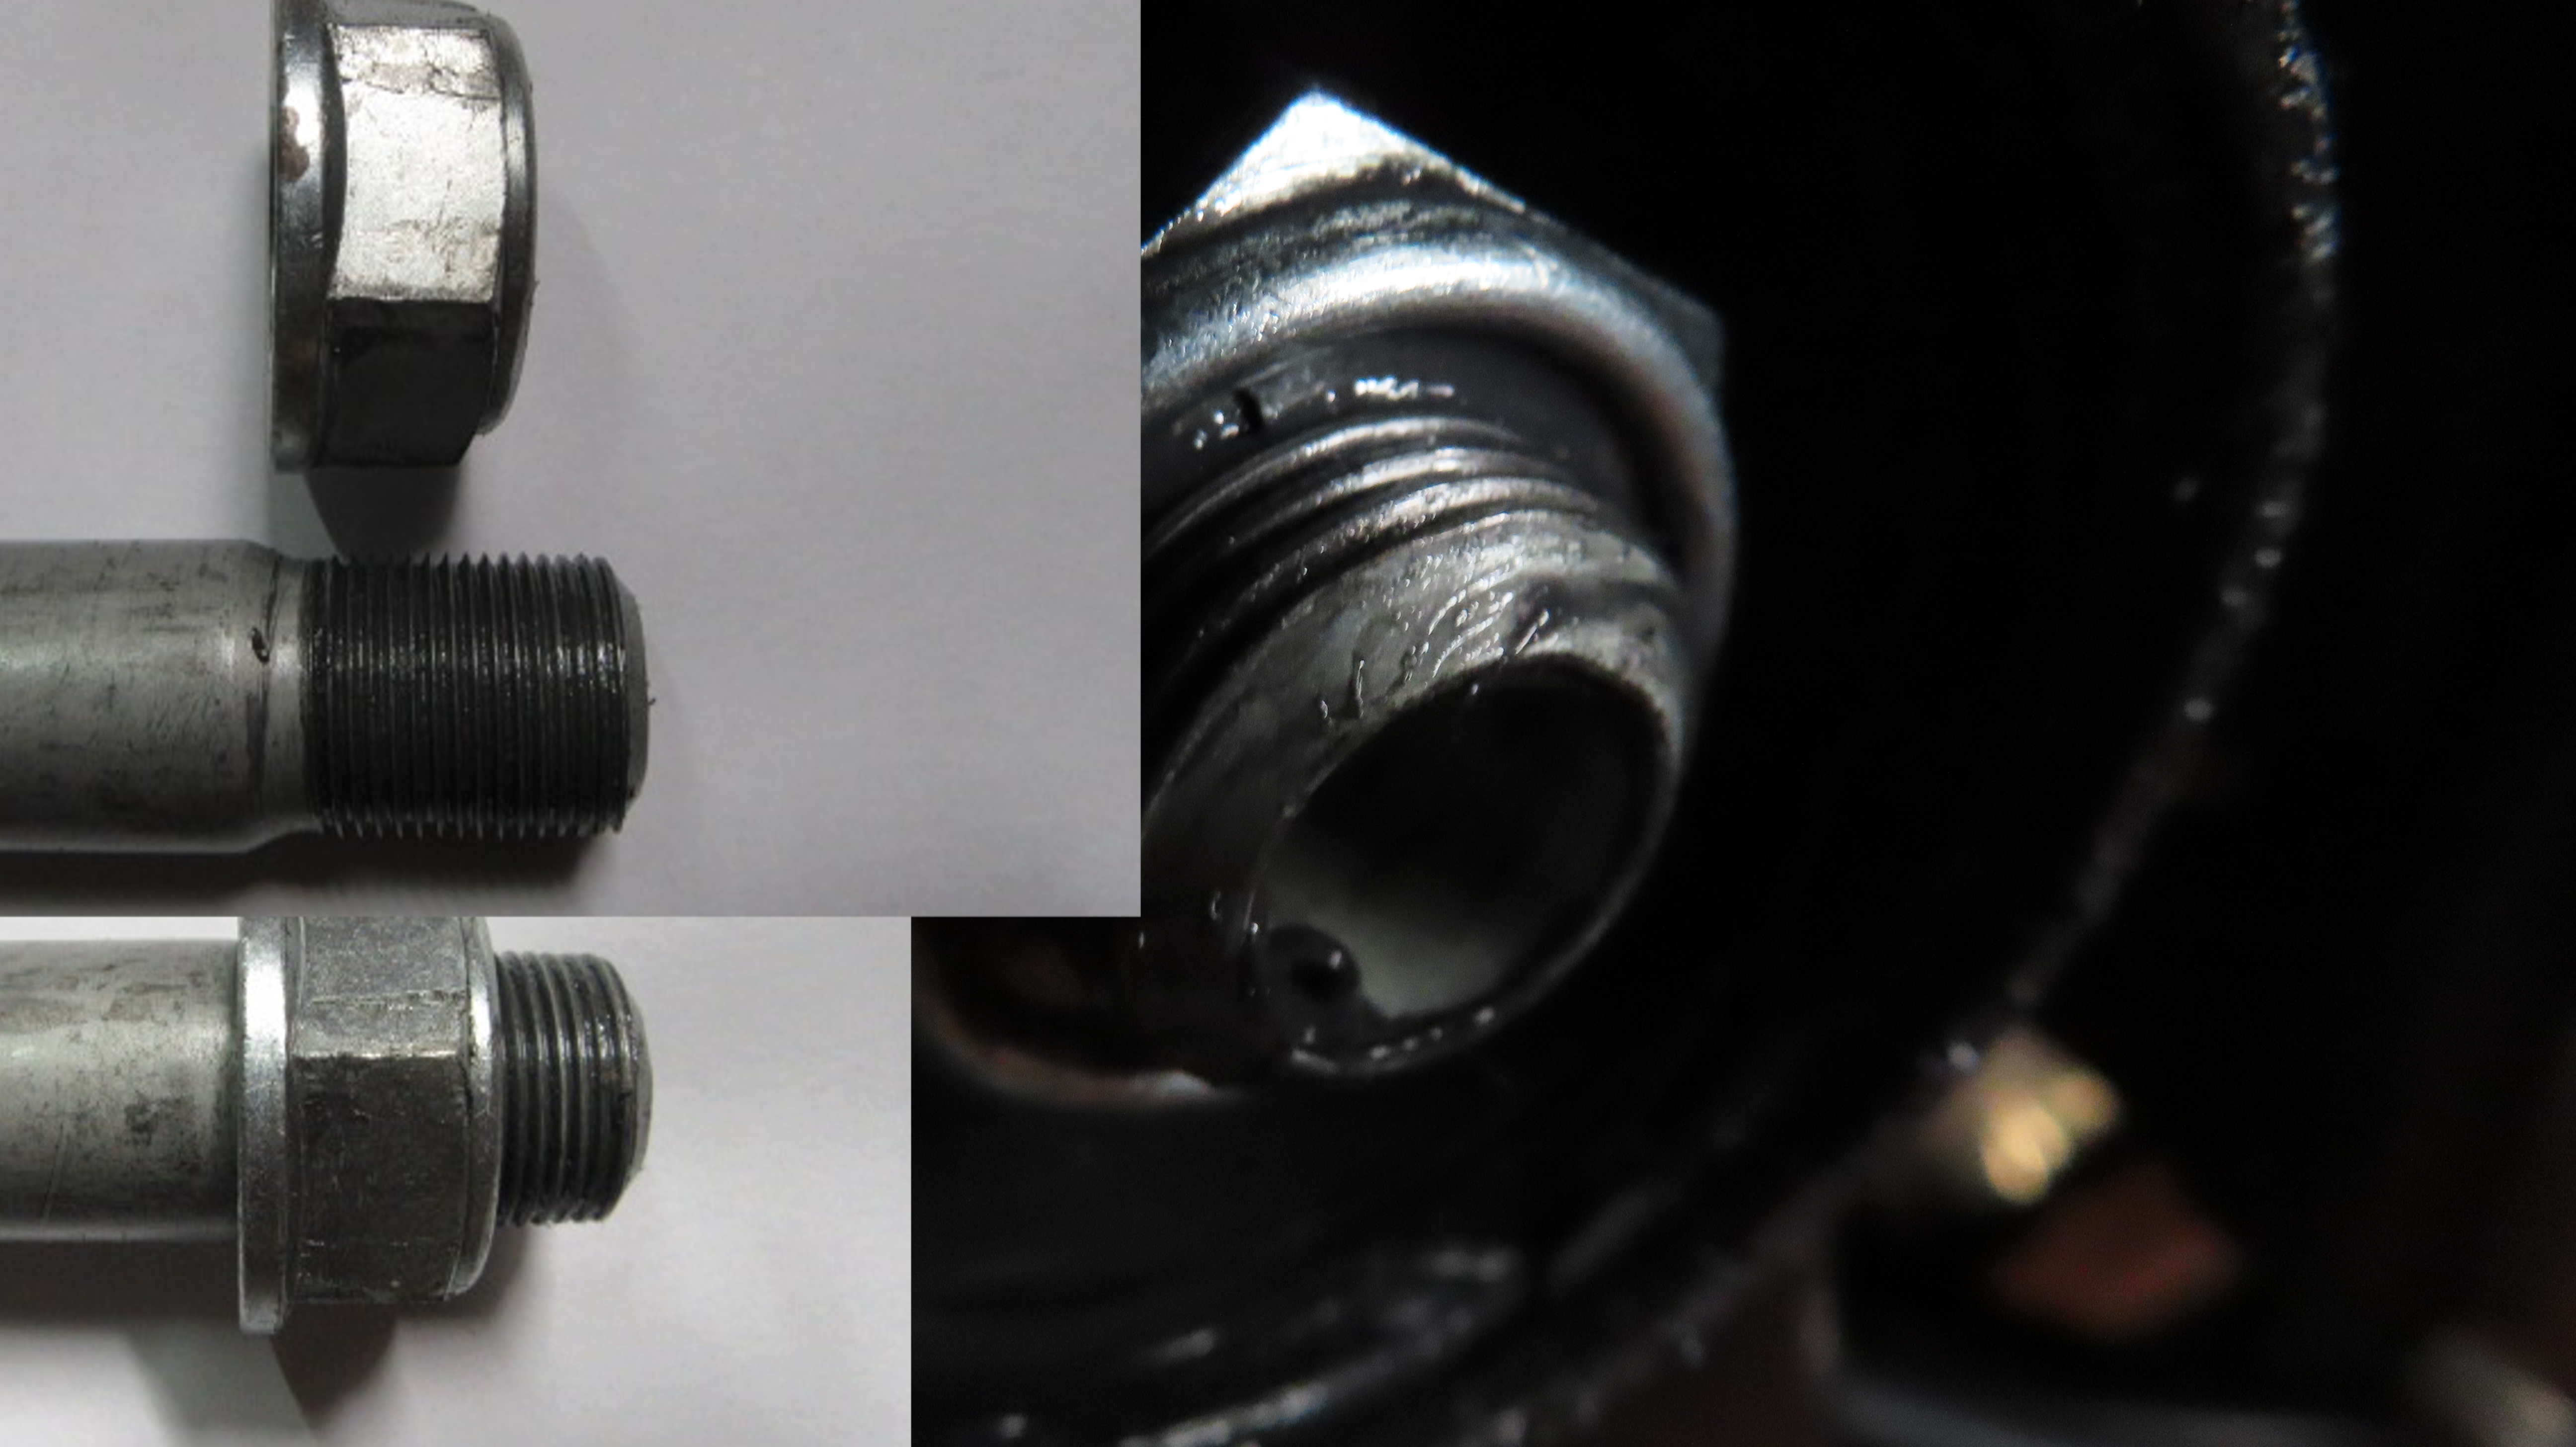
As promised, here are some pictures of the broken bolt:
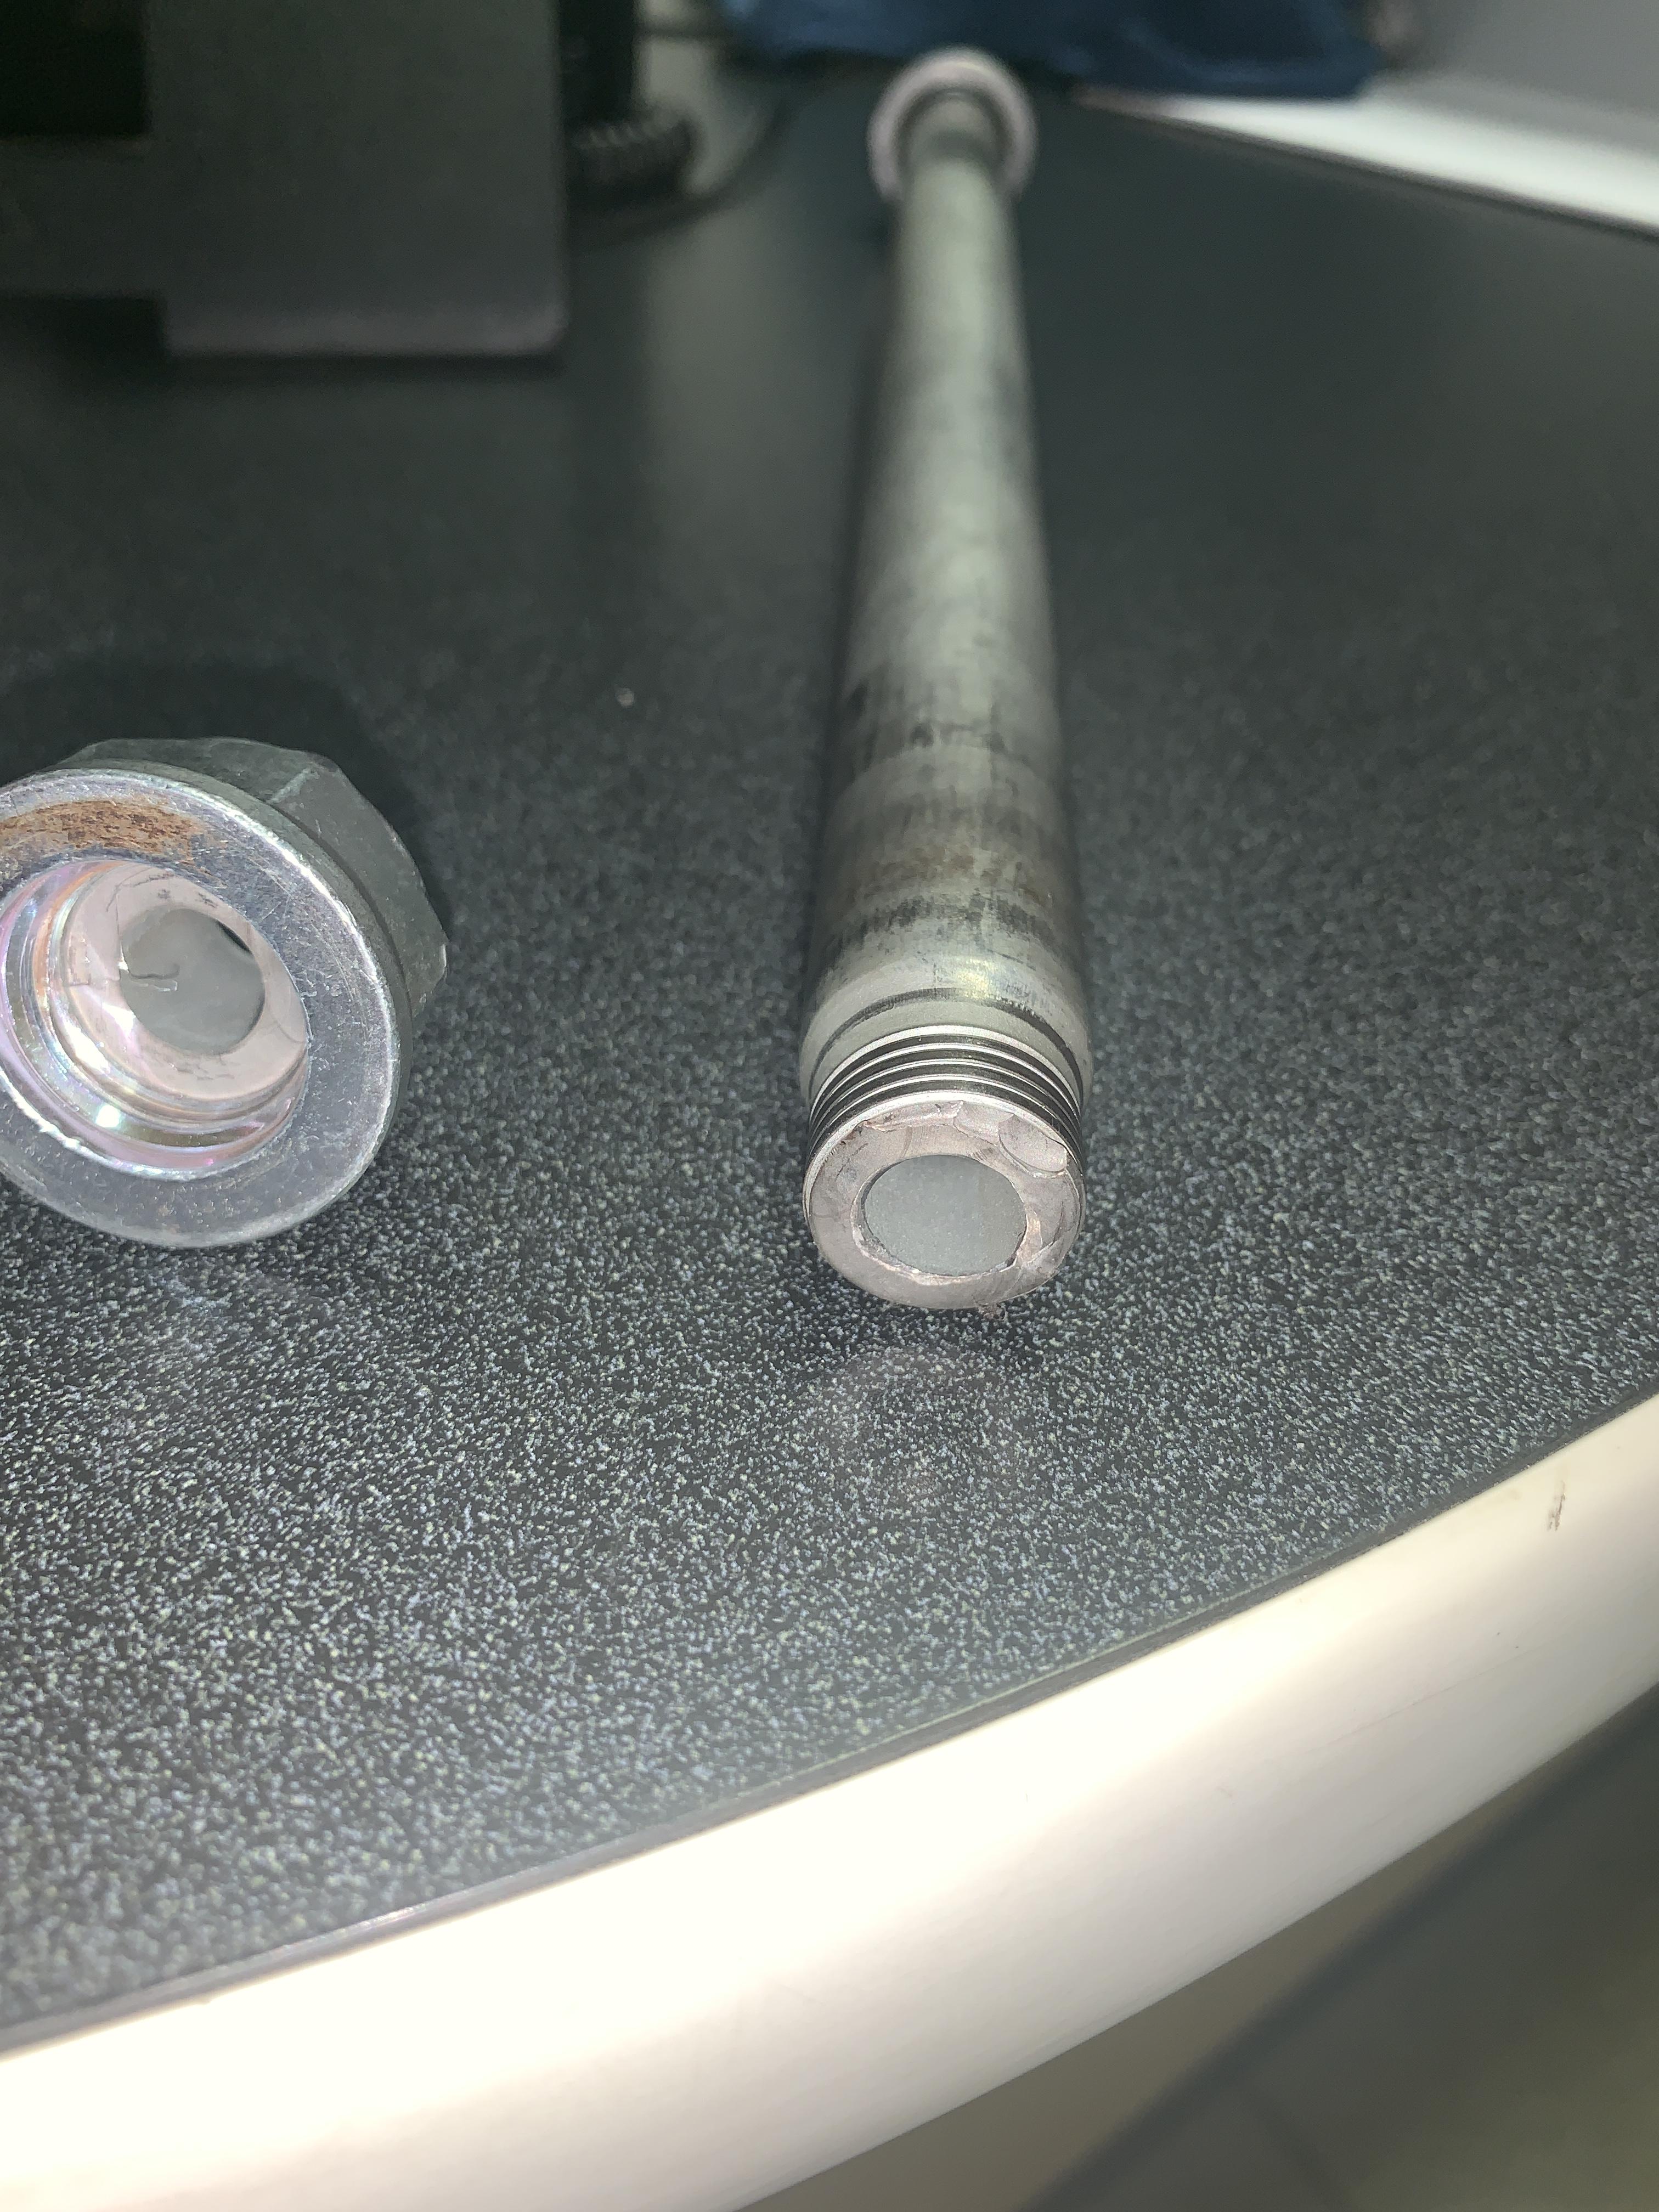
a0f3f9c275fded45fa84cbba015b2c02.jpg


ce8667dfb85e4ddd92b1673f7cbab546.jpg


dd340854e3d7683725f65f6c3636f0dd.jpg
 
See if you can see the same thing that i can, notice the bright ring on the start of the conical part of the shaft?

Looks as if the nut "bottomed out" on that part, continued to pull on the thread and stretched it for no good reason.

Threre is no rust on the broken surface, looks a recent event.

A simple washer could have prevented this, which begs the question;
Has a washer been used originally but since been omitted for some reason?

Cannot remember if my bolt was hollow but don't think so.

edit; yup,it's hollow and no washer installed here either;


This would be impossible to spot by the assembler at the time unless he had a lot of experience and the guts to tell his supervisor on the line, in the meantime.........

Great shots by the way:thanks:
 
That doesn't even seem possible to me, for the bolt (threaded tube) to break off inside of the nut, without the nut being unscrewed..

Max the threads do not look stretched to me, at least that I can see. Doesn't stretching usually show up as a narrowing of the bolt between the good threads (like a waist so to speak)
 
Ferret i just saw this but if you magnify the last pic of the threads you notice the extreme flat top of the threads as if they were "galled" which is what happens when a piece of metal interferes inside the thread when it is tightened and changes the shape of the thread.

These have been shaved off right to the very last bit of thread which is initially hard to see because it all looks the same, and the stretch would be too small to see before the break occurs, it's hardened steel and not very pliable.

But good point Mickey, well spotted !
 
Good work Pawel, i was hoping you had vernier calipers to measure the sizes, nice video's thank you.

The reason it's called a "shim" is because if you want to fill a small gap and bolt it down you fill the gap with some thin layers of brass sheet called "brass shim" which you cut out to the size required with a pair of scissors.
You have thus "shimmed it up" and bolt it up so it does not wobble, you have shimmed the parts and removed the play, i think you know what i mean.

It may not be easy to buy washers this size but even a tin or aluminium can could be cut to size with scissors and the edges straightened with a hammer to match the gap you want to fill between the frame and the needle bearing collar, no one can see it so it does not have to be pretty.

How much grease was in the needle bearing and on the shaft?

I put a layer of black electrical tape around the square bit of the swingarm on mine, it had started to rust where little chips of paint flaked off because road chips hit this surface and now the tape protects it better.:)

We are learning a lot from your video, thanks for all the work.
 
Final video is here:

Max, I don't think it will be difficult to buy a spacer in Poland.
1mm is available now for example SKF :

Podkładki zębate

You can buy such spacers at companies that deal with bearing trading.
They trade bearing accessories.


Thanks to all of you, my problem has been resolved.
I learned here that this problem can be solved differently than the replacement of bearings and bushings.
The idea of using a spacer is great.
To convince myself of this idea, I had to understand how this mechanism works.
I had to dismantle the swing arm and get everything into my eyes.
I was wondering if using a spacer it would press on the bearing. I checked it and it's OK. There is no such risk.

Thank you for the advice and support.
It is a great pleasure for me to participate in this discussion :)
 
syncronizator_imp said:
Final video is here:

Max, I don't think it will be difficult to buy a spacer in Poland.
1mm is available now for example SKF :

Podkładki zębate

You can buy such spacers at companies that deal with bearing trading.
They trade bearing accessories.


Thanks to all of you, my problem has been resolved.
I learned here that this problem can be solved differently than the replacement of bearings and bushings.
The idea of using a spacer is great.
To convince myself of this idea, I had to understand how this mechanism works.
I had to dismantle the swing arm and get everything into my eyes.
I was wondering if using a spacer it would press on the bearing. I checked it and it's OK. There is no such risk.

Thank you for the advice and support.
It is a great pleasure for me to participate in this discussion :)
Really swell tutorial Pawel.
 
max_imp said:
Good work Pawel, i was hoping you had vernier calipers to measure the sizes, nice video's thank you.

The reason it's called a "shim" is because if you want to fill a small gap and bolt it down you fill the gap with some thin layers of brass sheet called "brass shim" which you cut out to the size required with a pair of scissors.
You have thus "shimmed it up" and bolt it up so it does not wobble, you have shimmed the parts and removed the play, i think you know what i mean.

It may not be easy to buy washers this size but even a tin or aluminium can could be cut to size with scissors and the edges straightened with a hammer to match the gap you want to fill between the frame and the needle bearing collar, no one can see it so it does not have to be pretty.

How much grease was in the needle bearing and on the shaft?

I put a layer of black electrical tape around the square bit of the swingarm on mine, it had started to rust where little chips of paint flaked off because road chips hit this surface and now the tape protects it better.:)

We are learning a lot from your video, thanks for all the work.
There was sufficient part of grease inside the bearing.
Grease looked fresh.
 
Thanks for all the work Pawel, we appreciate the effort and feedback, your work makes it easier for the next guy to solve his problem and helped me better understand what goes on in the swingarm bearings and that washers are available to fix this.
Totally agree that we like to understand what exactly is wrong, not jumping to conclusions and firmly establishing the facts by experiment, that's how we get ahead.

That is why i want to correct a statement i made earlier about the nut bottoming out on the bolt.
It appeared that way but i had a closer look at my own situation and i don't think that was the case.
The following picture with inserts shows the nut installed on my bike with 4 threads exposed, it also shows the nut bottomed out on the hollow bolt with at least 7 threads exposed.
That means that there is about 3 turns left on the bolt when installed before it reaches the end of adjustment.
That should be interesting info to other members wondering about their assembly process, here goes;

990c4f46edc111d5a71a0091e6747a89.jpg


In closing i would like to point to a video that makes it very easy to check rear wheel alignment accurately and can be done in 5 minutes just in case it helps you with assembly;
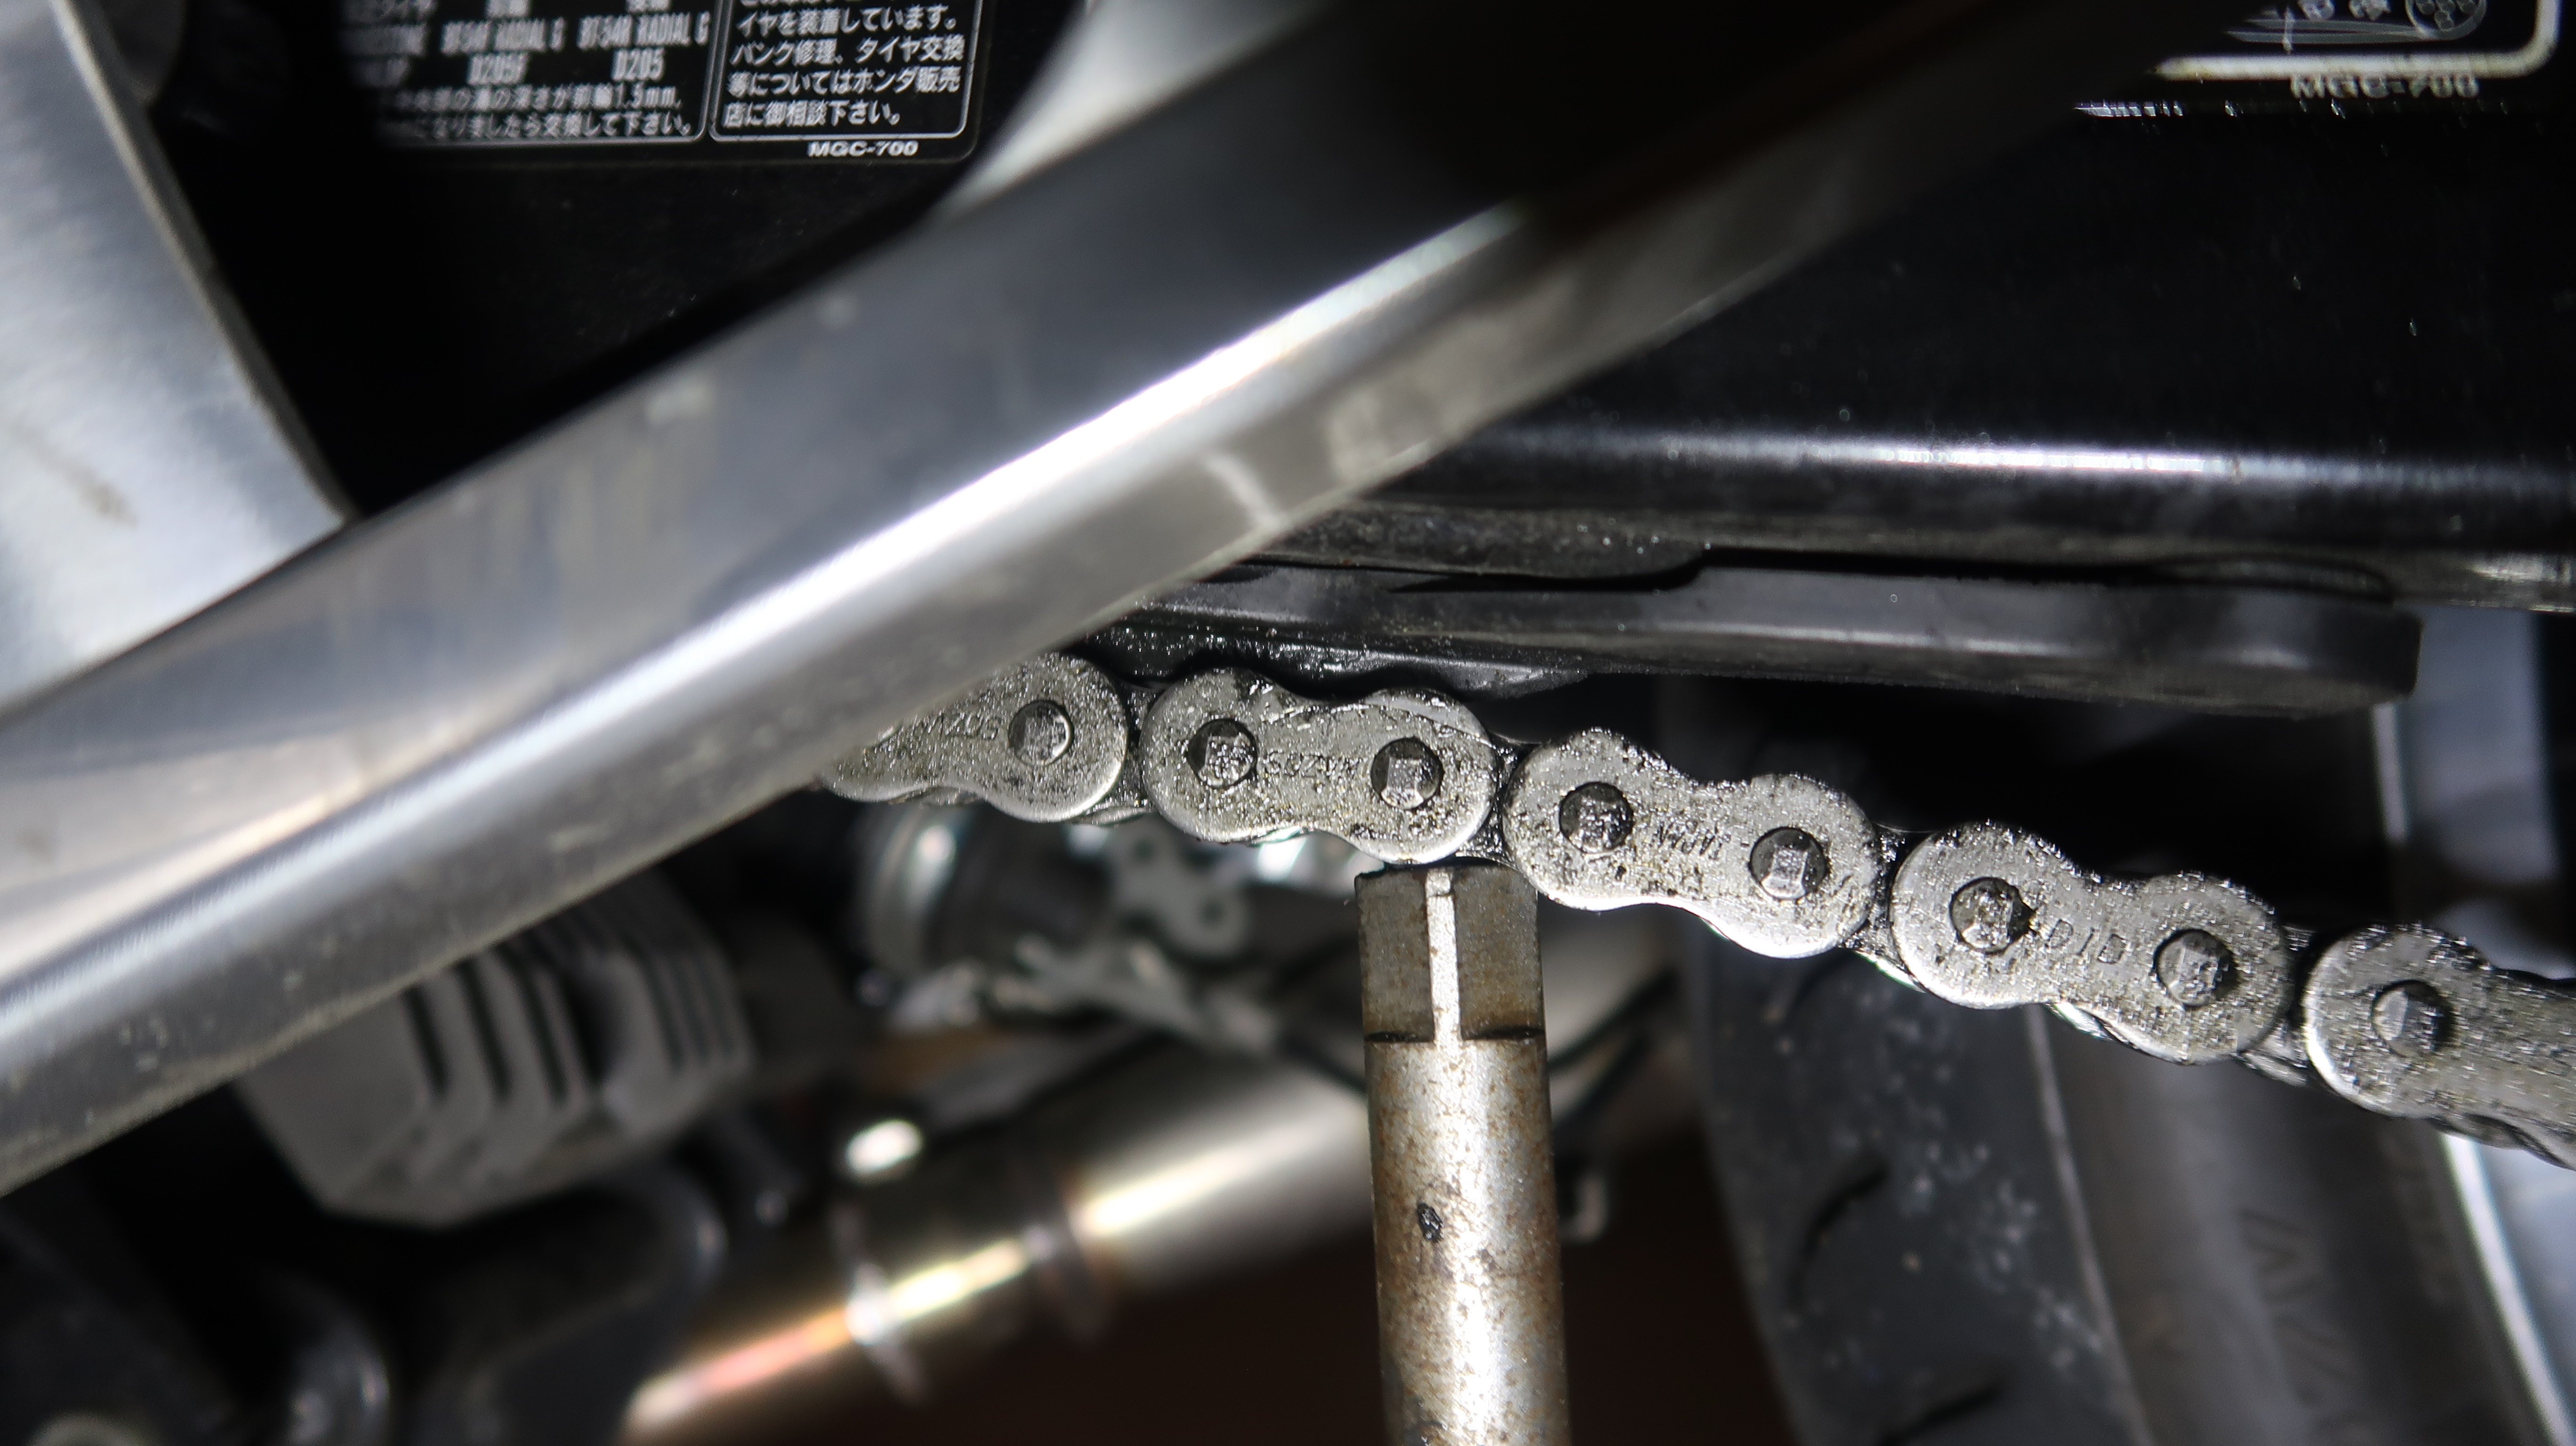
There is also a very simple way to check correct chain adjustment, the chain should just reach this point on the lower chain guide when pushed to the limit, if it does not reach this point it's too tight and when it reaches farther back it should be adjusted tighter.

cb47d4af60c4ba3a8d43148dae245135.jpg


I made a mistake once not realizing that if the chain is too tight the chain stretches when you ride the bike because the geometry changes the angle of the hinge points and damaged the chain very quickly, that change in geometry is why there has to be some play in the chain to make up for that change.
 
Nice and cheap idea to check alignment.
In fact, I haven't thought about verifying alignment yet. Thank you.

I am currently waiting for washers. The cost is 3.5 USD with the shipment.
Shipping cost 2.5 USD

I ordered 2 different sets of steel washers:

22 x 32 x 0.1 mm - 2 pieces
22 x 32 x 0.5 mm - 2 pieces

20 x 28 x 0.1 mm - 2 pieces
20 x 28 x 0.5 mm - 2 pieces

I had a problem with the precise chain tension adjustment due to the lack of a stable position of the swing arm.
I hope it will be better now.

I am posting a video on removing the rear wheel i my CB.
This video shows how the chain tension changes when the swing arm position changes:


I will probably assemble the motorcycle on Saturday. Now I don't have time for this.
I go out to work it is dark outside.
I am coming back from work, it is also dark.
Unfortunately, it is winter in my country and I have to wait for the test drive.
 
Working in the dark - I hear ya.

Hey syncro, it is winter in the western world too. :)

It is winter in Australia too, but they probably call it summer down under.
 
Back
Top