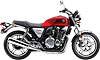
When we ride our motorcycles or move them about, there is always the possibility a nick or two may appear. It can be a difficult moment when the perfect paint or finish is less so following a mishap. Thankfully, a repair to a minor scratch is doable without incurring significant investment in time or money.
This repair thread focuses on a common repair: paint chip on a brake caliper. The same technique could be applied to your motorcycle’s frame, gas tank, or any other part of your motorcycle that involves metal, primer, paint, and a topcoat.
Before I share my process, please note I am not advocating that every surface of every motorcycle should be pristine. A motorcycle with a 100,000 miles on the clock will most likely tell its story with each accent from the road. There is a beauty there, too. But if you want to have the appearance of your motorcycle to look like it did when it arrived from Japan, here is an option to consider:
Step 1: Determine the color that you are “matching” and procure the primer, paint, and topcoat. For my repair, I used
https://scratcheshappen.com/. They have a great online matching tool, fantastic paint, and nice kits complete with applicators:
![[Image: hx5Wn8e.png]](https://i.imgur.com/hx5Wn8e.png)
![[Image: ILCQenW.png]](https://i.imgur.com/ILCQenW.png)
![[Image: ZzvjCVm.png]](https://i.imgur.com/ZzvjCVm.png)
Step 2: Clean the area thoroughly where the paint chip has occurred. If necessary, use an exacto blade to gently remove hanging paint. Prepare the surface as smooth as possible.
Step 3: Tip your applicator into the primer and get a very small portion of primer. Apply a thin coat of primer to the affected area. When possible, find a leverage point on your motorcycle to steady your hand so you can smoothly apply the primer. Apply the primer with a smooth, gentle “brushing” motion. If the primer is not smooth, wipe it off and try again. We want to gently add layers of primer, paint, and topcoat to cover the paint chip but also make the chipped area appear smooth again, flush with the other surfaces surrounding the paint chip.
![[Image: o1uBXpq.jpeg]](https://i.imgur.com/o1uBXpq.jpeg)
![[Image: 2ajs3Z4.jpeg]](https://i.imgur.com/2ajs3Z4.jpeg)
Step 4: After the primer has completely dried, follow the same technique for applying paint. Note that some of the Honda Paint Color require “two” paint layers: a base layer with the metallic sparkles and a top paint layer for the finish color. I recommend one base layer and three “light” top layers, allowing each layer to dry before applying another. Good paint tends to naturally settle into the intention caused by the paint chip. When the intention is flush, stop applying layers. The paint I used required 60 minutes between layers. See image below following the 2nd coat of paint:
![[Image: JCXODza.jpeg]](https://i.imgur.com/JCXODza.jpeg)
Step 4: Apply the topcoat layer. Shiny helps hide painter imperfections. See caliber following the topcoat application:
![[Image: 3Xx165M.jpeg]](https://i.imgur.com/3Xx165M.jpeg)
I have touched up other motorcycles by going to Autozone, picking a paint that “matched” what I was repairing, and applying a topcoat afterward. I have also used acrylic nail polish, too, I matched at the CVS Pharamcy.

I used the process outline above to make sure that a better match occurred. I opted to use an applicator for this repair because the paint chip was not prominent. If something different had occurred, I would have used the aerosol option, but that requires a lot more work to tape things off prior to spraying.
If you have a better approach or a technique, please share. I always learn something from every post, particularly those which point out my mistakes or how I made something simple needlessly complex.

Have a great week. David

 Search
 Member List
 Calendar
 Help
Help
 Basic Maintenance: Paint Touchup